All posts by dinkmaker

The Spyderco Dog Tag sees a little action by JD

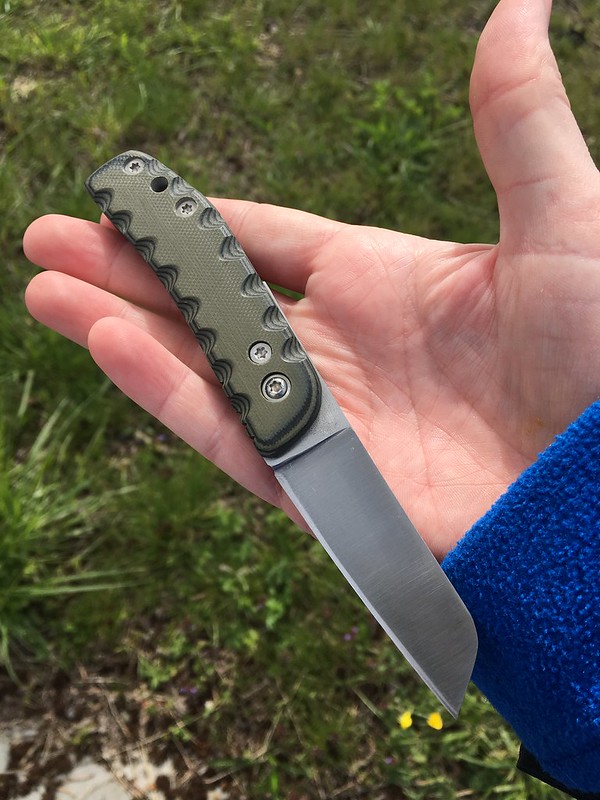
Recently Nemo offered me a chance to try out a Spyderco Dog Tag. I gladly excepted the opportunity to see how this little knife would work for me!

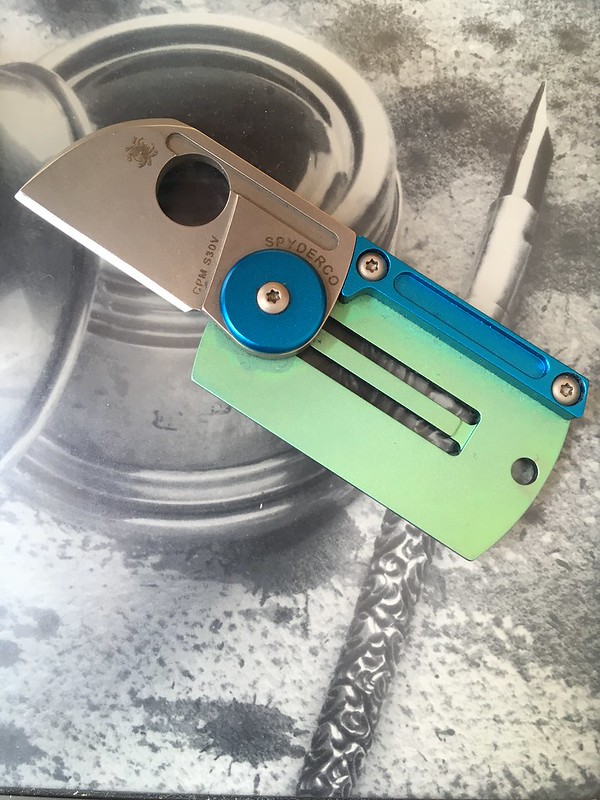
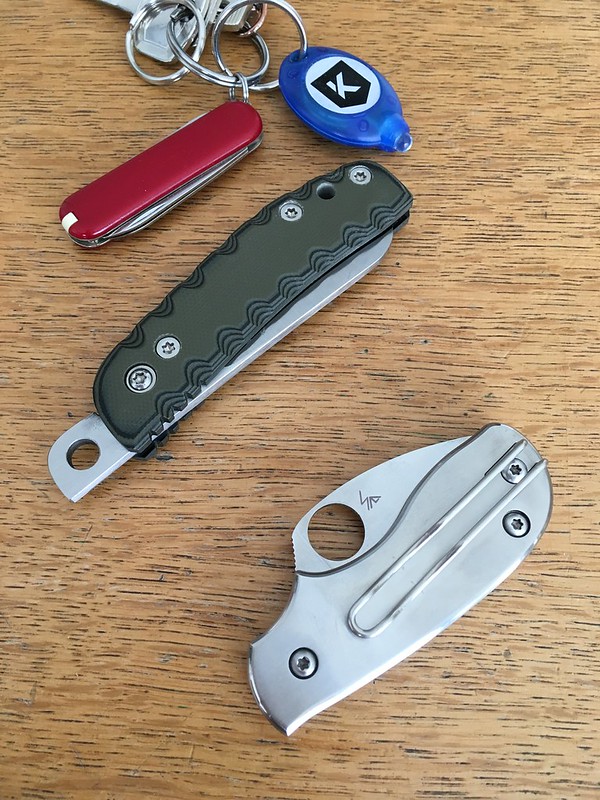
Spyderco’s Dog Tag folders are designed by knife maker Serge Panchenko and inspired by his customs. There are several version of this knife. The one Nemo send me is the version with the green titanium handle and blue aluminium back stop featuring a CPM S30V blade. The overall length is 82mm and the blade length is 31mm. The blade is held in the open and the closed position by means of a detent ball on a titanium spring. Effectively it functions like a slip joint.

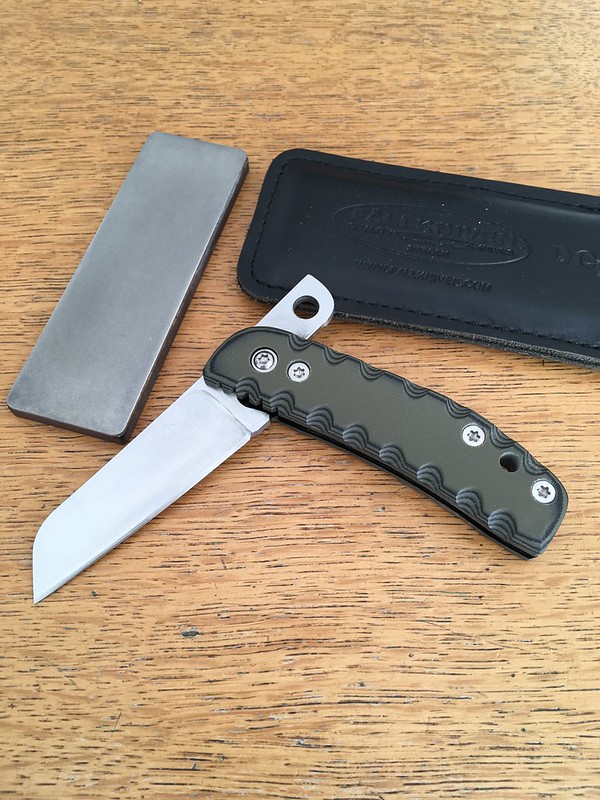
When I received the Dog Tag from Nemo it still had the factory edge but it was not in new condition. It had been cut with. It was still sharp enough to slice receipt paper but not sharp enough to push cut it. The edge was still good as a working edge, but could be sharper. And, I do like to put my own edge on a knife! The blade has a two bevel chisel grind. The front side has a flat main blade bevel and small, also flat, edge bevel. The back is completely flat.

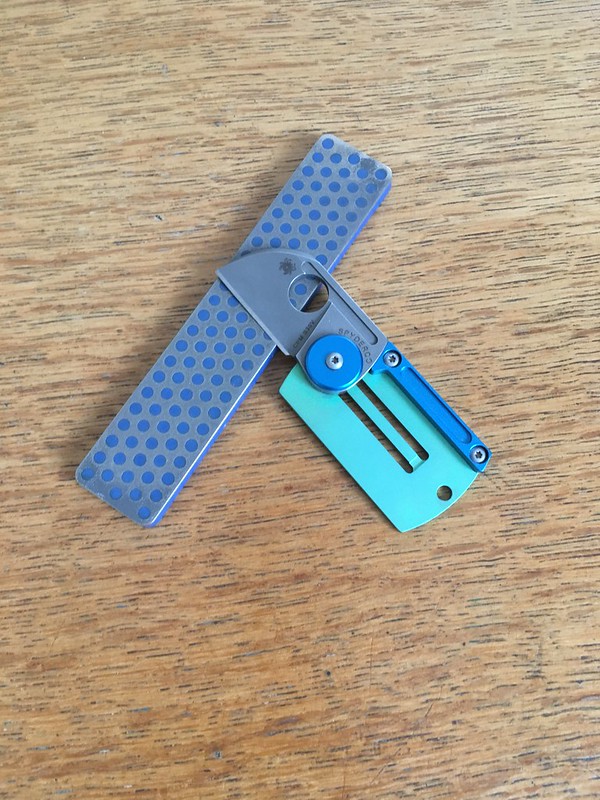
I started sharpening the edge with the diamond side on my Fallkniven DC4 but soon found out that it was going to slow. The edge bevel had a sight wave in it as well. This is not unusual with an edge that has been sharpened on a belt at the factory. But it becomes visible soon after you start sharpening it on a flat hone. A little more work was needed to get the edge right and for that I switched to a DMT coarse hone. With  that I would be able to remove metal faster than with the DC4.

Besides getting the edge bevel even I also wanted to make it slightly convex so it would have a smoother transition from the edge to the main bevel.

Convex chisel grinds on knives are not that well known but have been, and are used on performance oriented blades. For example Jimmy Fikes, one of the pioneers of modern blade smithing and performance testing, used to make tanto’s that were convex chisel grind. Another example are the traditional working knives of the Yakut of central Russia. That knife also has a convex chisel grind. This knife is used traditionally for, among other things, woodworking and cutting frozen fish. On youtube there are quite a few video’s showing how this knife it made and used.

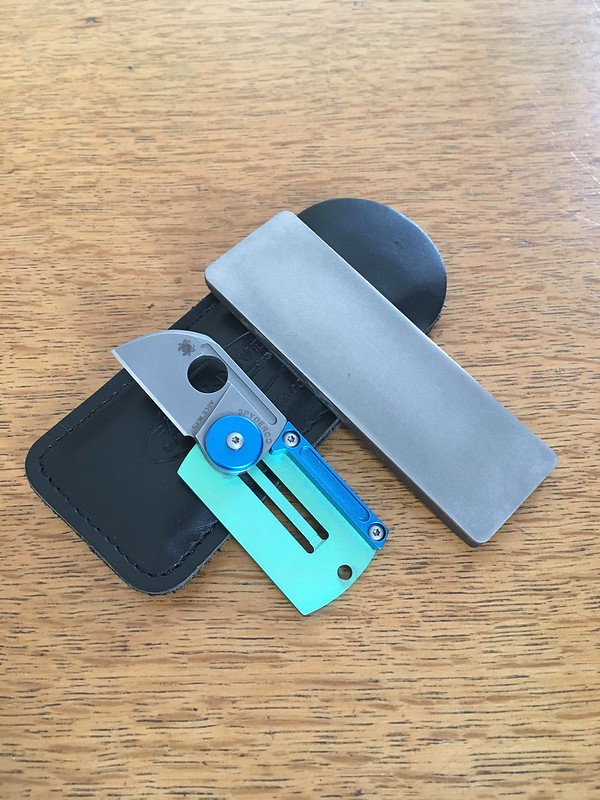
After I had used the DMT to removed the unevenness of the edge and had created a burr on the flat side of the blade, I knew the shaping work was done. Time to switch back to the DC4 to refine the finish and get her sharp!

After having finished the work with the DC4 it was time to remove the burr that had been created. On a chisel ground knife you only shape the beveled side but you have to work both sides  of the edge to remove the burr and make it sharp. Often with a chisel ground knife you remove the burr from the flat side by laying that side flat on the hone. As I did not want to scratch the finish of the that side of the Dag Tag, I lifted it just a few degrees of the hone. By going lightly I avoided creating an edge bevel on the flat side while still removing the burr there.

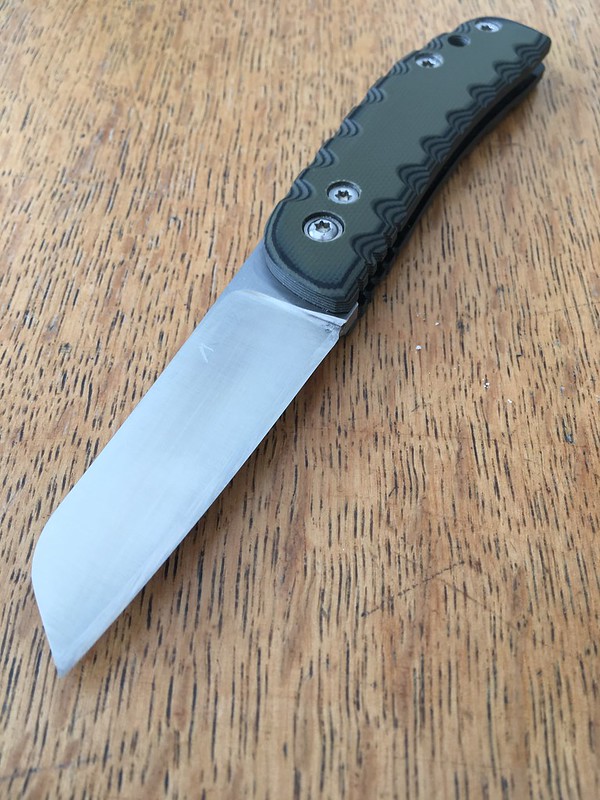
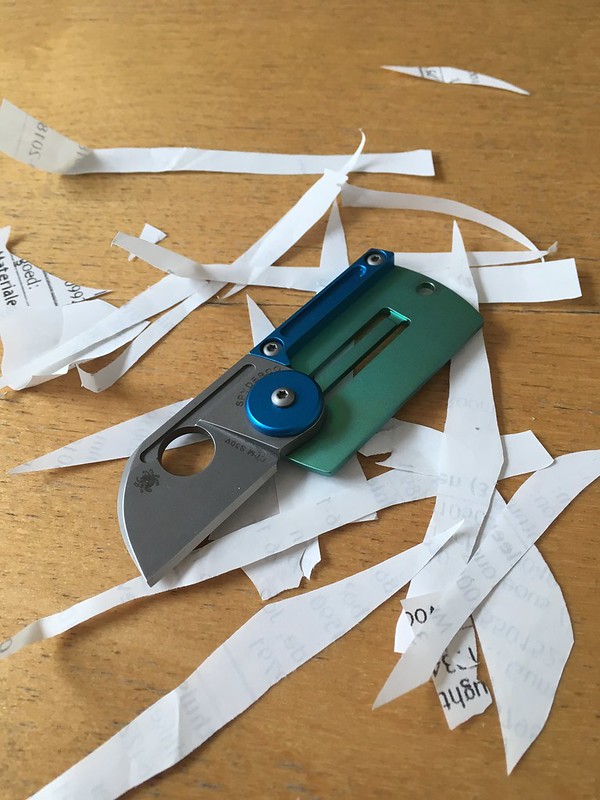
On this knife the burr proved easy enough to remove.  This  suggests that the blade has had a good heat treat and had sustained non or little damage during factory sharpening. The resulting edge was sharp enough to push cut receipt paper as well as cut a free standing head hair. Nice! Into the pocket it went ready for use.

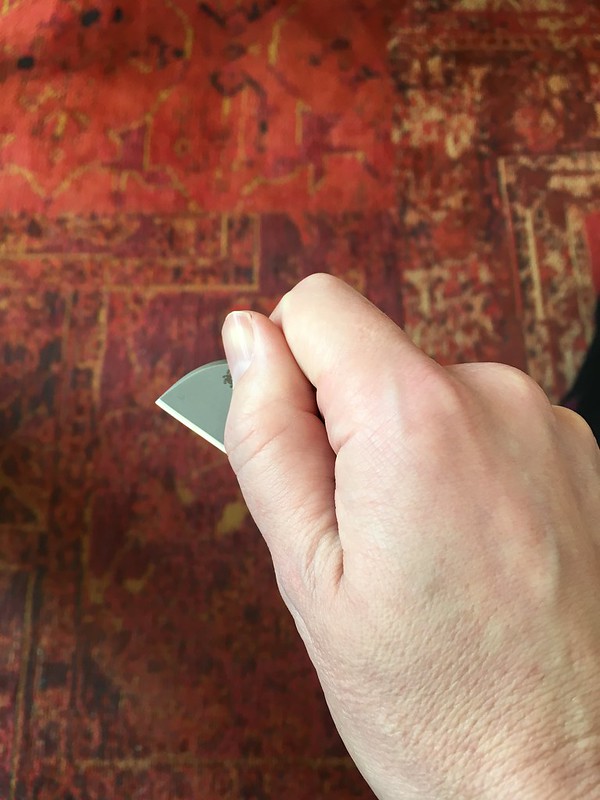
I took a few time opening and closing the knife to find out how to do it confidently as the knife feels different in the hand than most conventional folders. after playing with a little the process became fluent and comfortable. The Dog Tag can be opened by just using the opening hole while the handle lying on your fingers. Or you can pinch open the blade between your thump and index finger and then snap the handle to the open position. Like in a Spydie drop. Good fun!

Closing the knife is also very easy. A little push is enough to overcome the detent and swing the blade so it is once again covered by the handle. After a little practice its easy opening and closing action turned it into a fun fidgeting knife!

Another advantage this easy opening and closing action is that the knife can be used very subtly. Handy when you want to open a package or remove a label in a public space where you do not want to draw attention your knife.

When using small knives like this Dog Tag, I am always impressed by how capable they are. I can do almost all the things I use a pocket knife for with a blade of this size. The most notable exception is cutting larger foodstuffs. The fact that it is a chisel grind sometime made cutting  straight a little bit of a challenge. But no more than that, a little. The small choil between the back of the edge and and the handle sometime hung up on what I was trying to cut. Like the sharpening choil on many knives can do. On a short blade I just notice it more. Other than these small issues it has been a fun and functional little knife!

A star is born! A look at the Spyderco Alcyone by JD

At the end of the 2017 Spyderco meet in Amsterdam we received the Spyderco Polestar. A year later, at the the 2018 edition of this event, we were presented with its smaller brother the Alcyone. Nemo gave his example to Pascal who wrote and excellent review of the name of the knife, and his experiences with the it during his use.  Here I will present my experiences with this knife.

I have reviewed the Polestar before.  As the Alcyone and the Polestar are made of the same material and share many features, here I will focus on the things that I noticed to be different.

To start with the biggest and most obvious difference: the size! The Alcyone comes with a 7,4cm (2,9inch) blade where the Polestar’s is 8,4cm (3,3inc). This makes it more edc friendly for me. I have carried it in the waistband comfortably for a month at the moment of writing.

The design is quintessential Spyderco. Put is next to other knives that have been designed by Spyderco’s founder Sal Glesser, and the family resemblance is unmistakeable. Sal puts a lot of attention into designing knives that work great in the hand, and he definitely succeeded with the design of the Alcyone. It feels pleasant in the hand and offers a lot of control while cutting. Both in normal edge-out as well as edge-in grips, like when you are pealing something. Good stuff!

New the edge on my example was not very good. It could not push cut receipt paper and only slice it with difficulty. So it needed to be resharpened before I could carry and use it. The edge was also thicker that I liked. Edges on new production knives often are. (Though overall the edges on new Spyderco’s have become a lot better at this in recent years.) So I took out the well used extra course DMT Diamond hone and set to work. After the thinning I refined it on the diamond side on the Fallkniven DC4. I was not hard to put a head hair splitting edge on the knife this way. Now it cuts very well! In use the BD1 steel blade has proven to hold and edge well and be easy to keep sharp.

The Alcyone had a noticeably stiffer action out on the box than the Polestar. The Polestar could be middle-finger-flicked from the get-go, not so the Alcyone. Opening the blade with the thump though was easy to do. Putting a little nano oil on the pivot and the detent ball made it a little smoother. The biggest difference though was made when I unscrewed and re-tightened the pivot and handle screws. After I did that the knife became noticeably smoother and it became possible to middle-finger-flick the knife. Which is a lot of fun!

I also took the knife apart. Not something I often do but I was curious to see what for a effect it would have on the smoothness, and how difficult it would be to do. It proved to be an easy operation but did not have more effect on the smoothness than releasing and re-tightening the screws had had.

The Alcyone has proven to be and excellent edc in the month that I carried and used it. A great design that just needed a little t.l.c. to shine at its full brightness!

Lucky meeting the Spyderco Lil’Native by JD

During the annual Spyderco meets in Amsterdam the Spyderco crew usually holds a few lotteries for knives, T-shirts etc. This year I was lucky to win a knife in one of the lotteries! And extra lucky because I won a Lil’Native with compression lock. I like compact knives! The knives I usually carry have a blade length of between 5cm (2″) and 7,5cm (3″). The Lil’Native fits right in there with its 6,2cm (2,5″) blade length. Also, I had not had a compression lock in years so this was a nice opportunity to play with one again.

The Spyderco Native hans been around since the nineties in different sizes and shapes. There are two things all the Natives have in common: one, they are all hump-less. On a lot of Spyderco knives the opening hole is in a hump on the blade which sticks out above the back of the handle, on the Natives this is not the case. And two, they all have a relatively short edge in relation to the handle which features a forward finger choil. This means you can get a full grip on the handle and put your thumb on the back of the blade for control and power while cutting.

The Lil’Native is the latest Native model as well as the smallest. Besides the version with the compression lock that I have there are plans for this same design with a mid-lock and as a slip joint. That last one will be a welcome addition to the Spyderco line-up for people in countries with more restrictive knife laws.

After returning home from the Meet I put s little Nano oil on the pivot and on the detent ball and opened and closed the knife repeatedly to work the oil in and make it (even) smoother. I quickly got used to the compression lock and was pleasantly surprised by how easy it was to manipulate and that it did not pinch me. This had been something I had experienced with early compression locks knives but clearly Spyderco’s engineers had improved the lock since then. CQI (constant quality improvement) in action!

Spyderco had done an excellent job with the factory sharpening. It easily push cut receipt paper! After a light sanding of the handle to make it smoother and little bending of the clip so it would go in and out of the pocket easier, it was ready for edc.

After a few day I decided to thin the edge a little and sharpen it. Not that the factory edge needed it, but I knew I could get is sharper and improve the cutting ability even more by taking it to the hone. Beside, it feels like putting your edge on a blade makes it more your own.

I thinned out and straightened the edge with my old extra coarse DMT bench hone. I refined and finished it on the diamond side of my Fallkniven DC4 until it could split a free standing head heir. This went of without any drama. The diamond hones cut the steel easily, and removing the burr represented no challenge. This suggest to me that the edge was not damaged during production or factory sharpening and that it was in good condition.. Well done Spyderco! Back in the pocked it went!

After having carried it for another week the Lil’Native had become smoother, I could flick it open with my thumb and with my middle finger. I cut a number of cardboard boxes and this caused a little bit of edge roll in front of the ricasso. Two light strokes per side on the Fallkniven DC4 got rid of it and made the blade sharp again.

All in all the Lil’Native has turned out to be a well made, practical, capable, and enjoyable compact folder. Well done Spyderco!

The Falcon has Landed by JD

This is not going to be a review but just my first impressions of the Massdrop, Ferrum Forge, WE-Knives Falcon.

I have been following Elliot en Chis Williamson, Ferrum Forge, their knife making journey on YouTube for a few year now. From Elliot’s start in his garage and the making of his first folders to the established brand that they are now. The knives they make are interesting for sure but outside of my budget. So, when I read about their collaboration with Massdrop and WE-Knives to make an small, flipper, folding knife that would less than $150, I ordered one as soon as the Drop was opened. A little later Nemo decided to do the same.

Nemo received his example a few days before I got mine. He wrote very positively about his example. So I was very interested to see how I would like mine!

For the most part I concur with Nemo’s review. This knife is a lot of value for money and seems very well put together! It fires snappier that the Spyderco Mantra 2 I recently reviewed, due to having a stronger detent. What it shares with the Mantra 2 is that you have to be careful not to put any pressure on the lock bar. If you do it won’t fire. The jimping on the flipper tab is pretty sharp and after flipping the Falcon a few times it became uncomfortable. This can probably by fixed by rounding the edges with a hone or some sandpaper. I could not use the hole in the blade to open the blade one handed but it worked well for opening it with both hands.

The blade came decently sharp though can be improved upon. The handle is nicely rounded and fits well in the hand.

There is just one problem with the Falcon which stops me from carrying it, and that is the pocket clip. It is much too tight for my jean pockets! I have to use two hands and push hard to get it clipped. I have no such issues with Spyderco clips. Interestingly enough I had the same problem with the WE-knives 617 that I got to handle on a pass around a couple of months ago. Apparently WE-Knives clips are just not for me. Perhaps in the future WE-Knives or Massdrop will start offering bent clips for the Falcon (and other WE-Knives). Then I would be able to clip it to my pocket make it part of my EDC. The knife deserves it!
You can read another review of the Falcon here:
https://nemoknivesreview.com/2017/10/10/massdrop-x-ferrum-forge-falcon-s35vn-folding-knife-flipping-modern-gentleman-knife/

Flipping the Spyderco Mantra2 by JD

When I was visiting Nemo in Paris he offered me the opportunity to try out his Spyderco Mantra 2. I have handled this knife before and of course have read Nemo’s review of this folder. I was interested in finding out how it would work for me, but not interested enough to buy one for my self. So Nemo’s offer was very welcome!

I have carried a few flipper knives in the past, a Buck Vantage and a Spyderco Domino. The Buck was a great cutter but not a great flipper and the handle didn’t really work for me. The Domino is high quality knife that cuts well and I liked the handle. Nemo and I wrote reviews of it a few years ago. (You can find it here.) After a few weeks I found it to heave and big in the pocket and I stopped carrying it.

One of the things I learned from the Domino and other frame lock flippers is that with manny of them you have to be careful where you place your fingers. A little pressure on the lock bar can stop the flipper from working well. Even just a little pressure can be enough to force the detent to block or slow down the opening of the knife. From having handled the Mantra 2 previously I knew it was very sensitive to this as well. What I was looking to find out was how I would get along with this knife on a day to day basis. Would I adapt to the flipping and the handle with the flipper guard or would it just not work for me.

After having sharpened it, very easy with an extra coarse DMT and the diamond side of the Fallkniven DC4, in to the pocket it went.

First a few words about the flipping action of the Mantra 2. I would describe this as being light. After having made sure that your fingers are not resting on the lock bar or on the front of the clip, little force is needed to shoot out the blade and have it lock with a reassuring click. Both the light-switch and push-button method of flipping are equally effective. Putting a drop of oil on the detent makes the opening and closing the knife noticeably smoother.

After having carried and used the Mantra2 for two weeks I got used to opening a folder with a flipper. When taking it out of my pocket I would feel if my fingers were in the right place, not pressing on the lock bar! and most of the time the blade would open fully the first time. Good fun! But not as intuitive and reliable as a hole opener.

The handle worked well for me. Some hard cuts in cardboard revealed no pressure points. The flipper did not get in the way. And as there is no space wasted in front of behind the flipper guard I felt I had a lot of control over the blade.

I can’t say much about the blade other than that it worked well for my use, mostly cutting cardboard and plastic packaging material. The edge was thin enough to cut well and the point pointy enough to pierce well.

It was fun getting to get to know the Mantra 2! An excellent very day carry flipper from Spyderco!

Endura HAP40 blade and Pakkawood handle, sanded to my taste.

wp-image-1364064139

The tools of the trade. Leather belts, sandpaper sheaths and coffee.
As usual I cannot let ma knife as provided by the factory and Pakkawood being a synthetic ersatz of wood, I wanted to see how it reacted under the sandpaper.

P500 Metal sandpaper is used just to round the facets into rounds. The Pakkawood is soft and it’s done without any kind of discoloration. It reacts a lot like Micarata. No smell.
Anyway I was holding my breath. Those dusts are unhealthy.

“If you have a buffing wheel, try polishing the wood handle – it buffs up beautifully with a XAM or green rouge compound.” said to me Howard Korn.

wp-image-128584173

Then I take the chance to sand the edge of the liners. It always great to feel an handle with not sharp edge. I have done also the same with the hole. I don’t want to chanfered it like on the AFCK but less edge makes my thumb safer. Remember, I was bite by the Tatanka hole once.

I have sand the spine to smooth it and then used some polish on leather to remove the sharpening scratches.
Eventually I have turn the Endura into a great razor which has be baptised with my blood for good measure. (I happen during the stropping…)

wp-image-1702930307

Back to the Future: A first look at a Jan Dox friction folder by JD

Recently I went to the Dutch Knife Exhibition (DKE) in Tiel. This is the only Dutch knife show and has been held for the last few years in the second part of April in Tiel. The DKE has a nice mix of handmade and production knives as well as knife maker supplies. Before I went to the show this time I had in my mind that one of the thing wanted to check out were the friction folders by the Belgium knife maker Jan Dox. I looked around the show, stopped by Jan’s table and looked the friction folders over and talked a bit with Jan. Jan told me he carries one of his own friction folders as an EDC. I like it when a knife maker carries and uses his own knives. It shows they have confidence in their product. After I finished looking around the show I went back to Jan’s table and decided to buy the folder you see pictured here.

Let me tell you some of my first impressions of this knife. The G10 handle looks good and is nicely rounded, feeling comfortable in the hand. The opening and closing action is smooth but secure. I can open and close the knife with one hand but it does not feel loose. Should the amount of friction change over time, the pivot can be tightened with a torx 10 screwdriver to make it right again.

A lot of friction folders have a narrow tang sticking out when closed. Not something I would like to carry in the pocket without a sheath. And I do not like pocket sheaths much. The friction folders Jan Dox makes have a wider but relatively short tang that is rounded on one side and can be carried in the pocket naked. That is how Jan Carries his and that is how I will carry mine.

The edge it had new was not very sharp and had a small burr on the front halve of the blade. I think I had best look on this as: old fashioned style of knife, old fashioned sharpening paradigm! The maker puts on the edge bevels and the user sharpens it the way he wants. If you use it you have to sharpen it anyway. Besides, this was a very affordable handmade knife and I like to sharpen.

Putting a fresh edge on this blade made out of D2 tool steel, was pretty easy. I used a Extra Course DMT to refine the edge bevels and then put the final edge on with diamond side of the Fallkniven DC4. Following this I cut up some card board just to see how it did. No complaints there! The blade went trough the material with little effort. After having cleaned the tape gunk of the blade with lighter fuel I sharpened it up to head hair splitting sharpness. It is a pocket scalpel now! You can tell the maker took good care not to over heat the steel during fabrication. There where no nasty burrs to chase from side to side and a crisp, clean edge was easily obtained.

All-in-all I am pretty happy with my purchase and look forward to getting some use out of my new knife!

Dimensions:
Total length: 15,5cm
Length closed: 10,3cm
Blade length: 6,5cm
Handle length: 9cm

Update after about seven weeks of carry and use:
After having carried and used this knife for a while now I have found that it works well for me. for most of that time it has been my main edc. I have cut paper, cardboard, plastic packaging material, as well as bread buns with ease. During this time the D2 steel has held its edge well and was easy to touch-up or resharpen when it lost some of its sharpness. I found it Very easy to get it head hair splitting sharp with just the diamond side of my Fallkniven DC4.

There is enough friction between the handle and the blade to hold the knife open and closed but not so much that it is hard to operate. This means it can be opened (and closed) with one hand, which can be pretty convenient! This is the first friction folder that I have carried and used and it has proven to be a very useful design that has been well executed. It does just what I like a pocket knife to do, and does it well!


On the edge of the Polestar by JD

Like Nemo I have received my Polestar as a gift from Spyderco. It was in the goodie bag at the 2017 Amsterdam Meet. When I took the knife out of the box and looked it over my first impressions were positive. The blade opened smoothly and locked solidly with the lock bar fully engaging the tang. I liked how the gray G10 looked and felt, a nice combination of grippy and smooth. Clip tension was also excellent. I could slide the knife in and out of the pocket and waistband without any problem. The edge it came with from was less impressive, it could push cut receipt paper but had no slicing aggression at all.

When I came home I put a drop of Nano oil on the pivot which made it even smoother. I could flip the knife open with my middle finger, which is a lot of fun! Other than flipping it a few times I didn’t know what to do with Polestar. For me it is quite a big knife, having a blade length of 8,5cm. In my urban environment and with my use I have found that a blade length between 5-7 is ample. Small knives are often just more convenient for me.

After a few weeks of from time to time picking it up and flipping it I decided to give it a try and see how I would like to carry and use it. Like Nemo I moved the clip to the tip down position. I was going to carry it in the waistband and tip down carry reduces the chances of the blade accidentally opening. Thanks to the Spyder hole hump it could still be easily and quickly opened with the Spydie drop.

Before I was going to use it the edge would need to have more slicing bite then it did new. So, I thought a few passes on a coarse DMT hone would be enough for a quick touch up. I was wrong! I found out that, especially close to the recasso, the edge was pretty uneven. In some places it was even a high angle convex. The edge would need to be formed anew!

I cut of the old edge with a few light cuts into a stone and then created a new edge with my extra coarse DMT hone. I was interested in how the knife would function as it was intended by Spyderco. So I did not change the angle of the edge much but just evened out the edge bevel and formed a new apex. The steel was not hard to grind but, due to the unevenness, some parts needed lots more work than other parts. After I had was sure of having formed an apex by creating a burr on either side of the edge, I removed as much of the burr as I could by using alternate and high angle strokes. The burr flip flopped from site to side a lot and was not easy to cut of. Once I had removed most of the burr on the extra coarse hone I repeated the procedure on the fine DMT with the same difficulty in removing the burr. At that time the edge would slice receipt paper well but I have had better edges.

From past experiences I know that often a new knife needs to be sharpened a few times before the edge reaches its full sharpness and edge holding potential. So, this did not disturb me much. It was to early for conclusions.

I proceeded to cut up some cardboard before repeating most of the afore mentioned sharpening procedure. Only this time I finished on the diamond side of the Fallknives DC4, one of my favorite hones, to an edge that would just split head hair. Removing the burr and finishing the edge had become a bit easier this time around. Over the following days I carried this knife and used it for my normal cutting tasks. Mostly cutting paper cardboard and plastic packaging material and perhaps a bread bun for lunch. A funny thing I noticed: the edge its cutting ability seemed to first increase, then settle down, before slowly starting to dull!

After about a week of use the edge would still work for most of my cutting tasks but had lost some of its sharpness. I decided to resharpen the edge with just the diamond side of the Fallkniven hone again. Getting it sharp enough to shave arm hair was easy but getting it to split head hair still proved to be a bit fiddly, although I did managed it in the end. By comparison: my Elmax Squeak went from not biting in to the hair to cutting the hair with much less effort. A few passes on the hone did the trick there.

Normally I would have put the knife in pocket pocket as it was sharp enough for me use, but out of curiosity and to check my findings I resharpened it once more. I had become a bit easier to remove the burr and to make the edge arm hair shaving sharp. But to get the edge to split head hair was still a challenge. With other knives like my Maniago Spyderco’s in N690 and Elmax and, for instance, my Victorinox Bantam this had never been this difficult.

Overall the Spyderco Polestar is an enjoyable and capable knife: flipping the blade open with the middle finger is still fun and the handle works well, it handled my cutting tasks fine ones I got it sharp, but I am not impressed with the condition of the steel at the edge on my example. Still, it was interesting playing around with a knife that is so different from my usual fare!

JD

Squeak of same feather, fly together – The Titanium Squeak meets the FRN Squeak by JD

Spyderco Squeak

Not long after the original Squeak SC154PBK came out I got one. I carried and used it for a few months and enjoyed its performance. The blade was thin enough at the edge to cut well, the steel (Böehler N690Co) held its edge and was easy to resharpen. The handle was comfortable and I am a fan of the wire clip. The back spring was strong enough to keep the knife open and closed as needed, but not to stiff to impede easy one hand manipulation. The overall fit and finish was excellent. Well done Spyderco Maniago!

For me and my urban life style I have found that five centimeters of sharp is enough for my usual cutting tasks. The Squeak fit the role of urban cutter to a tee!

During the last Spyderco Meet in Amsterdam I enjoyed handling Nemo’s titanium and Elmax sprint run version of the Squeak. When Nemo suggested I try it out for a few months, I was delighted! Having carried this one for a while now, on its own as well as alternating with my FRN version, and I must say: I am impressed!

SPyderco Squeak

It seem even thinner at the edge and making it cut with little effort than my FRN version. I was unable to find any difference between the steels. I have found that it is difficult to tell steels apart in use. It is much easier to tell them apart by much effort they are to sharpen. Besides, I have a Spyderco Urban in Elmax from the same factory that I have carried and used for months that held its edge well.

The titanium handle was nicely rounded and, after having been in a pants pocket for a while, pleasantly warm to the touch. The smoothness of the titanium helped it slip in and out of the pocket just a little easier than the FRN model, without fear of it falling out by its self.

On Nemo’s Squeak the back spring is a little stronger due to titanium being stiffer than FRN, making the walk and talk more pronounced and the blade slightly harder to open with one hand. By-the-way, both the FRN and the titanium version can be opened with the Spydie drop! A sharp flick of the wrist does the trick!

Fit and finish is of a very high level. This knife exudes quality. All in all an excellent upgrade of the standard Squeak. Well done Spyderco!

null

The author: JD is a good friend and a regular contributor to the NKR. He also known for his precise skills in sharpening and is a real encyclopedia about knives. His carrying preferences goes for small folders.
All Pictures and text copyrighted by JD.

JD’S SPYDERCO LADYBUG IN SUPER BLUE STEEL LGYP3E

JD LADYBUG
 

Thanks to my friend Nemo I have had a chance to check out the Spyderco C(SB) steel with a full flat grind(ffg). This is my first ffg Ladybug and my first experience of Super Blue steel. Let me tell you what I found!


I have had a Ladybug before. The VG10 model with the saber grind.I did not like how it cut, for my taste it was far to thick at the edge and the back. I ground the bevels flat so now it has a singe bevel grind. It cut much better but I did not use it much.

The day I brought the Ladybug SB in to service I put a fob on it, Spyderco Jur style, to give me a little extra to hold on to. I oiled the joint with a little Nano Oil. The mid-lock was smooth and easy to operate. There was just a little vertical blade play. Which is not uncommon on mid-locks and back-locks. My older Ladybug was the same in that regard.

I then sharpened it, as the edge was only cutting note book paper roughly. At the same time I lowered the edge angle. When I sharpened the back the of blade, the part above the Spyderco hole, was about 1mm above the hone. This gave me a final edge that was just below 10dps(degrees per side) blended into the main bevel.

My idea is that a knife this small should cut with very little resistence. You are not going to put much force on the blade as the handle is to small for that. So, thin and sharp is the way to go! Grinding the whole blade flat on the stone would make it cut even better but is just to much work for me.

I cut a little cardboard just so see how well it would cut, how the edge would respond, and how the handle would feel in the hand. The blade cut well with little resistance but the edge had collapsed. After de-stressing the edge (lightly cutting in to a stone to remove the damaged steel) and resharpening it I cut some more cardboard. The edge seemed to be stable but more cardboard cutting revealed a small section had collapsed again. It took a few times de-stressing and resharpening to stabilize also this part of the edge. It has been my experience that often a knife need to be sharpened a few times before you see its full potential.

These sharpening sessions gave me the opportunity to use different hones to sharpen the blade. And I must say: this is a very nice steel to sharpen! No matter the hone. I sharpened with diamonds, a Norton fine India hone, and different ceramics. After de-stressing it could be apexed quickly with hardly any burrs forming. The burrs that did form could be removed with just a few light, high angle, passes into the stone. It was not just easy to sharpen, but easily took very sharp, hungry, edge! 🙂

The handle is large enough for me to get a two and a halve finger grip. During the cutting task I used the knife for, I found the handle to give me a good grip and precise control of the edge. I did find the handle small and fiddly for opening the knife with the thump in the Spyderco hole. So, usually I opened the knife in a different way.

The last few weeks I cut medium size apples, cardboard, I opened mail, cut open and removed the seed from and avocado, trimmed a nail here and there, and cut plastic food packaging. The knife handled all these task without much of a fuss, though the apple was at the limit of its abilities due to the length of the edge and the size of apple. Some of these task would have been easier or faster done with a larger knife, but you do not alway have that option. In those cases it is nice to know that this, slightly modified, ffg Ladybug will get the job done. As the saying goes: „I does not have to be big, just sharp!” As for the steel…It takes a great edge! 🙂

Text and Photos by JD.