Tag Archives: Diamonds

Spyderco CALY™ 3.5 – C144CFPE Caly 3.5 ZDP – Part II – Back To The Convex edge !

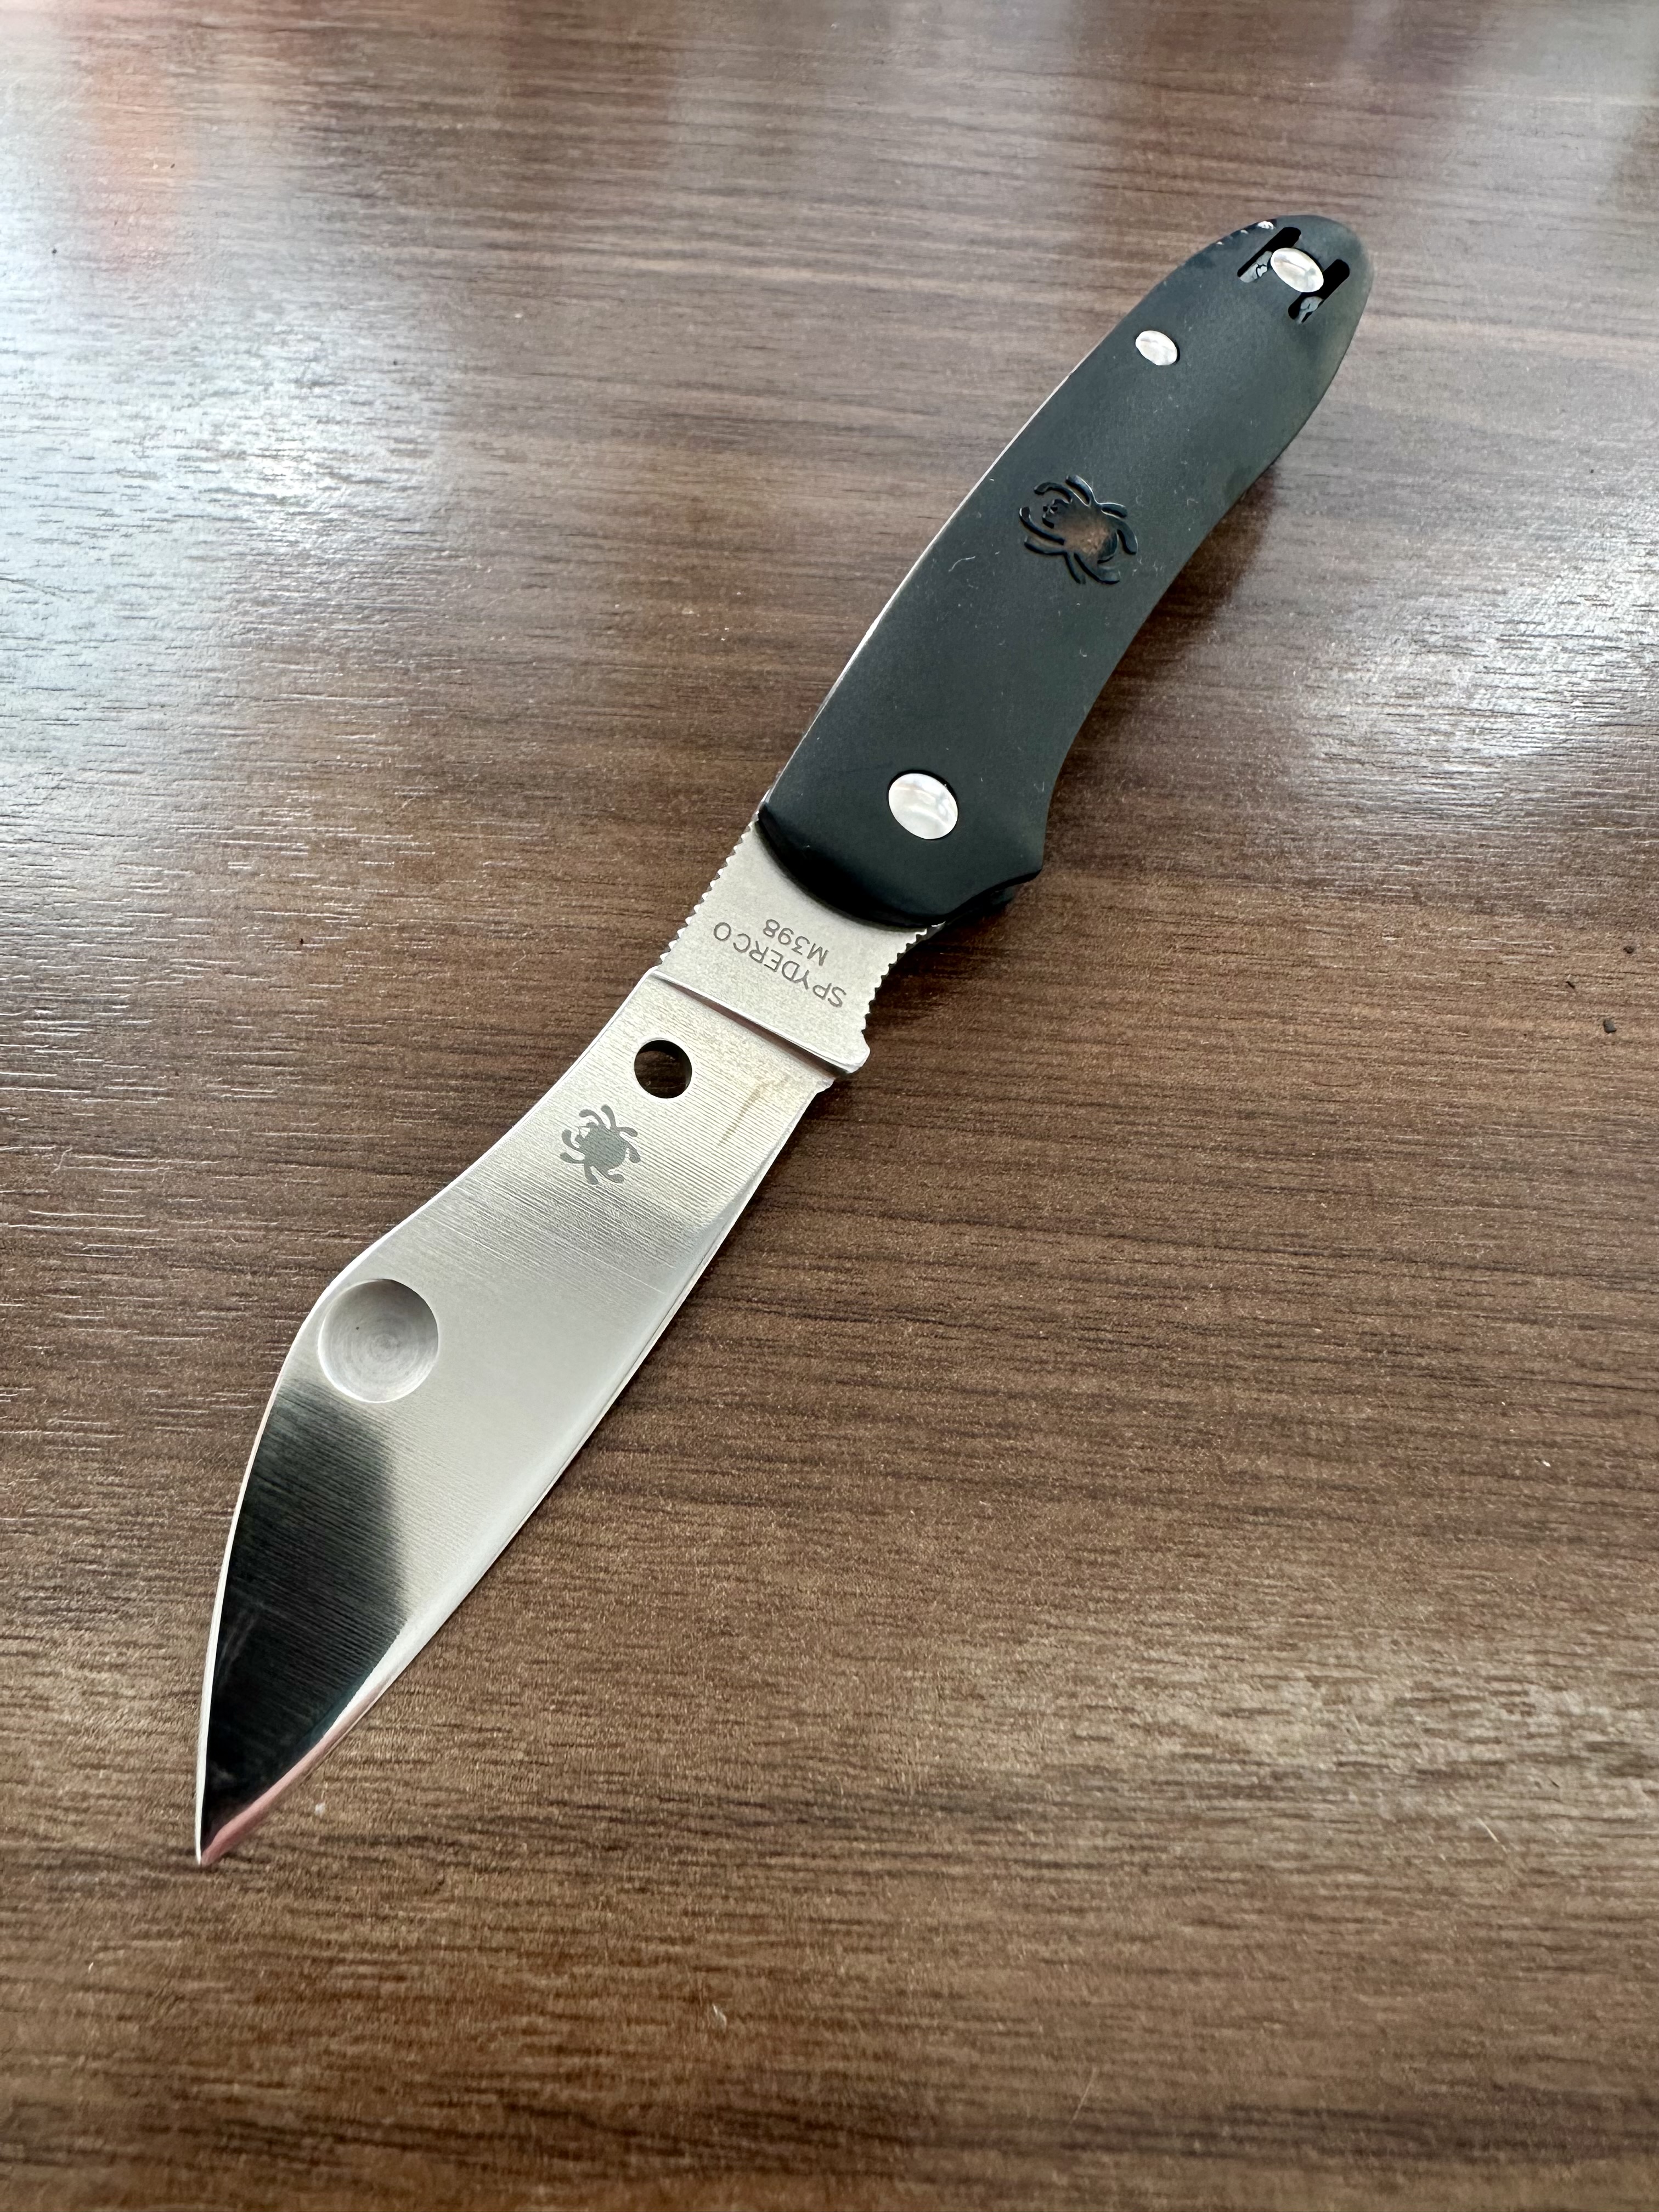
Disclaimer: The Spyderco Triangle Sharpmaker Diamond Rods Set of 2 – 204D was provided by Golden, along with the Caly 3.5. This article is the perfect opportunity to put them to the test.
The Sharpmaker is my own.

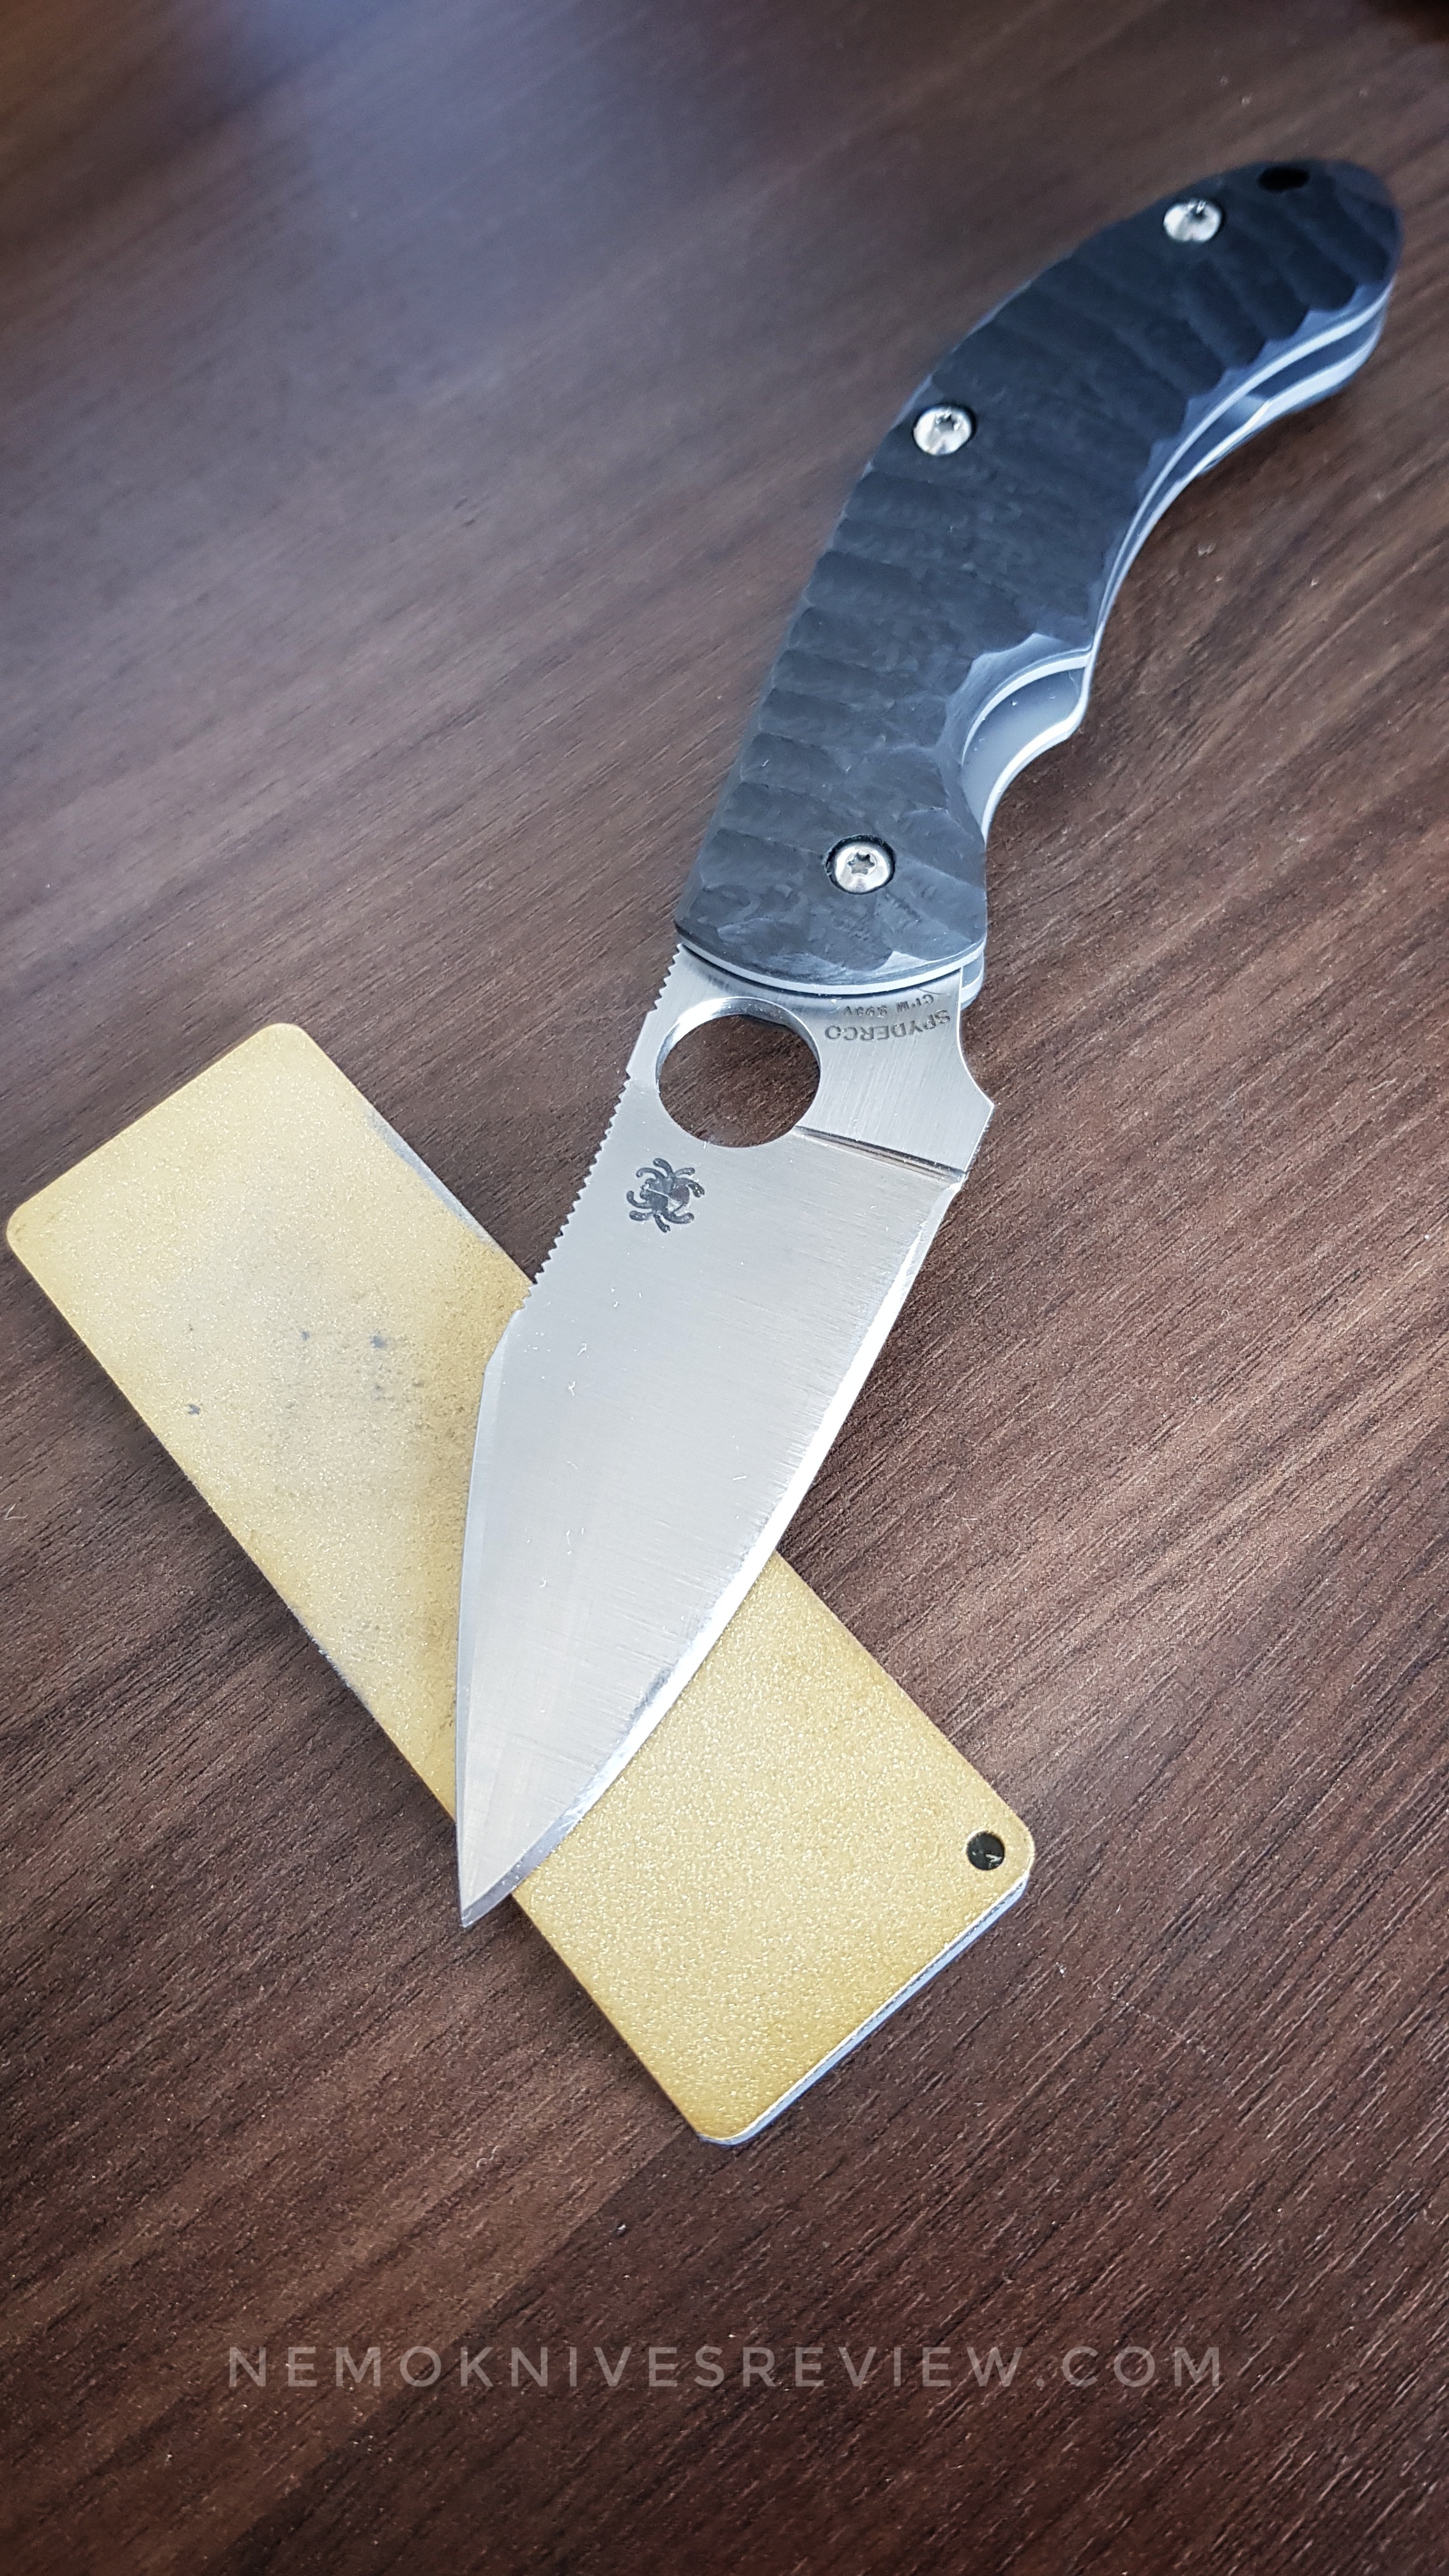
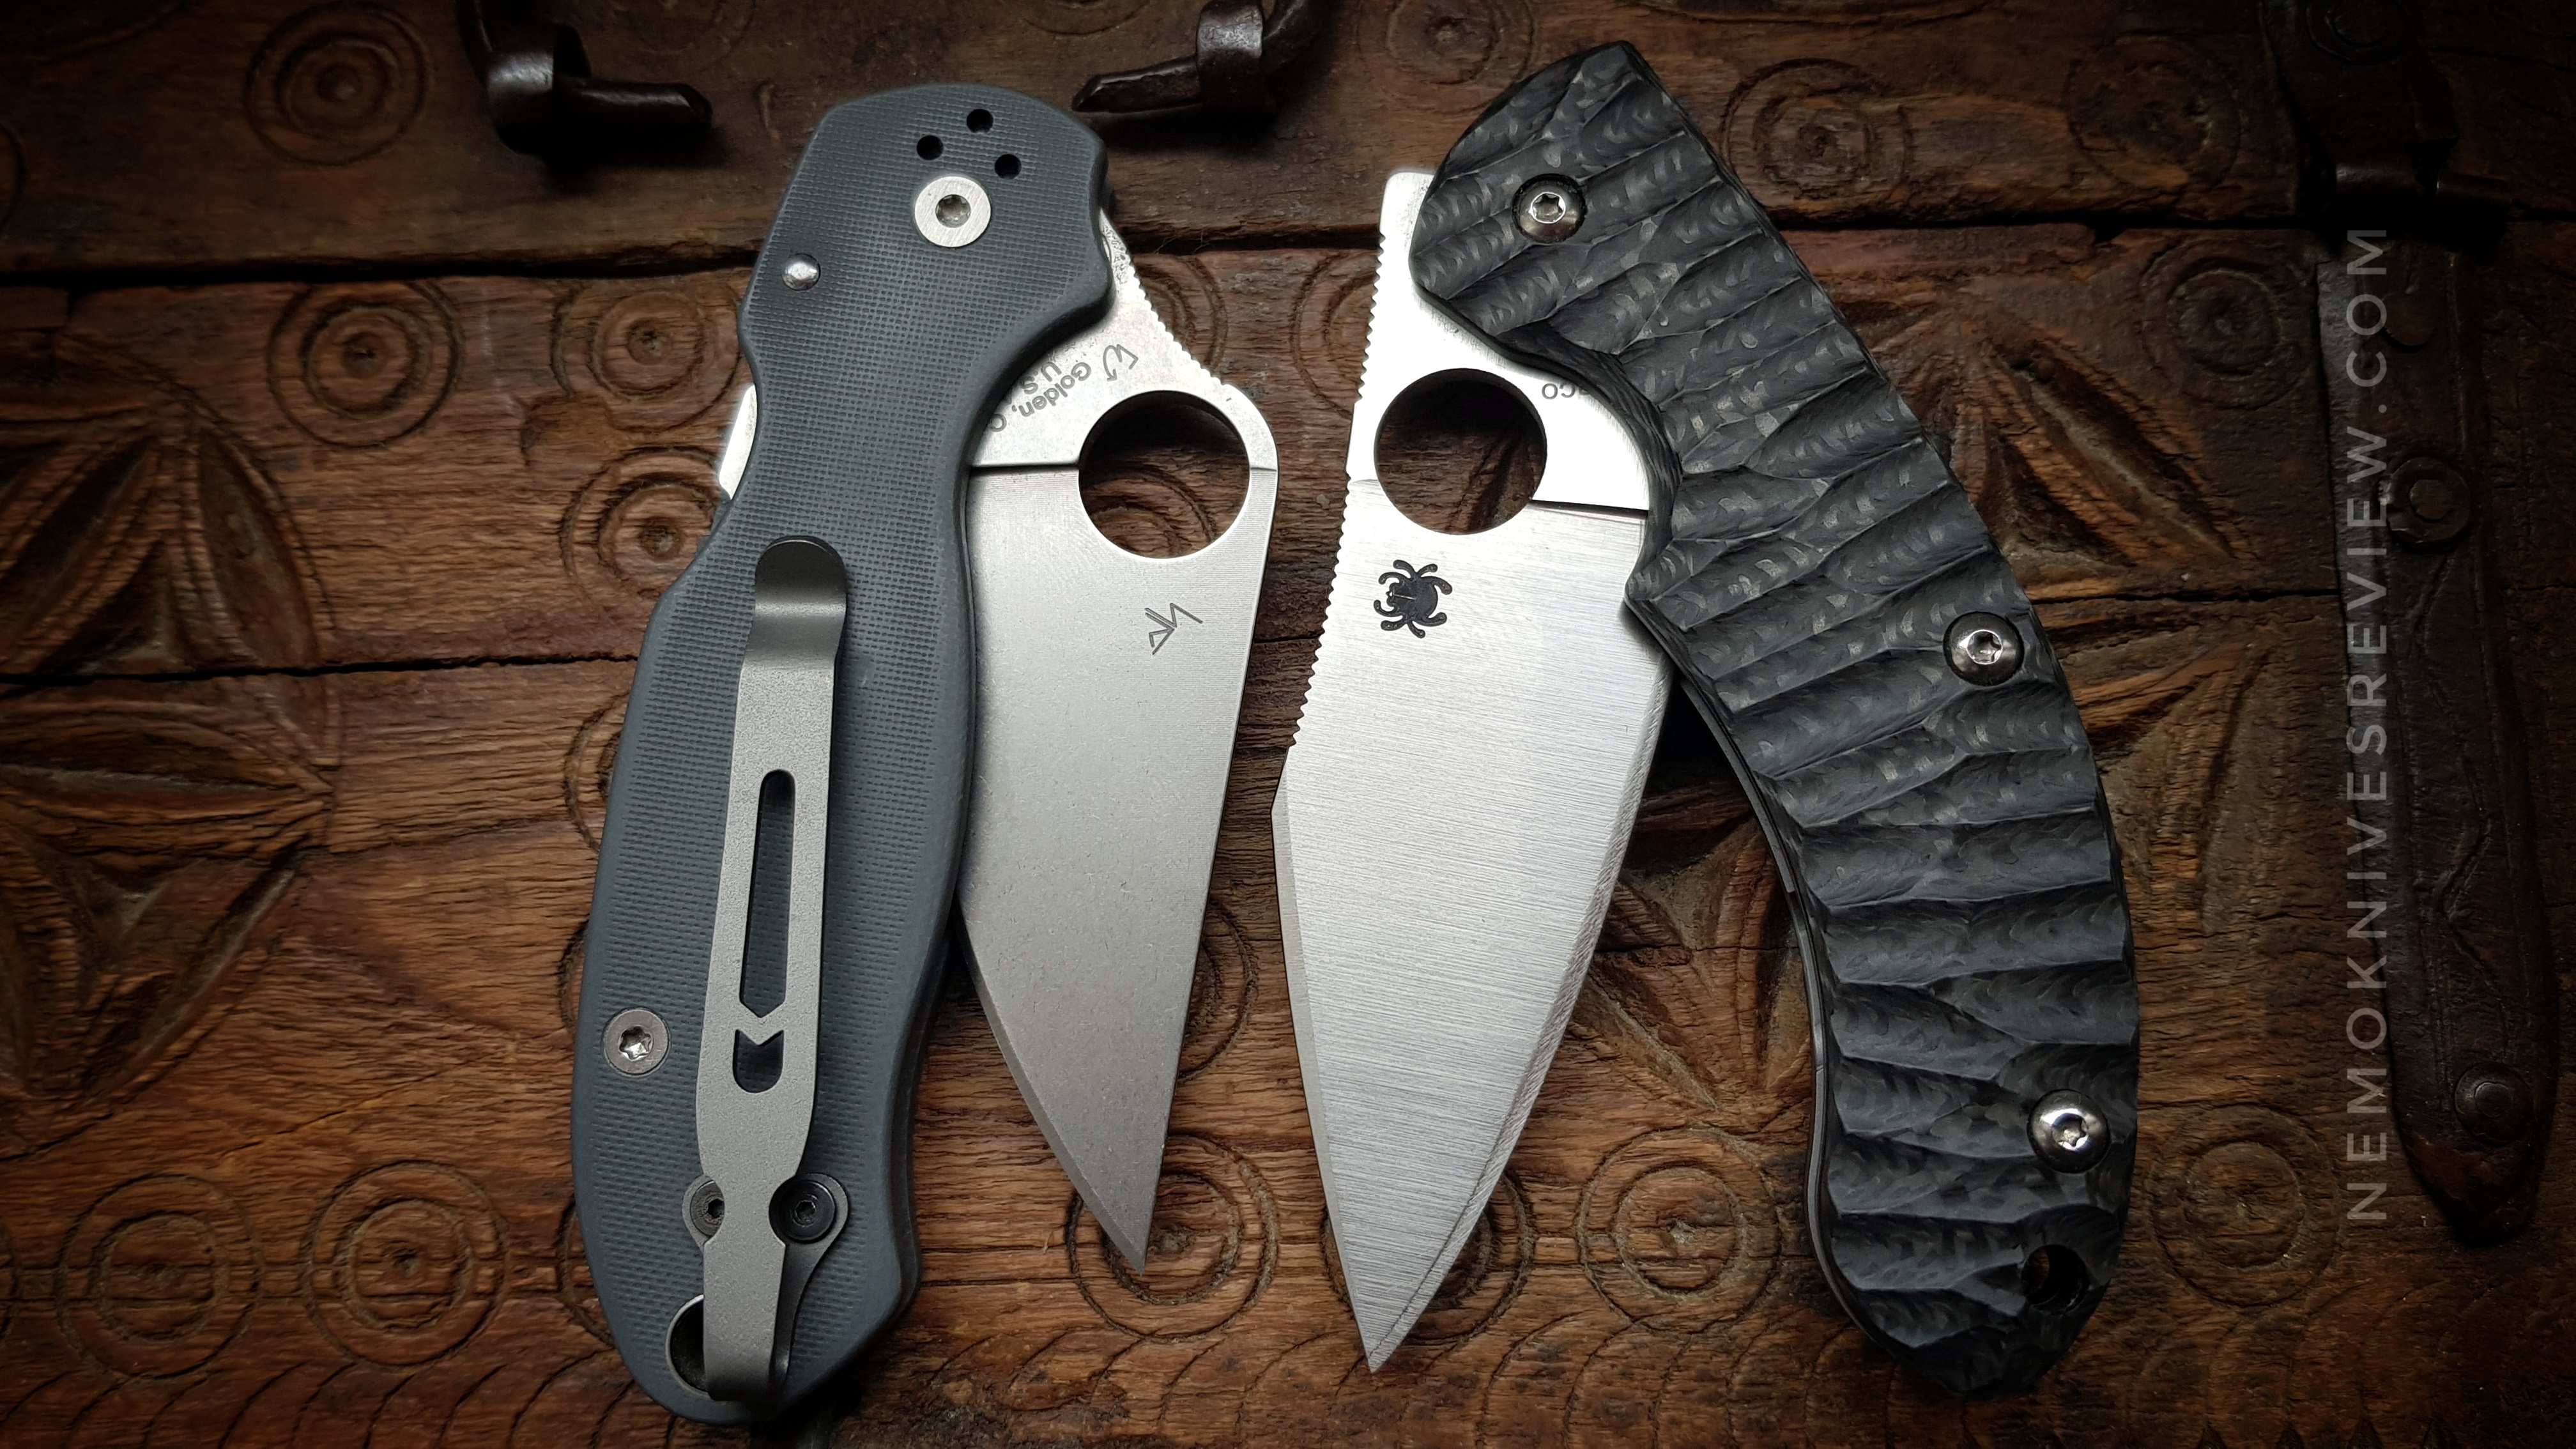
In the parcel from Golden were also two sets of rods: the 204CBN Cubic Boron Nitride rods and the 204D Diamond rods. Since my Caly 3.5 needed some convexing, it was time to see what these rods could do.

But you know, I’m a freehand sharpening guy. I don’t like being locked into fixed angles. I prefer to adjust pressure and movement based on what I feel directly from the blade against the rod. That’s why I’ve never been too fond of “systems” that take control away from your hands.

For me, sharpening should stay super simple, and—most importantly—adaptable. If I’m in the wild, far from the workbench, I still want to be able to bring an edge back with nothing more than a rod, a stone, or even something improvised.

That’s where the Spyderco Sharpmaker is different. It’s a system, yes, but it doesn’t dictate the process. It allows me to sharpen by feel, with freedom, and still gives me the precision I want.

Exactly — and that’s one of those clever little details only Spyderco would think of.

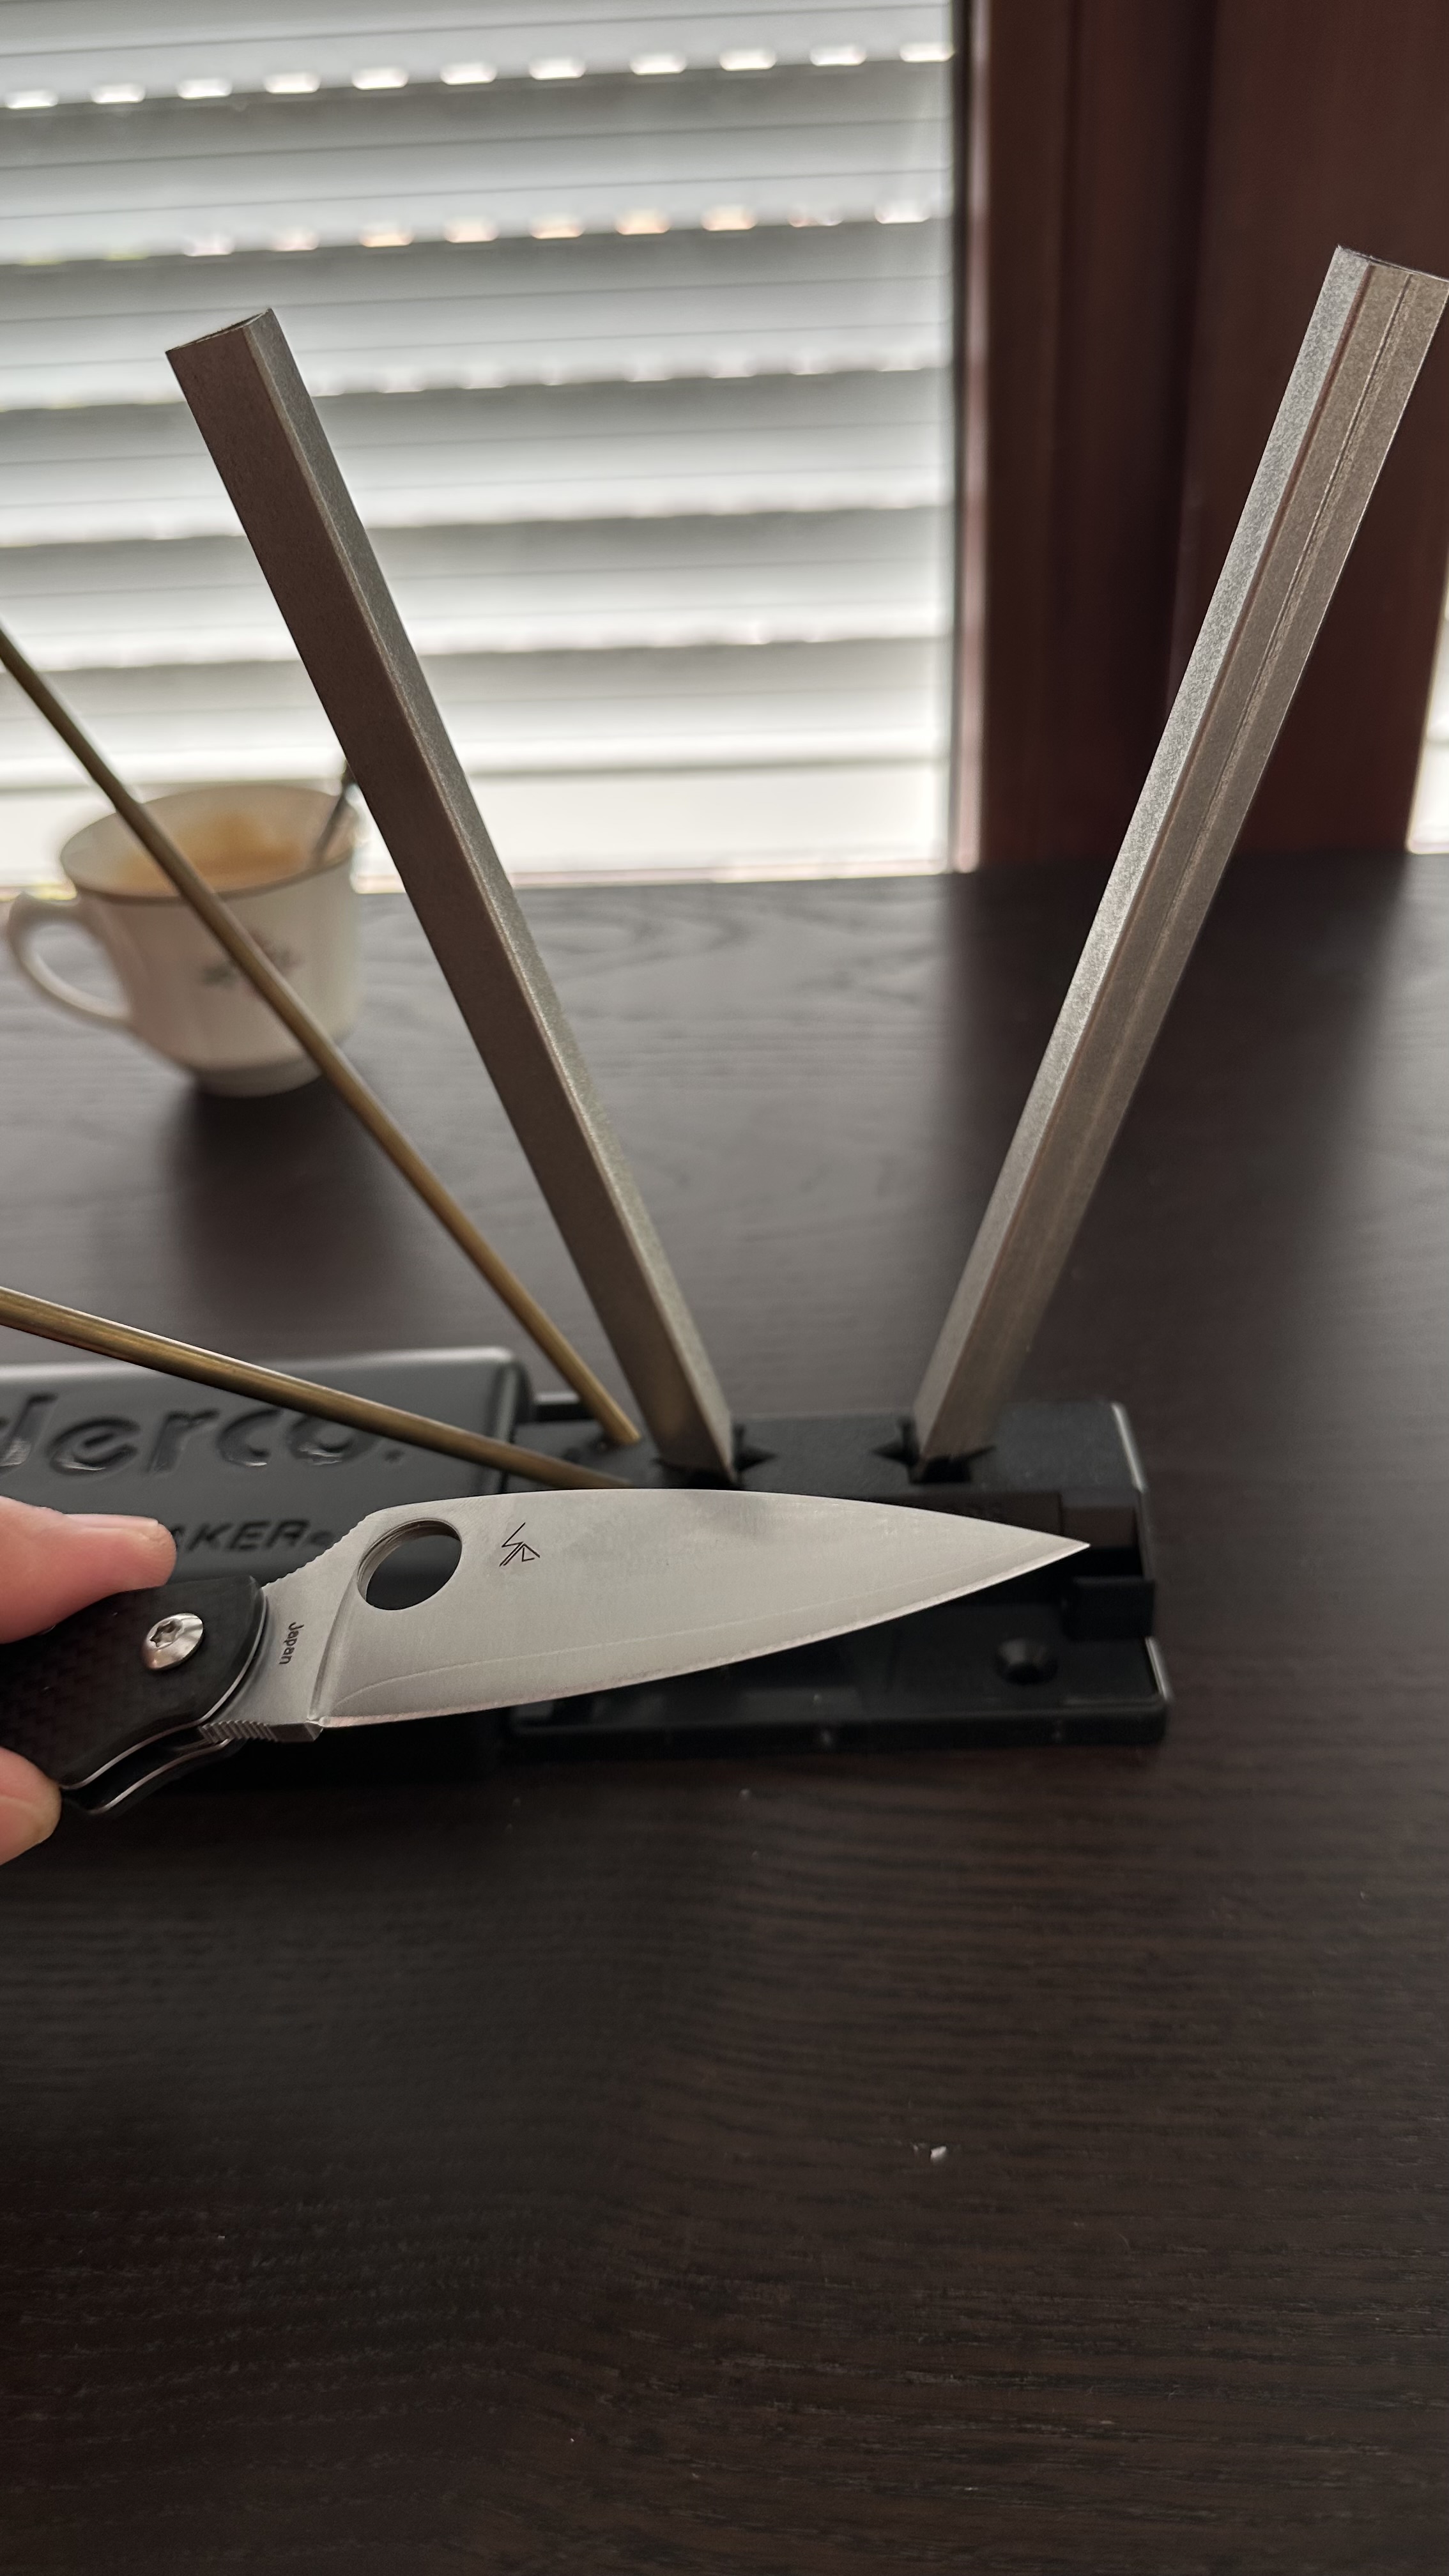
On the back of the Sharpmaker base, you’ve got two horizontal grooves that let you lay the rods flat. In that configuration, the tool basically transforms into a bench stone. With the diamond rods mounted this way, it works like a compact, portable diamond sharpening stone, letting you go full freehand.

So you get both options: the guided 30°/40° setup if you want consistency, and the freehand mode if you prefer to feel the steel, control pressure, and chase your own convex. That versatility is what makes the Sharpmaker more than “just a system.”

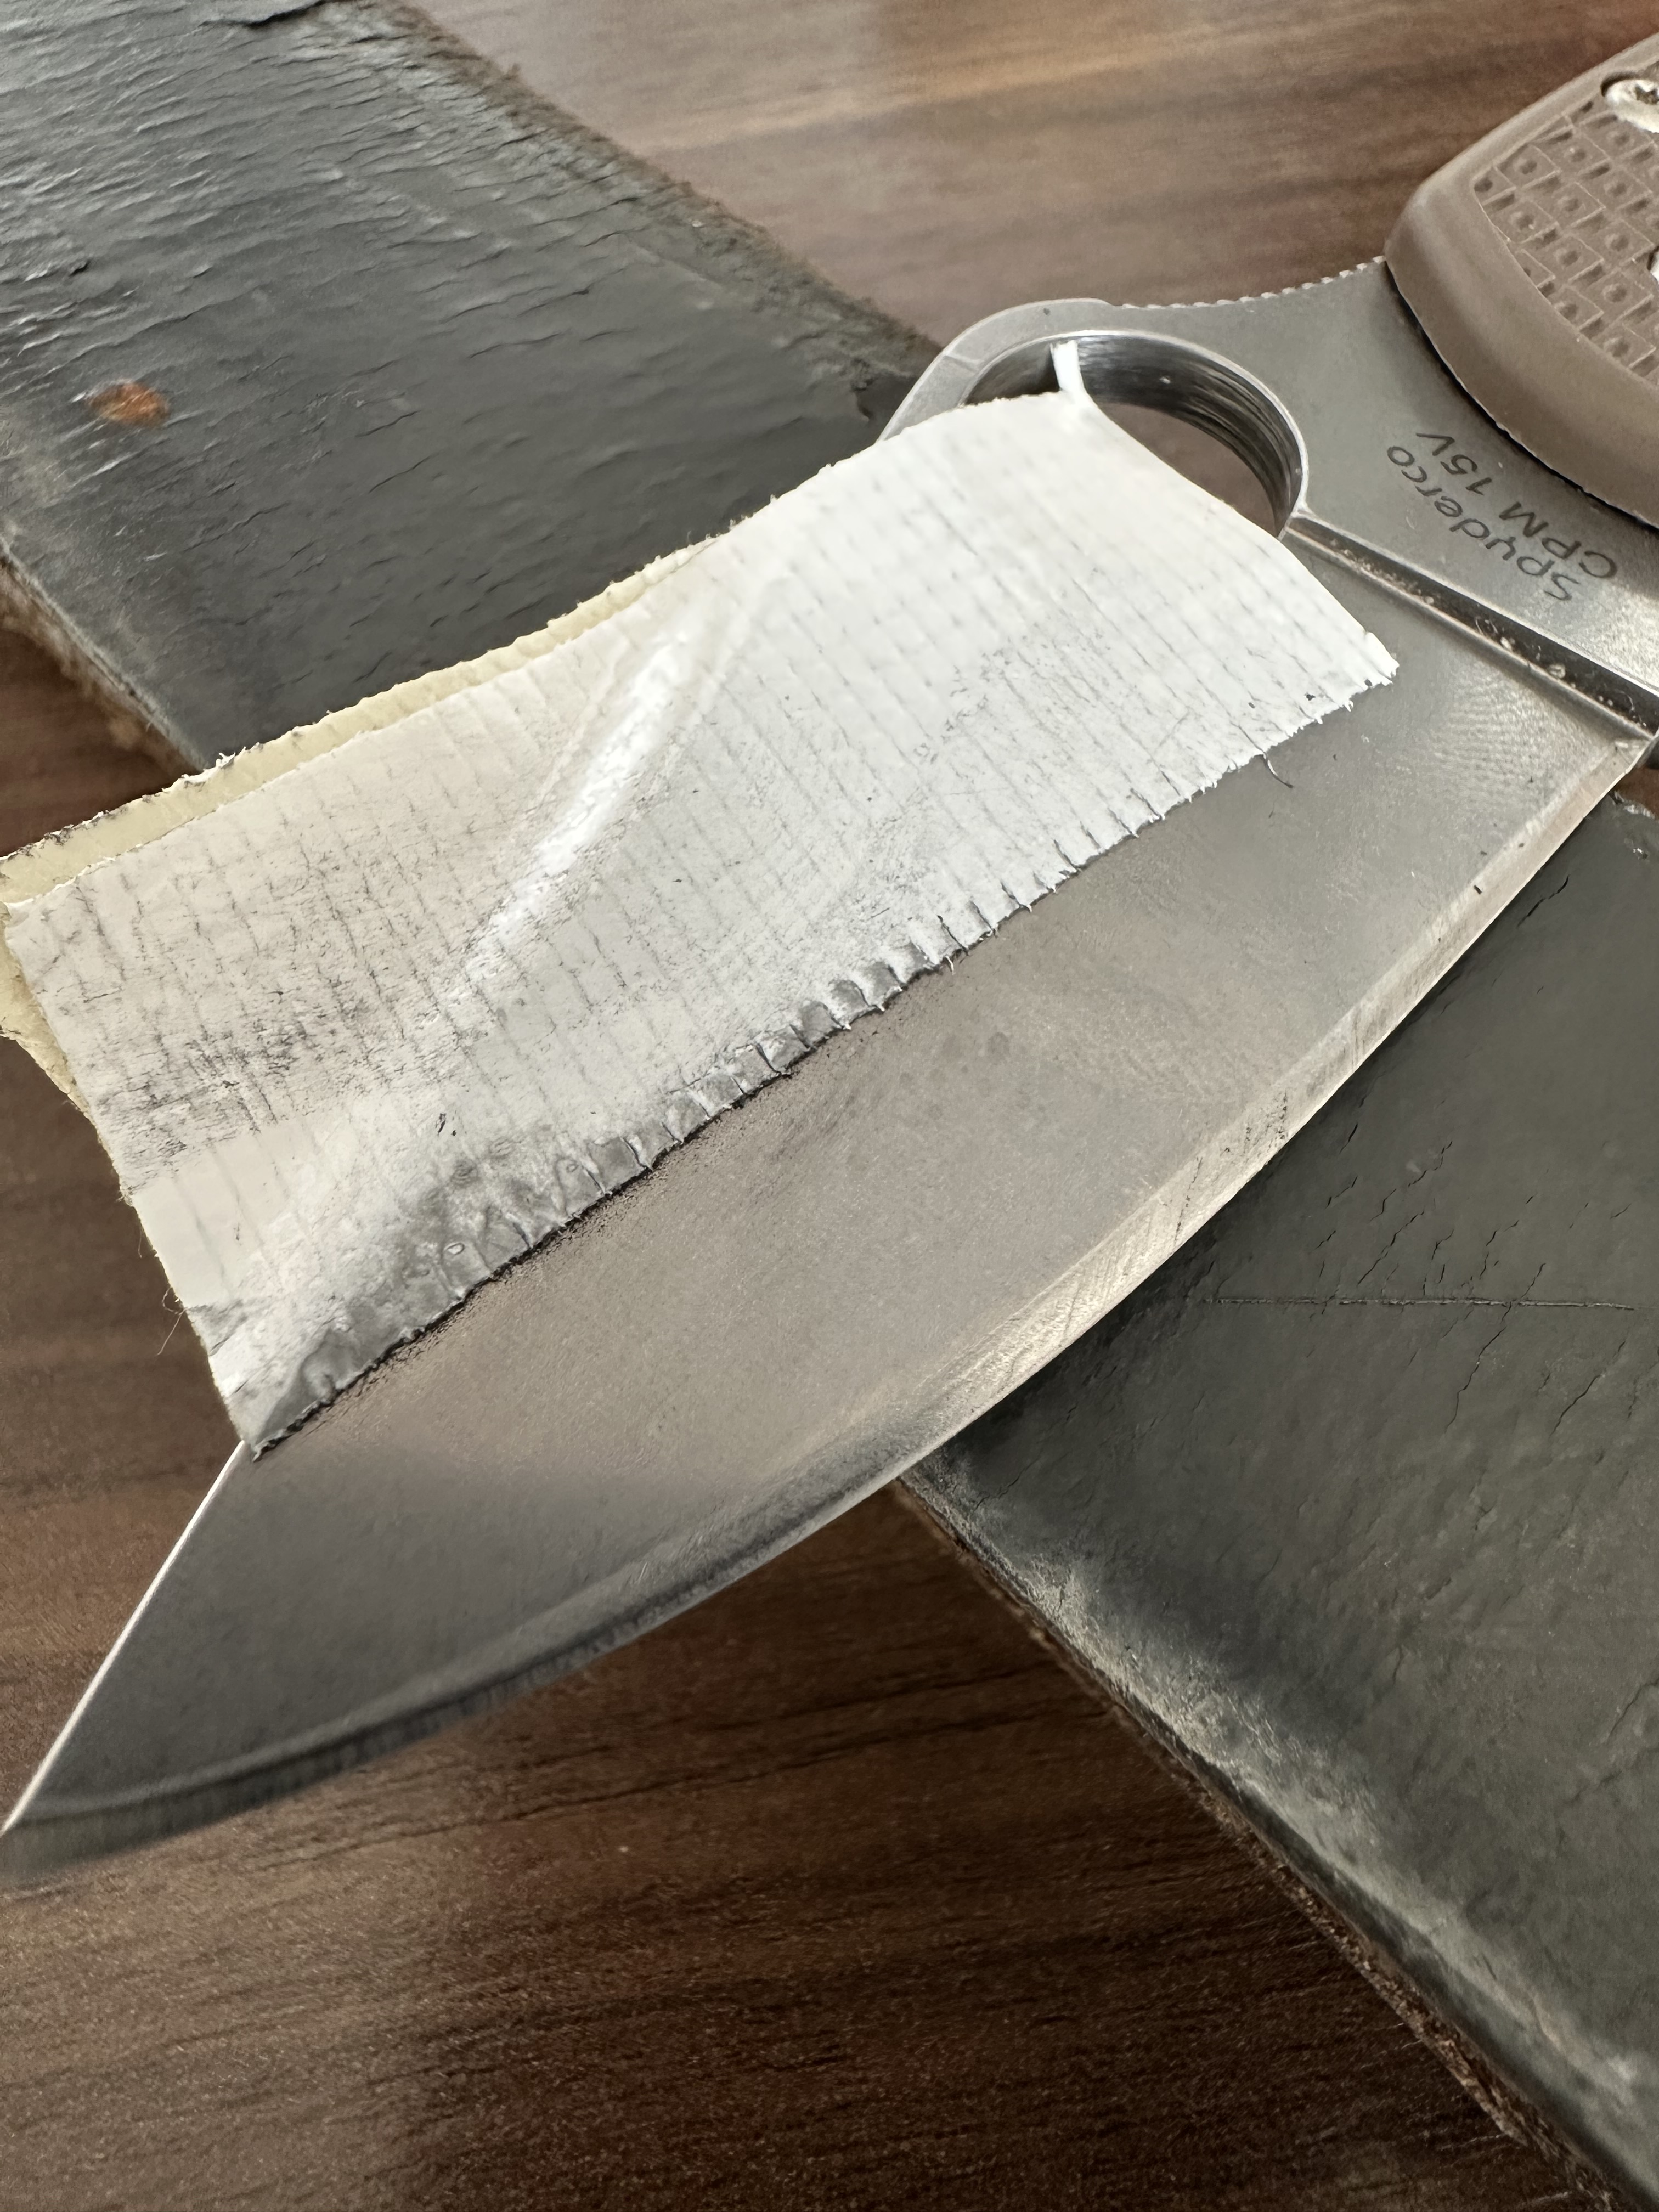
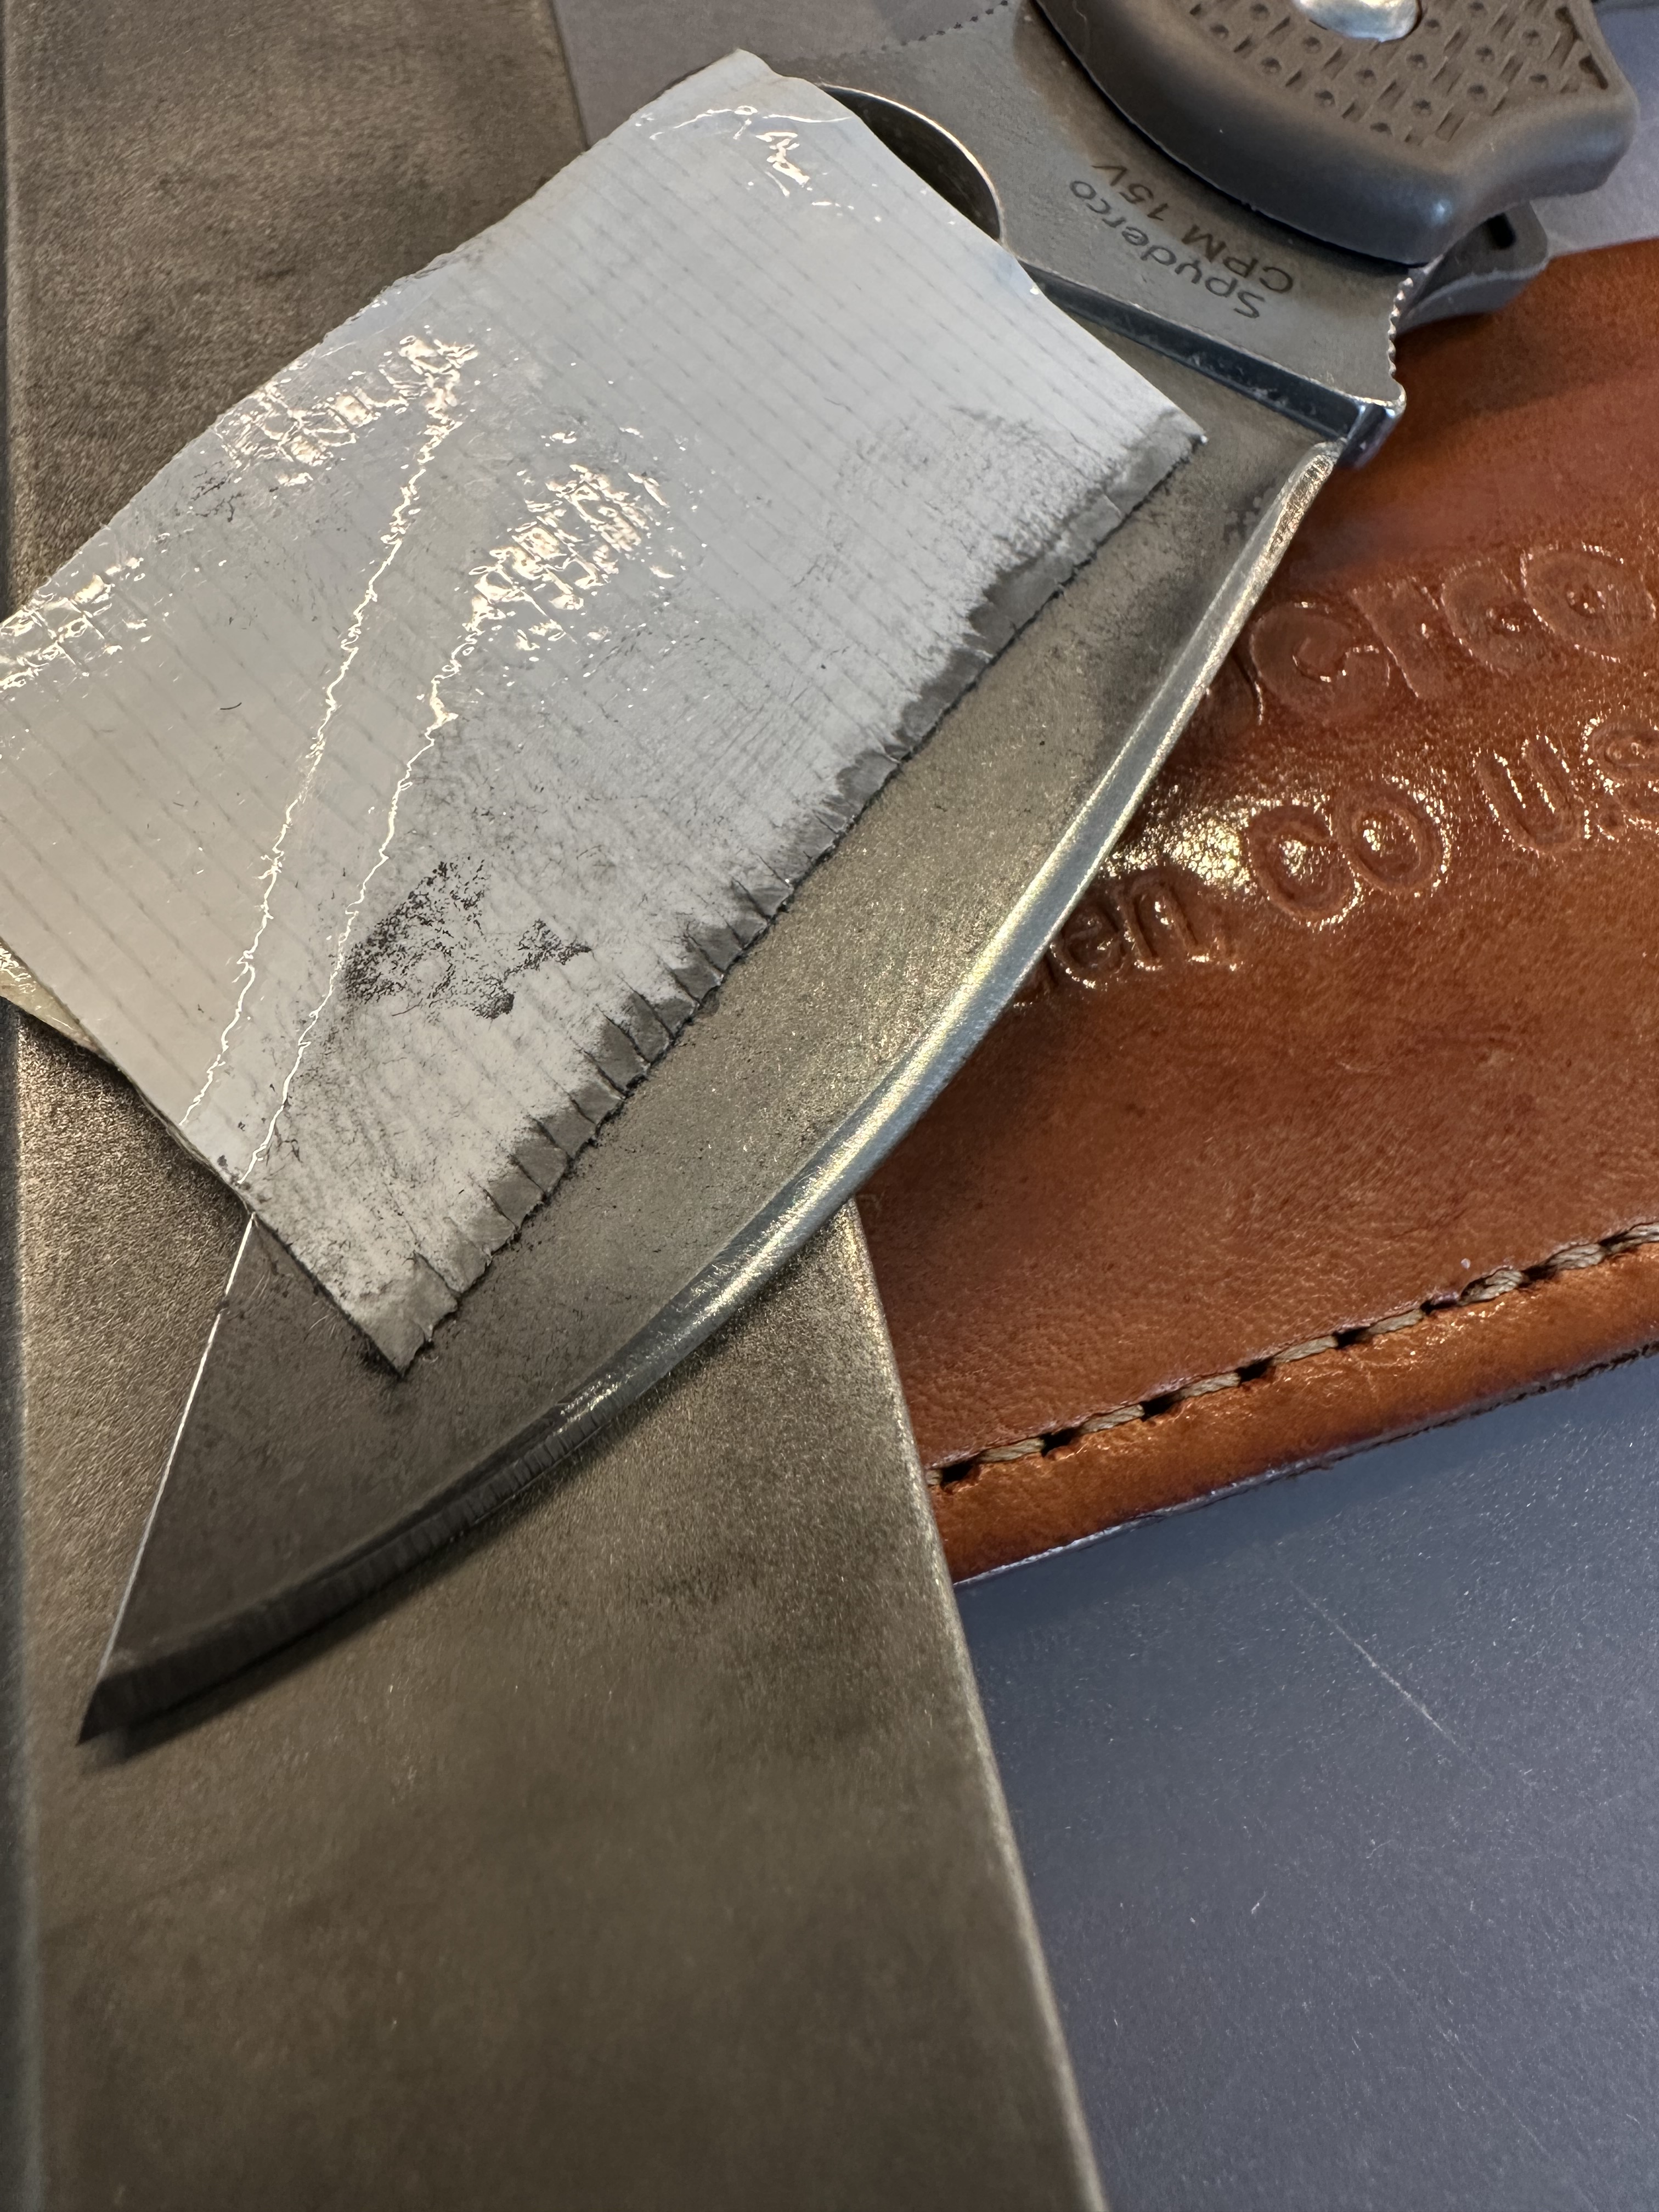
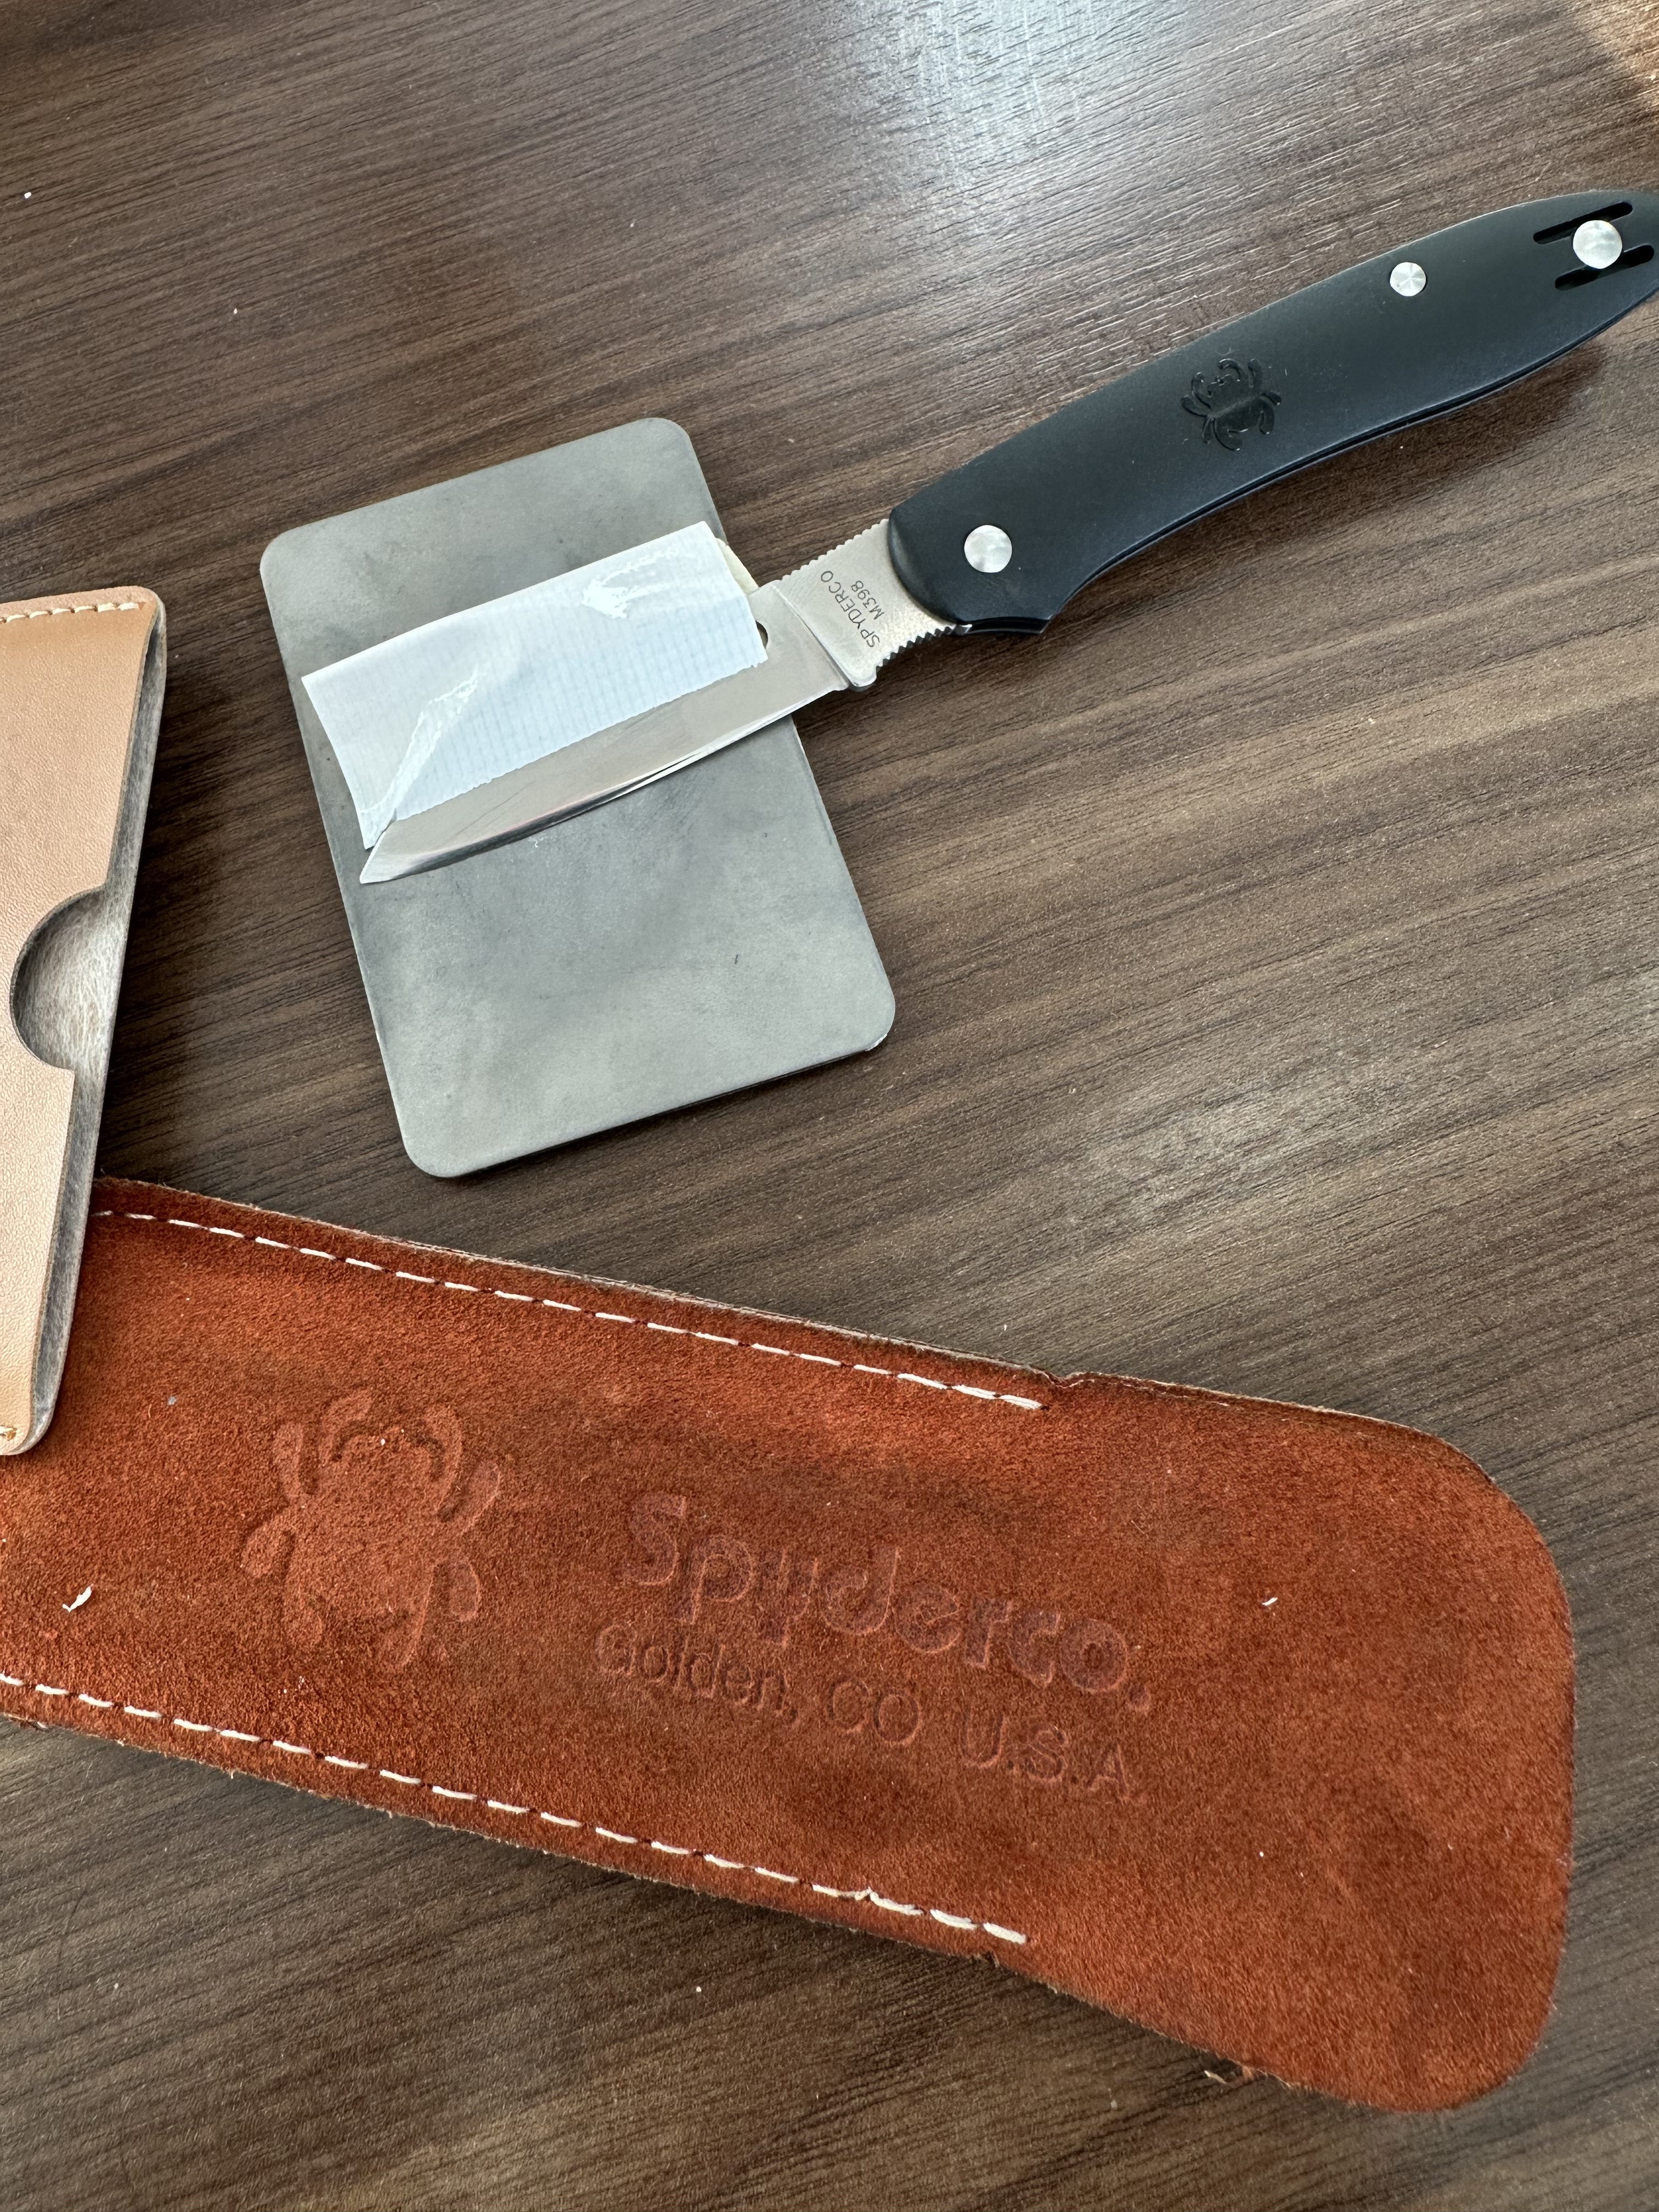
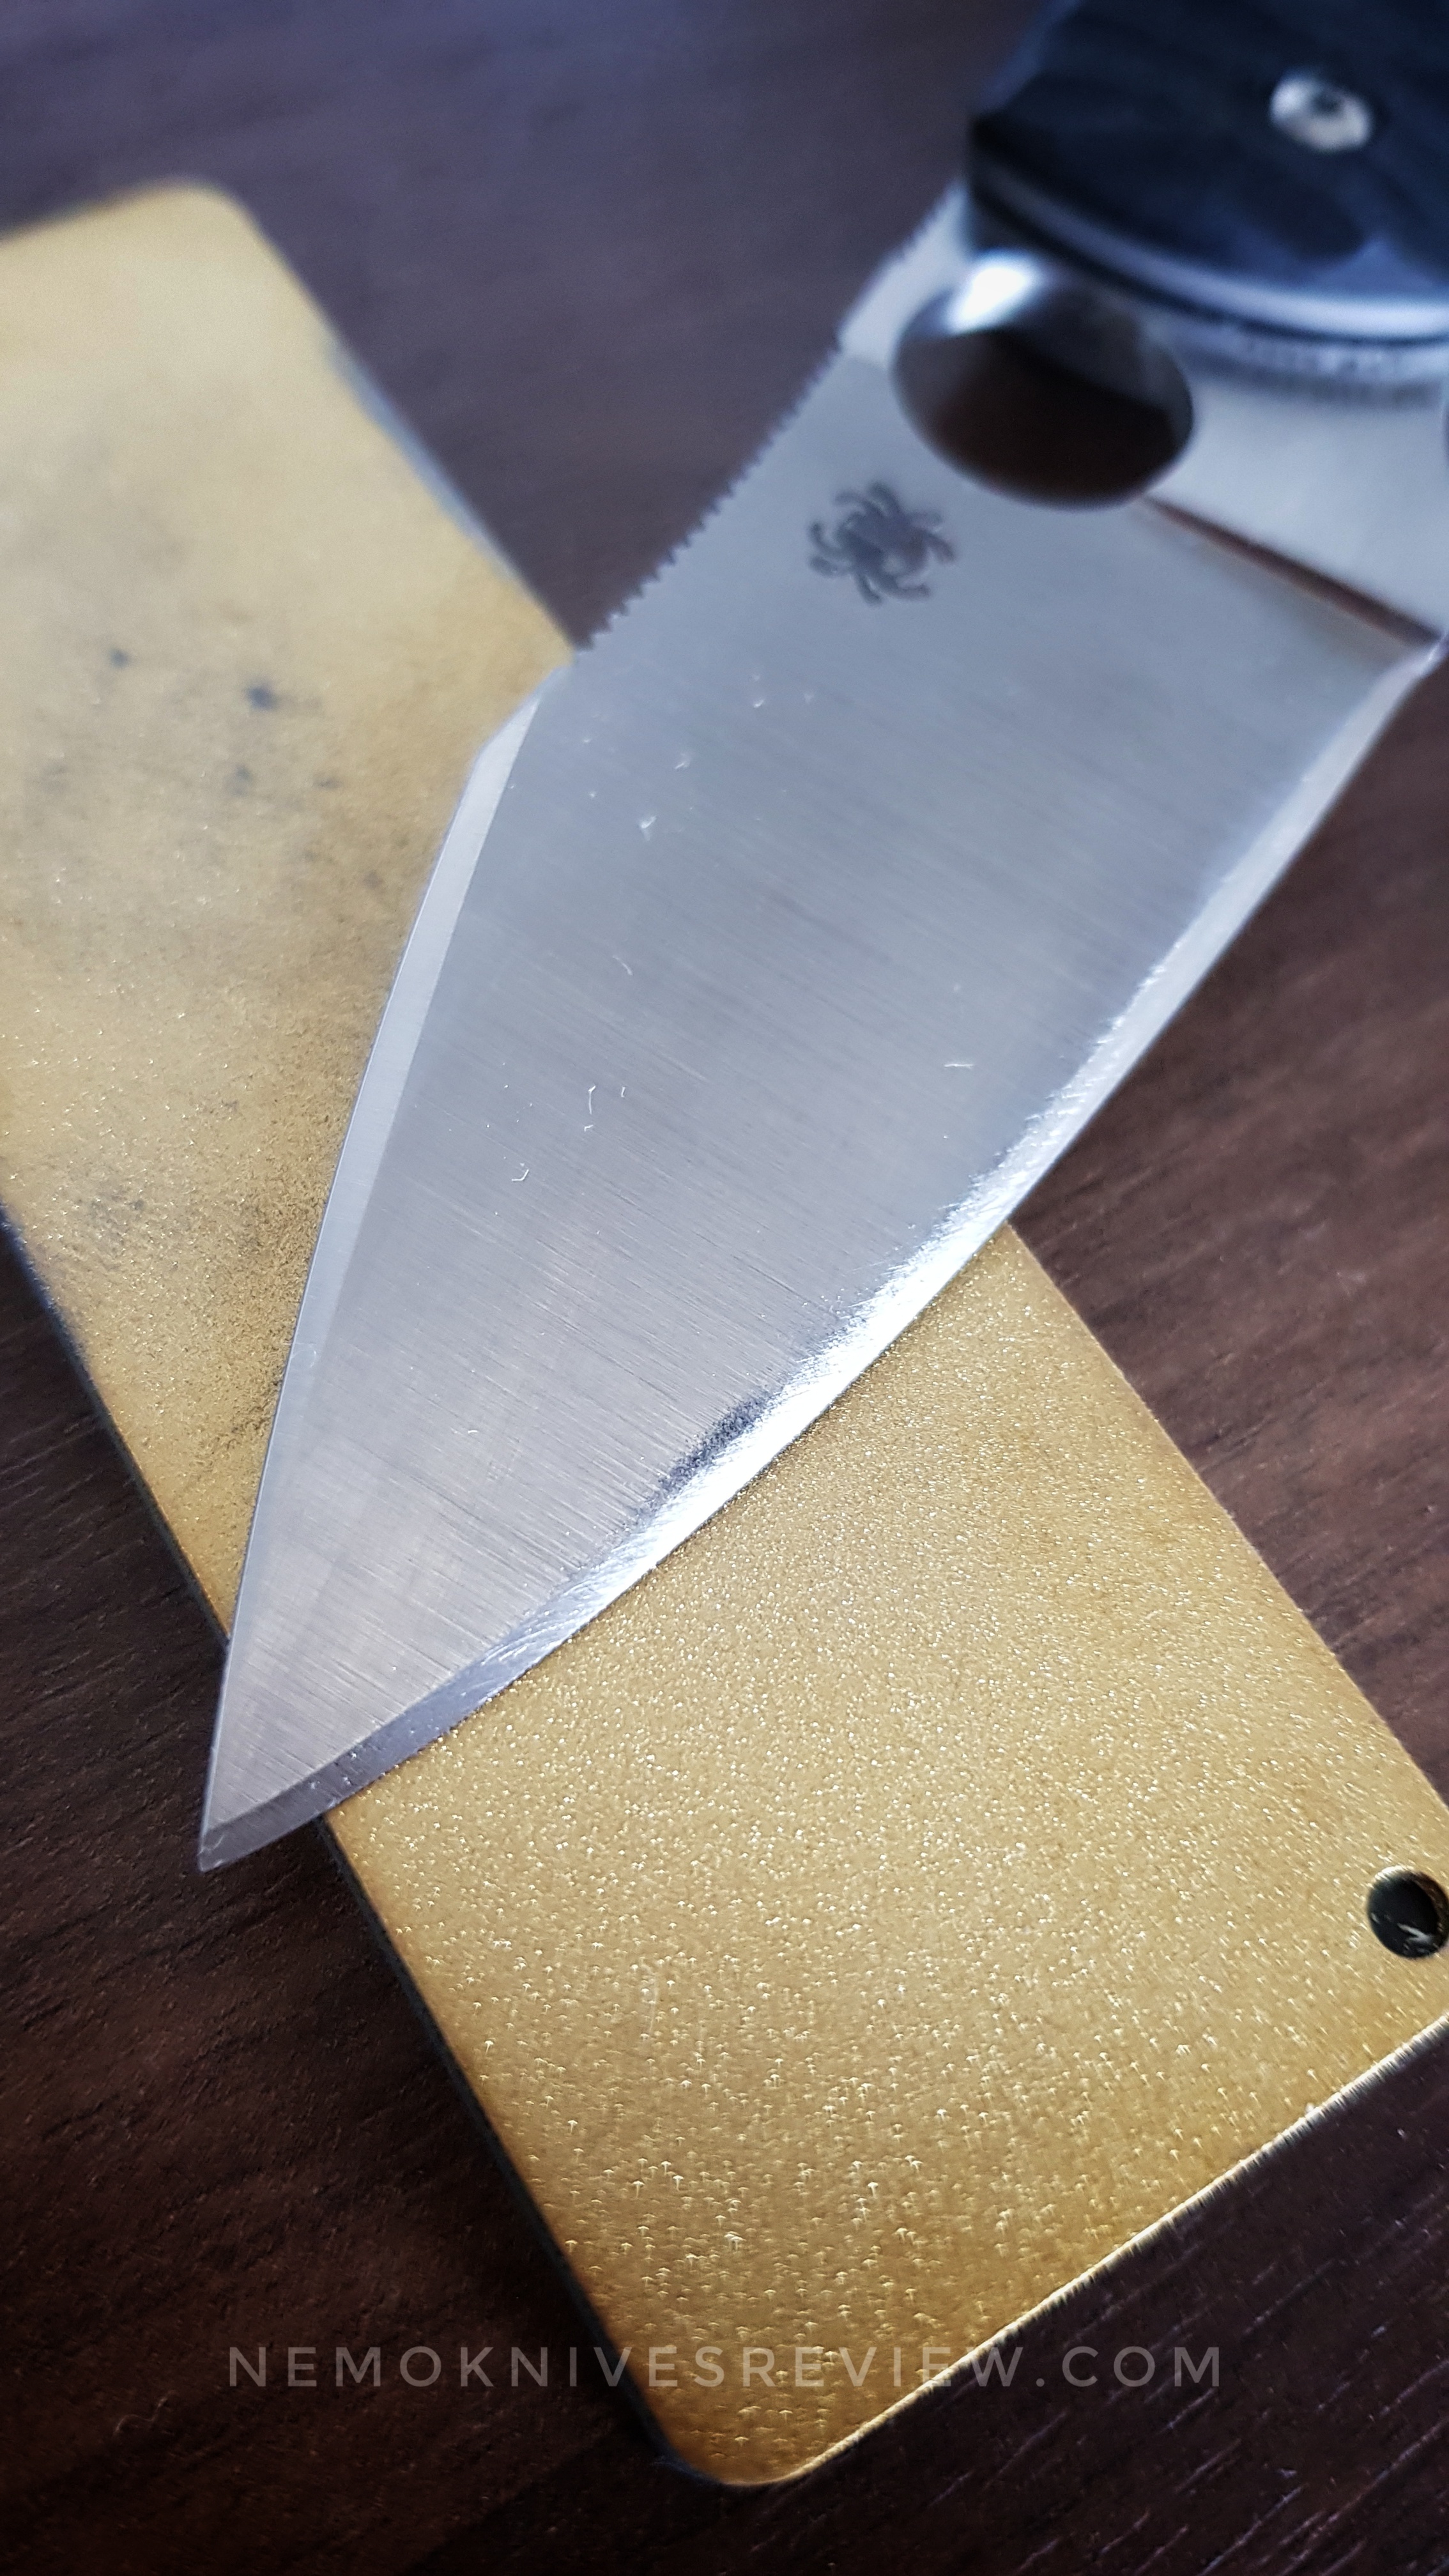
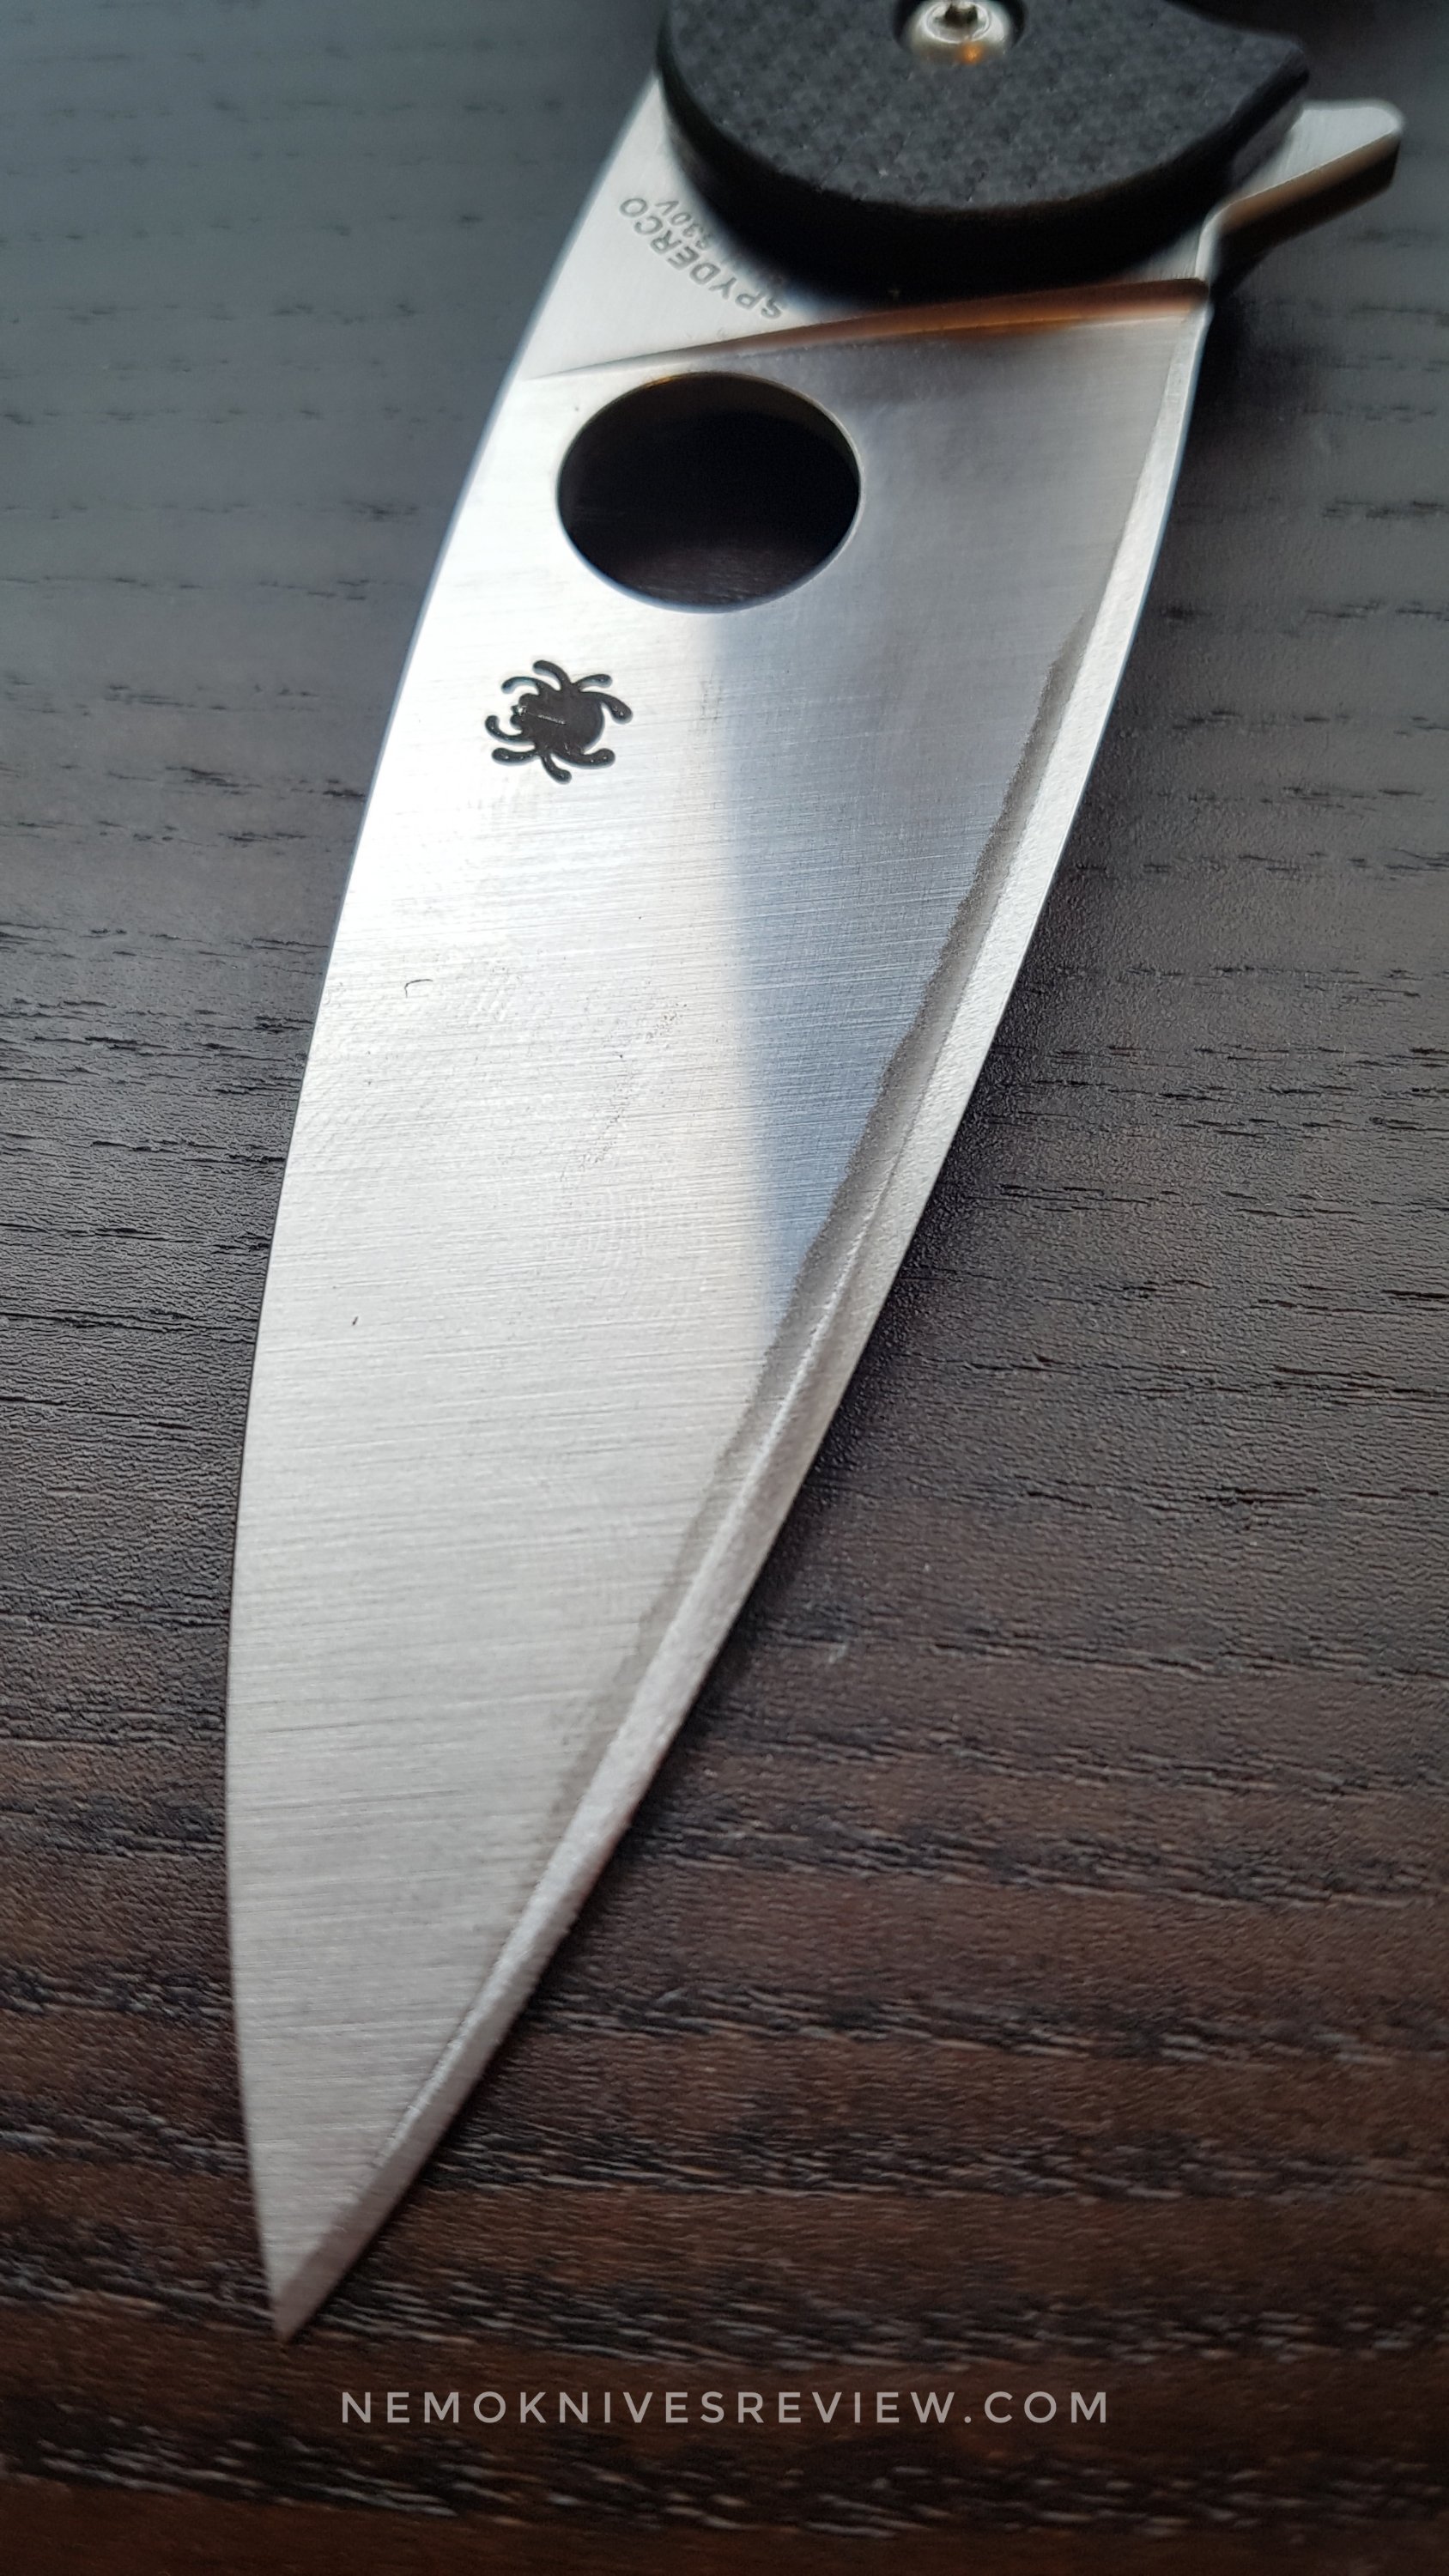
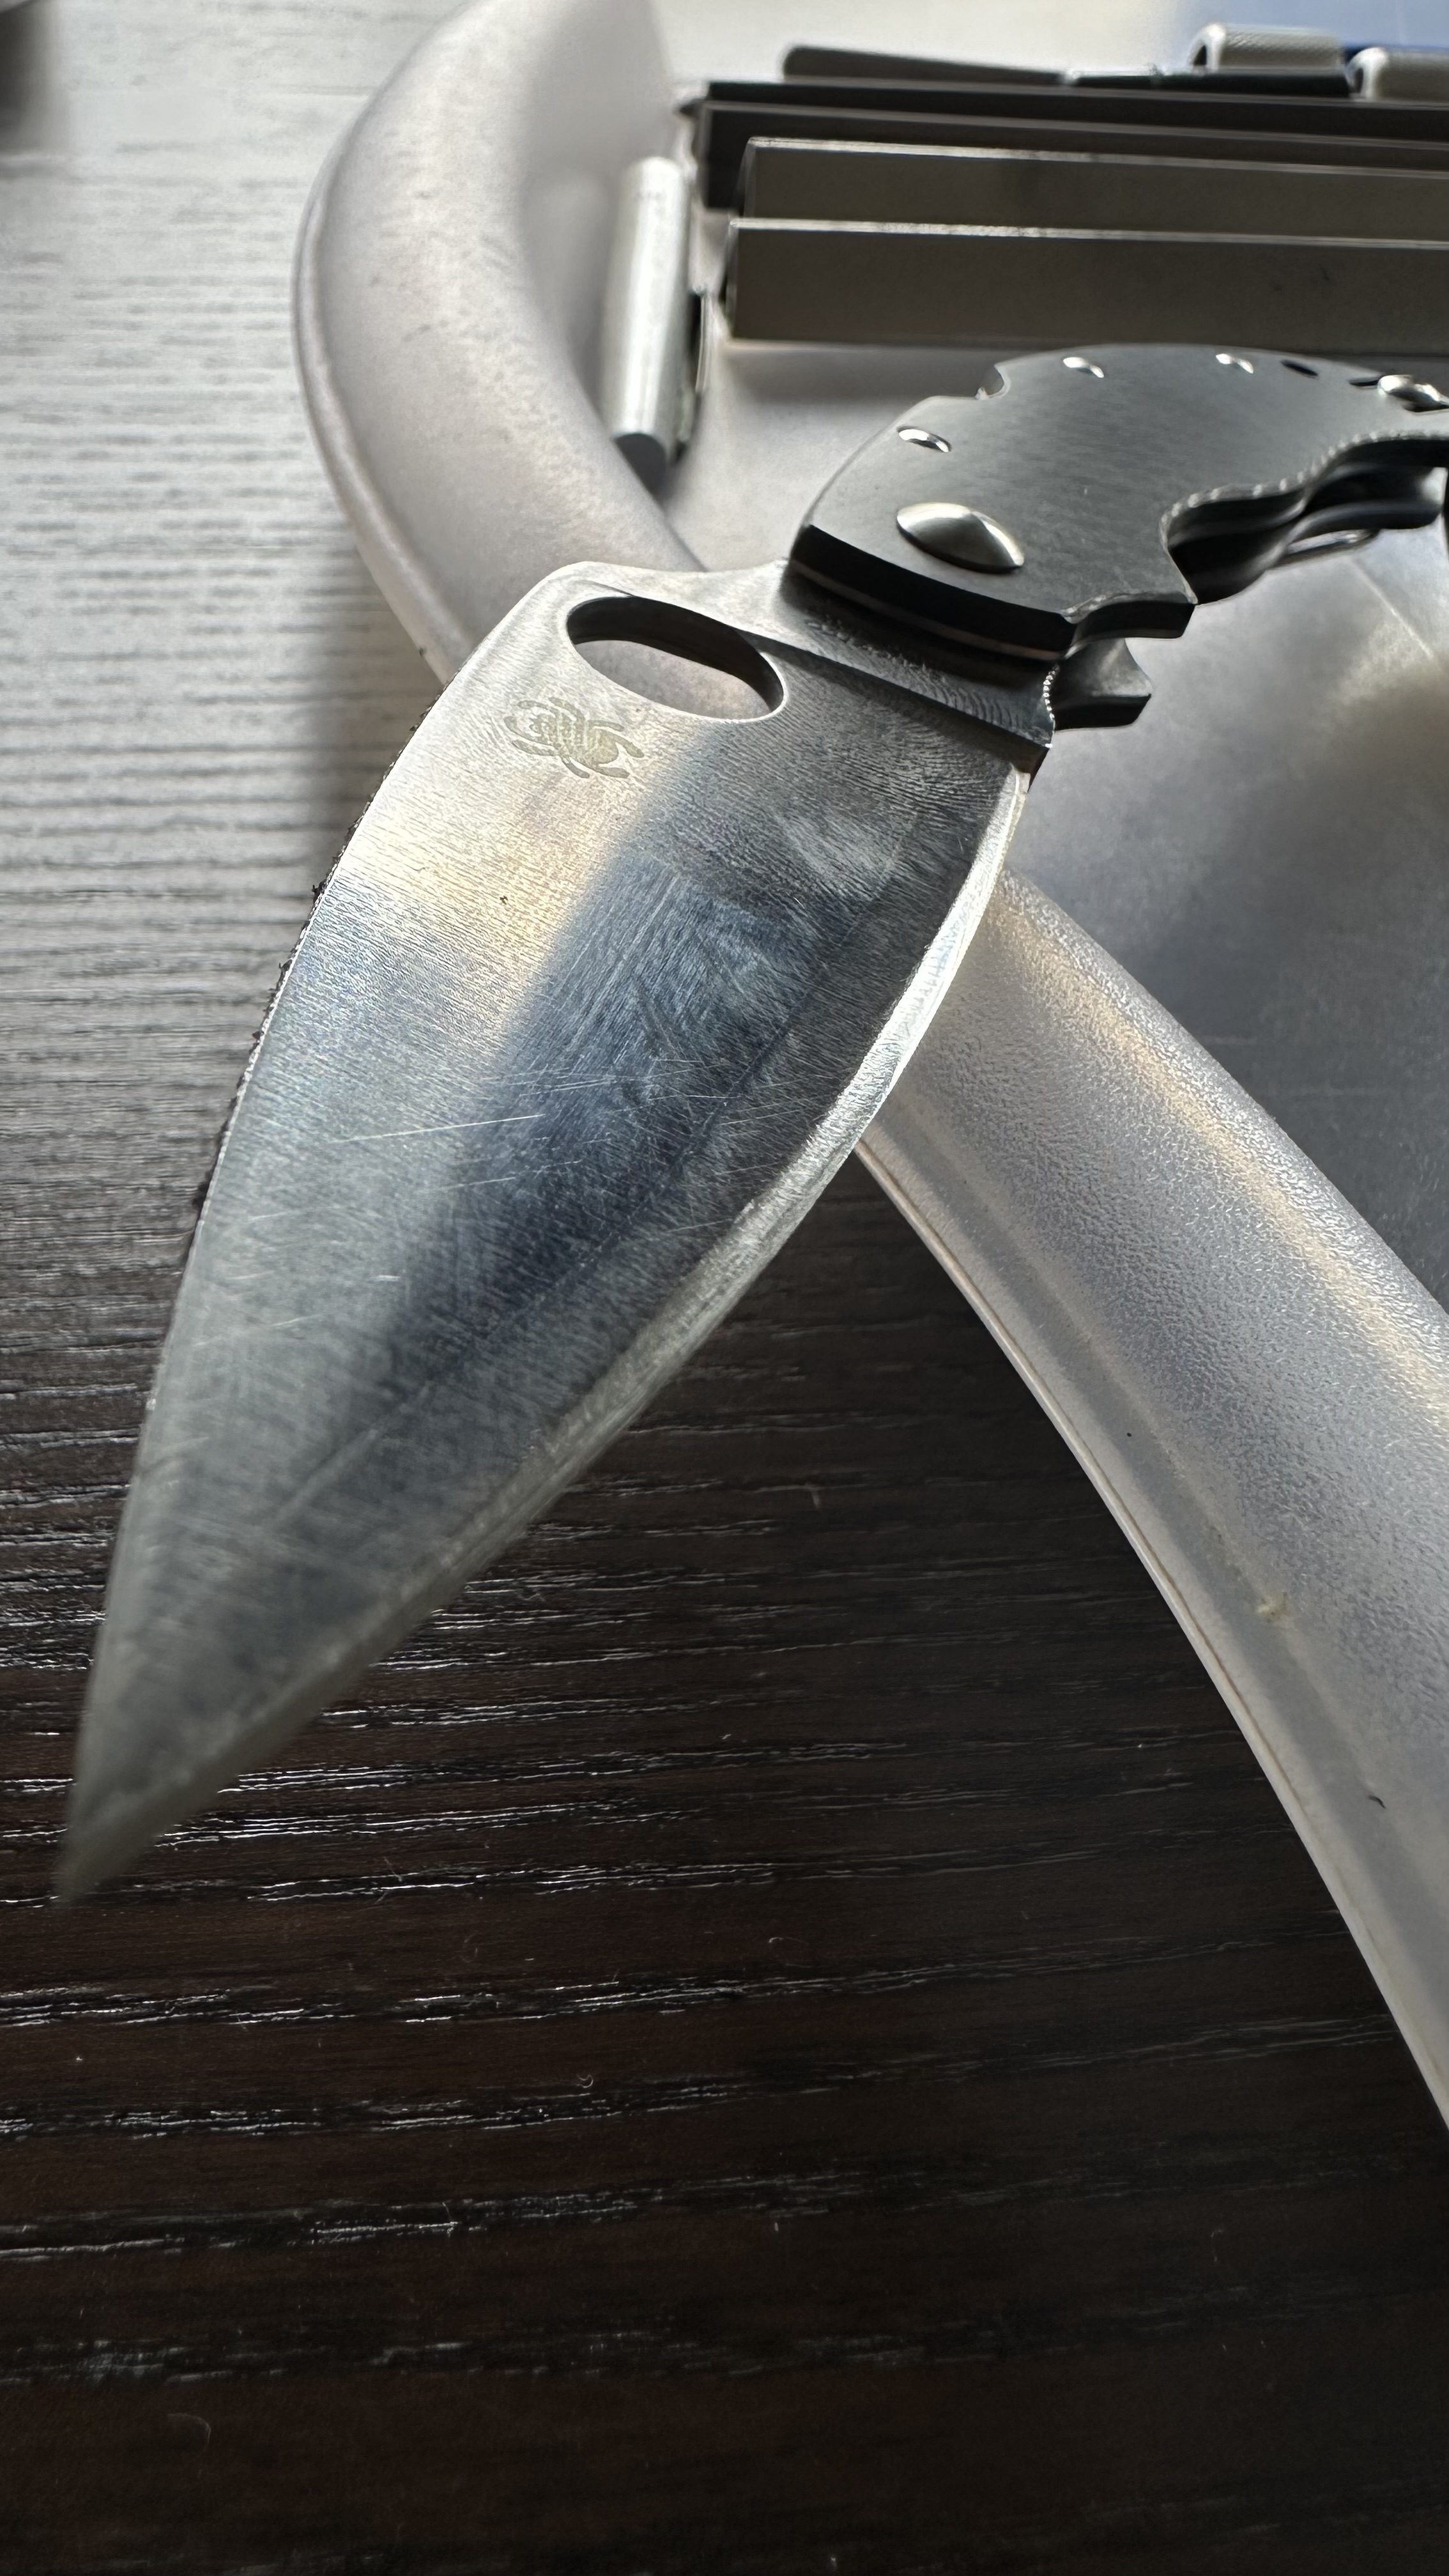
The gaffer tape trick is smart: it saves you from accidental slips while keeping the grind line safe. And yes, the 204D diamonds are hungry — they bite into ZDP-189 without hesitation, which also means they’ll scratch anything that touches them. But like you said, a working knife will earn its scars.

Polishing can always bring back some scratchless shine, but what really matters is how the geometry evolves: a little convexing, a thinner edge, and suddenly the Caly 3.5 stops being just elegant — it becomes a laser.

That’s exactly where your knife starts to become yours.

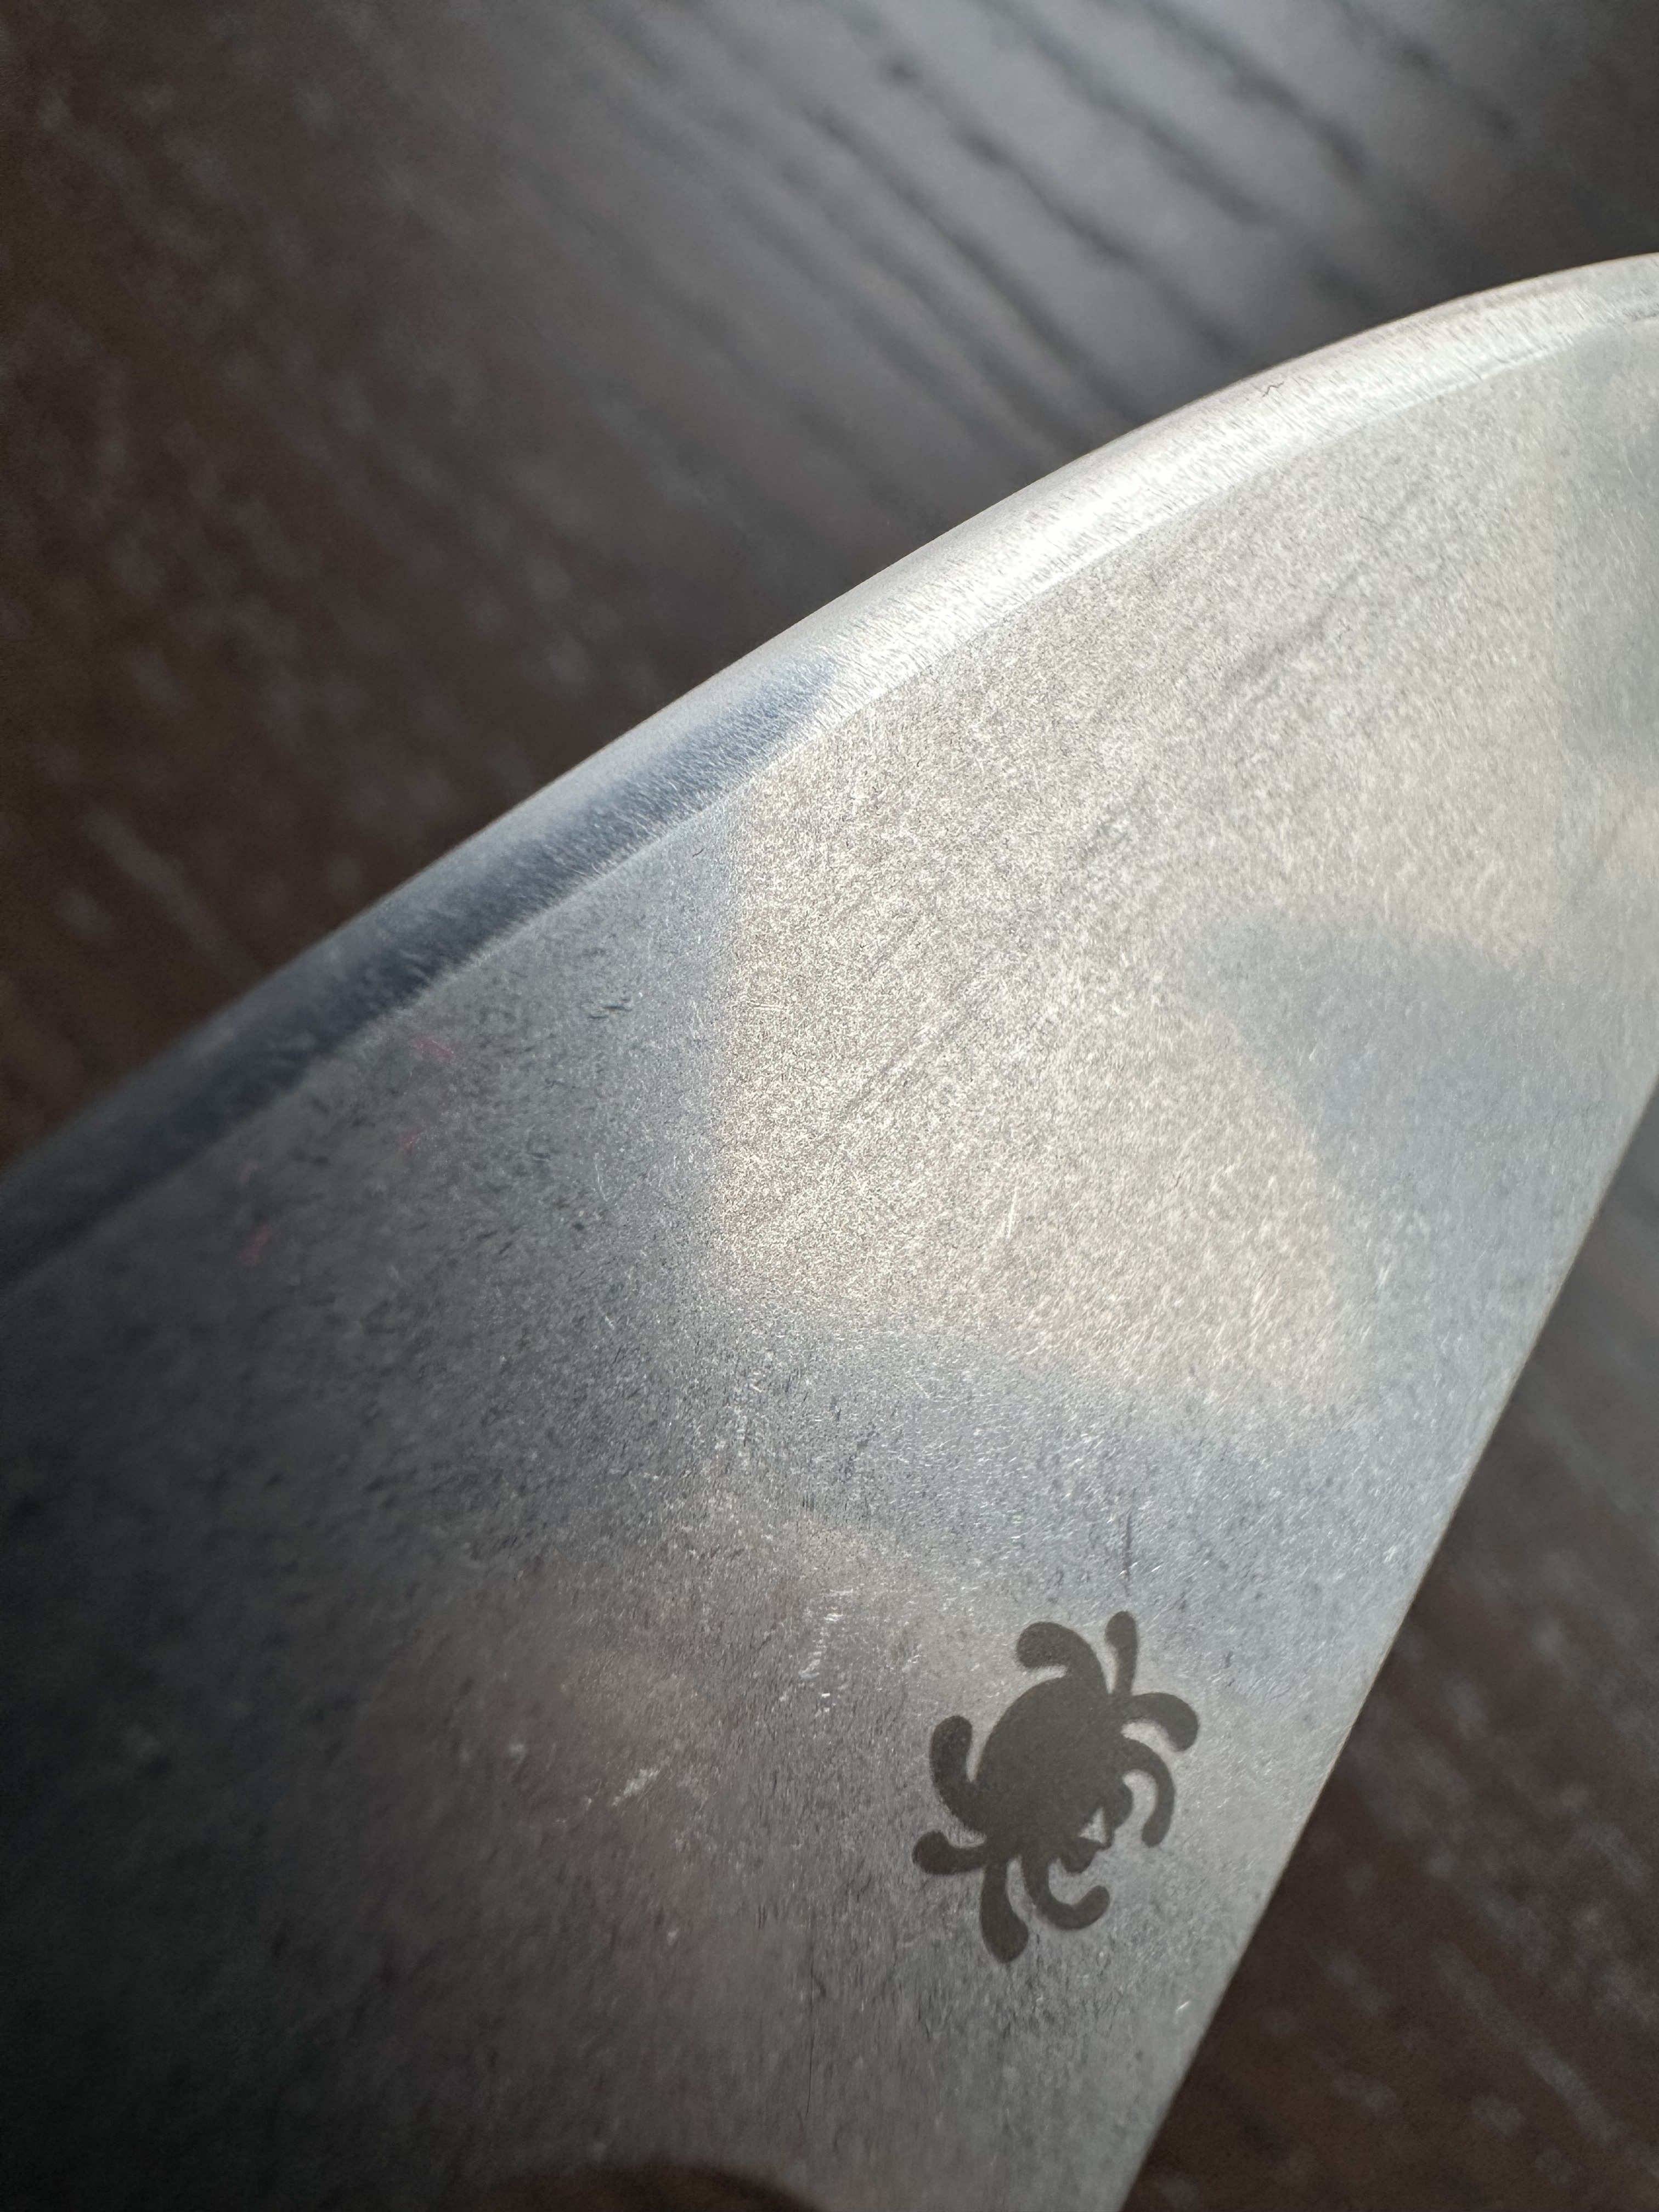
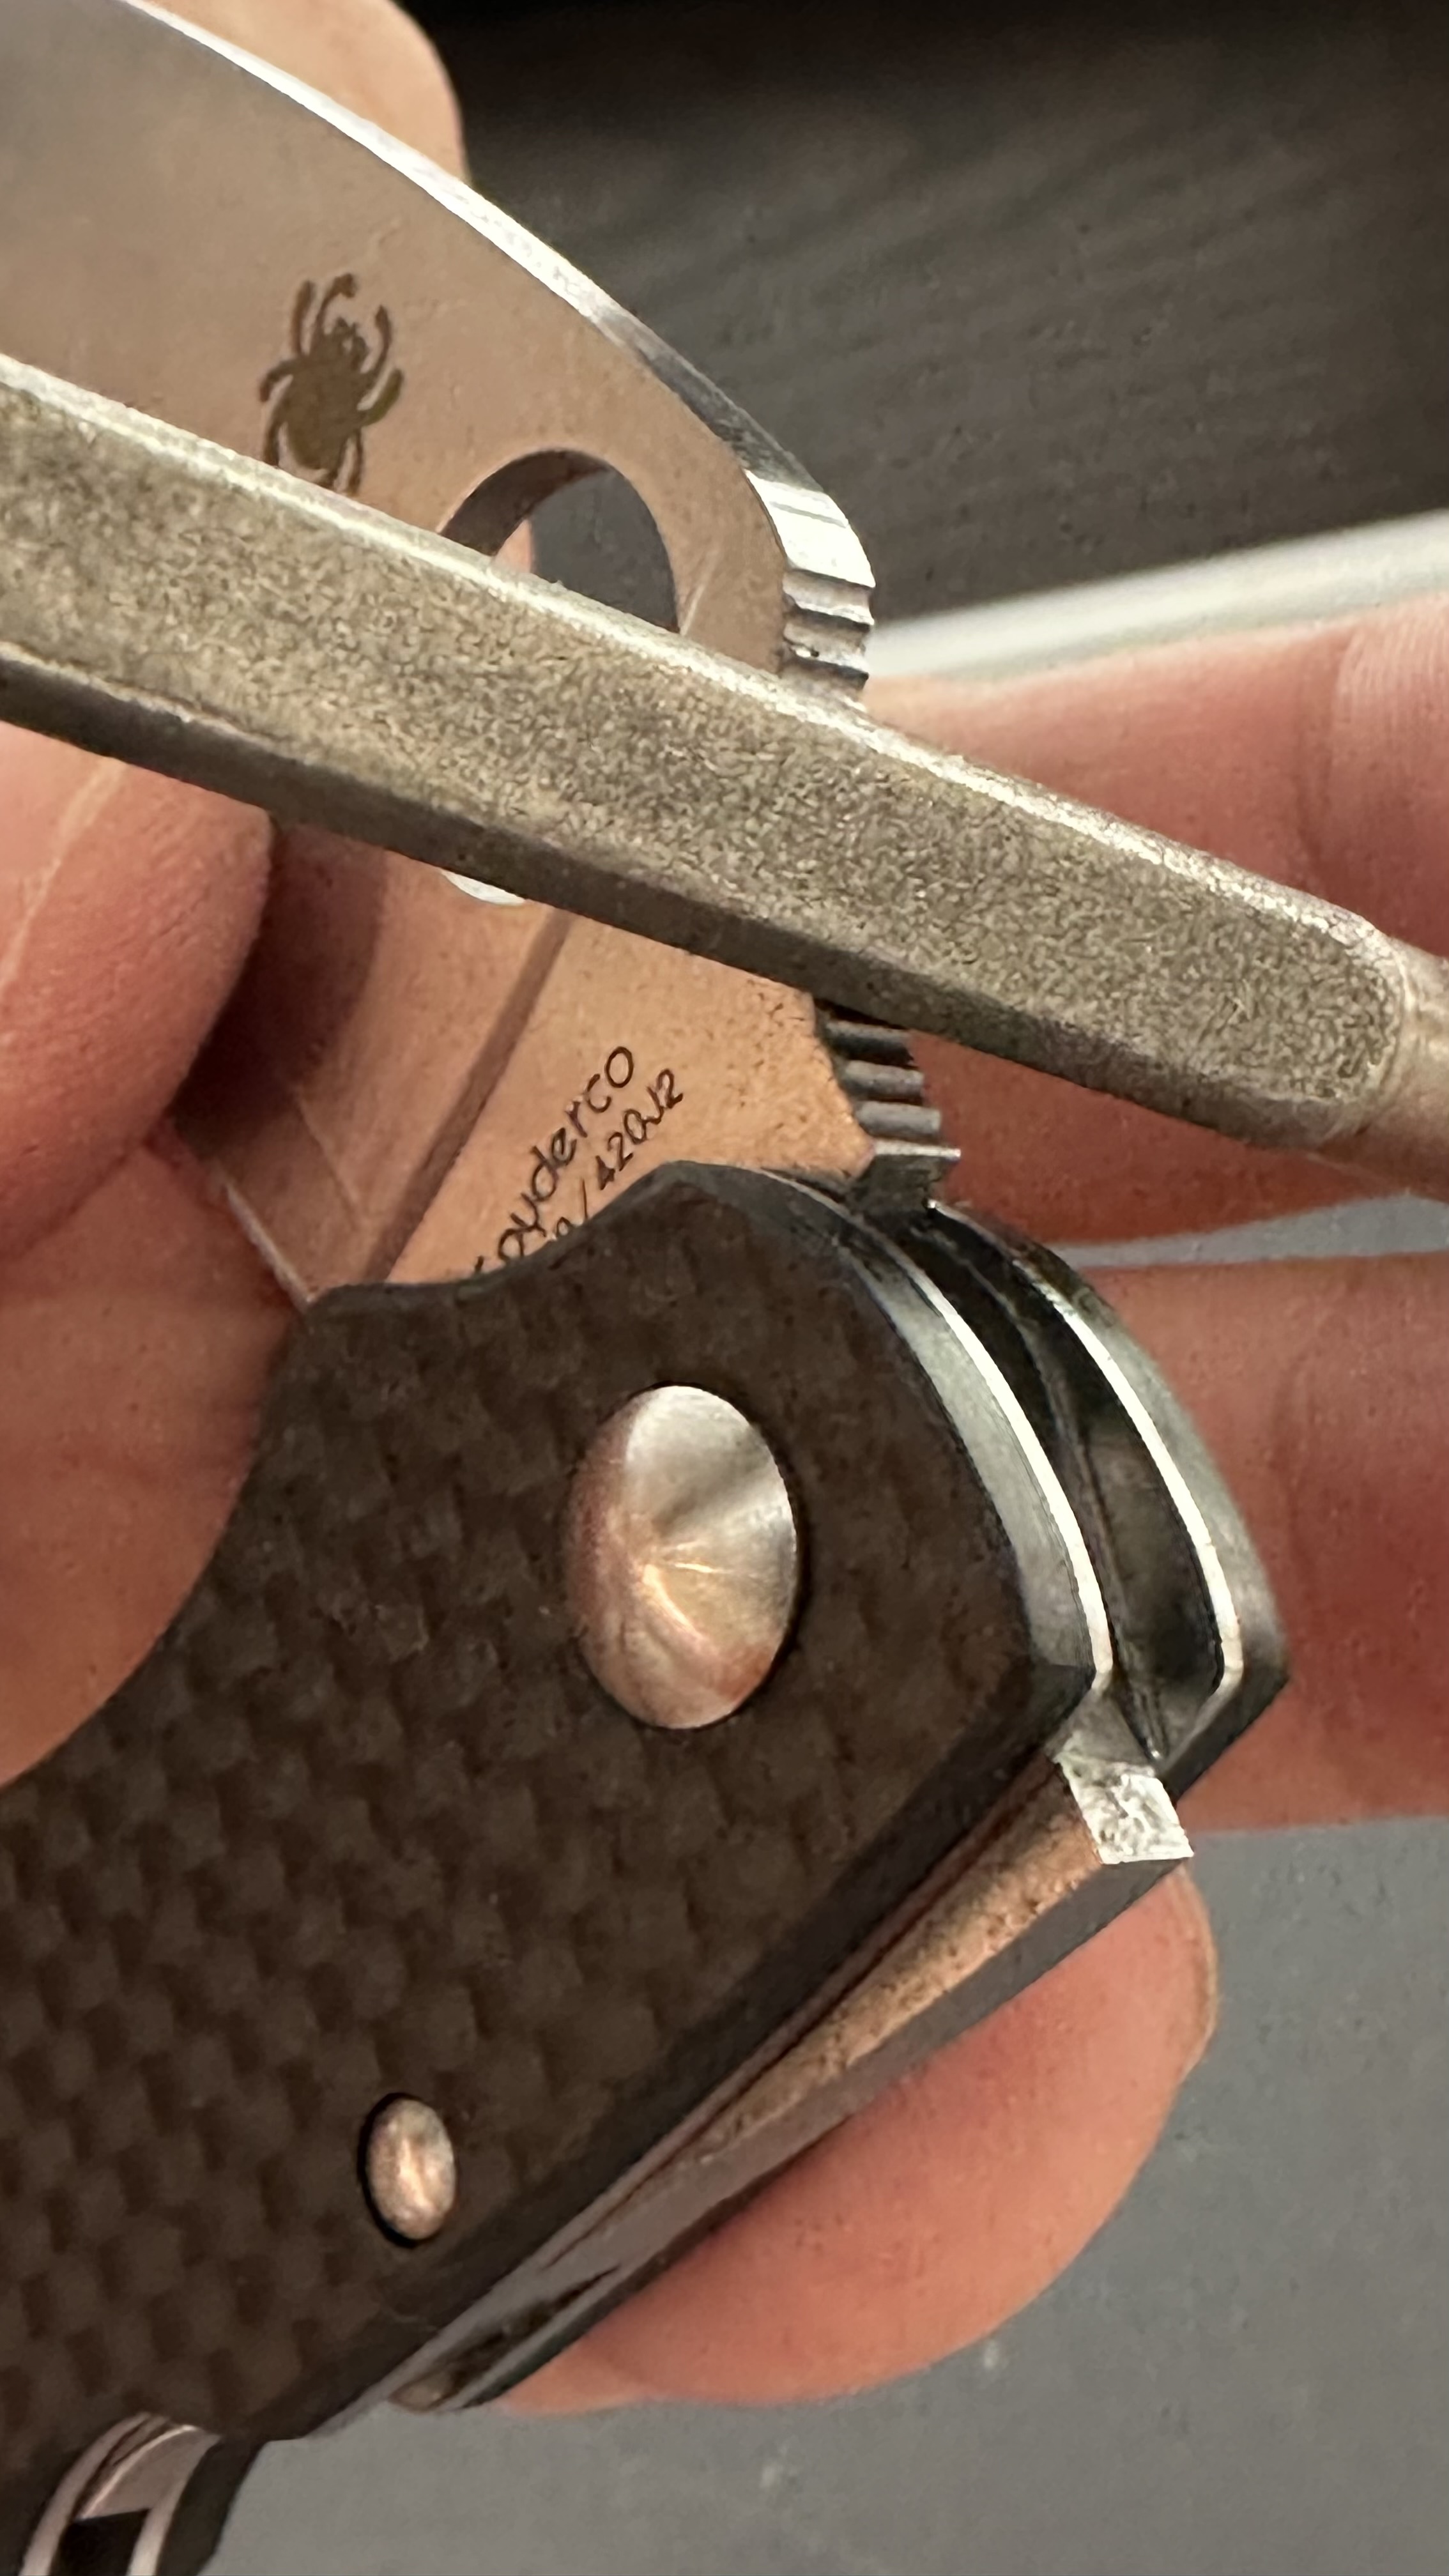
The convexing not only boosts cutting performance but also gives the edge that organic flow — you can see it in the way the bevel catches the light. It’s no longer a factory grind; it’s a living edge shaped by your own hand. It makes the knife more precious.

And by rounding the spine and softening the jimping, you’re turning what could feel harsh into something smoother, almost like a river stone. It transforms the Caly from safe queen into a companion you actually want to use every day, without hotspots or distractions.

Most people underestimate how quickly diamond or CBN rods load up, and how much that affects sharpening efficiency.

Clay stone (terre de Sommières, or even a simple pottery stone) is excellent because it’s mildly abrasive: it lifts out the embedded metal without scratching or damaging the surface of the rods, and it works faster than detergents or erasers.

It’s also in the spirit of my philosophy: keep it simple, practical, field-ready. No fancy cleaners, just a tried-and-true trick that works every time.

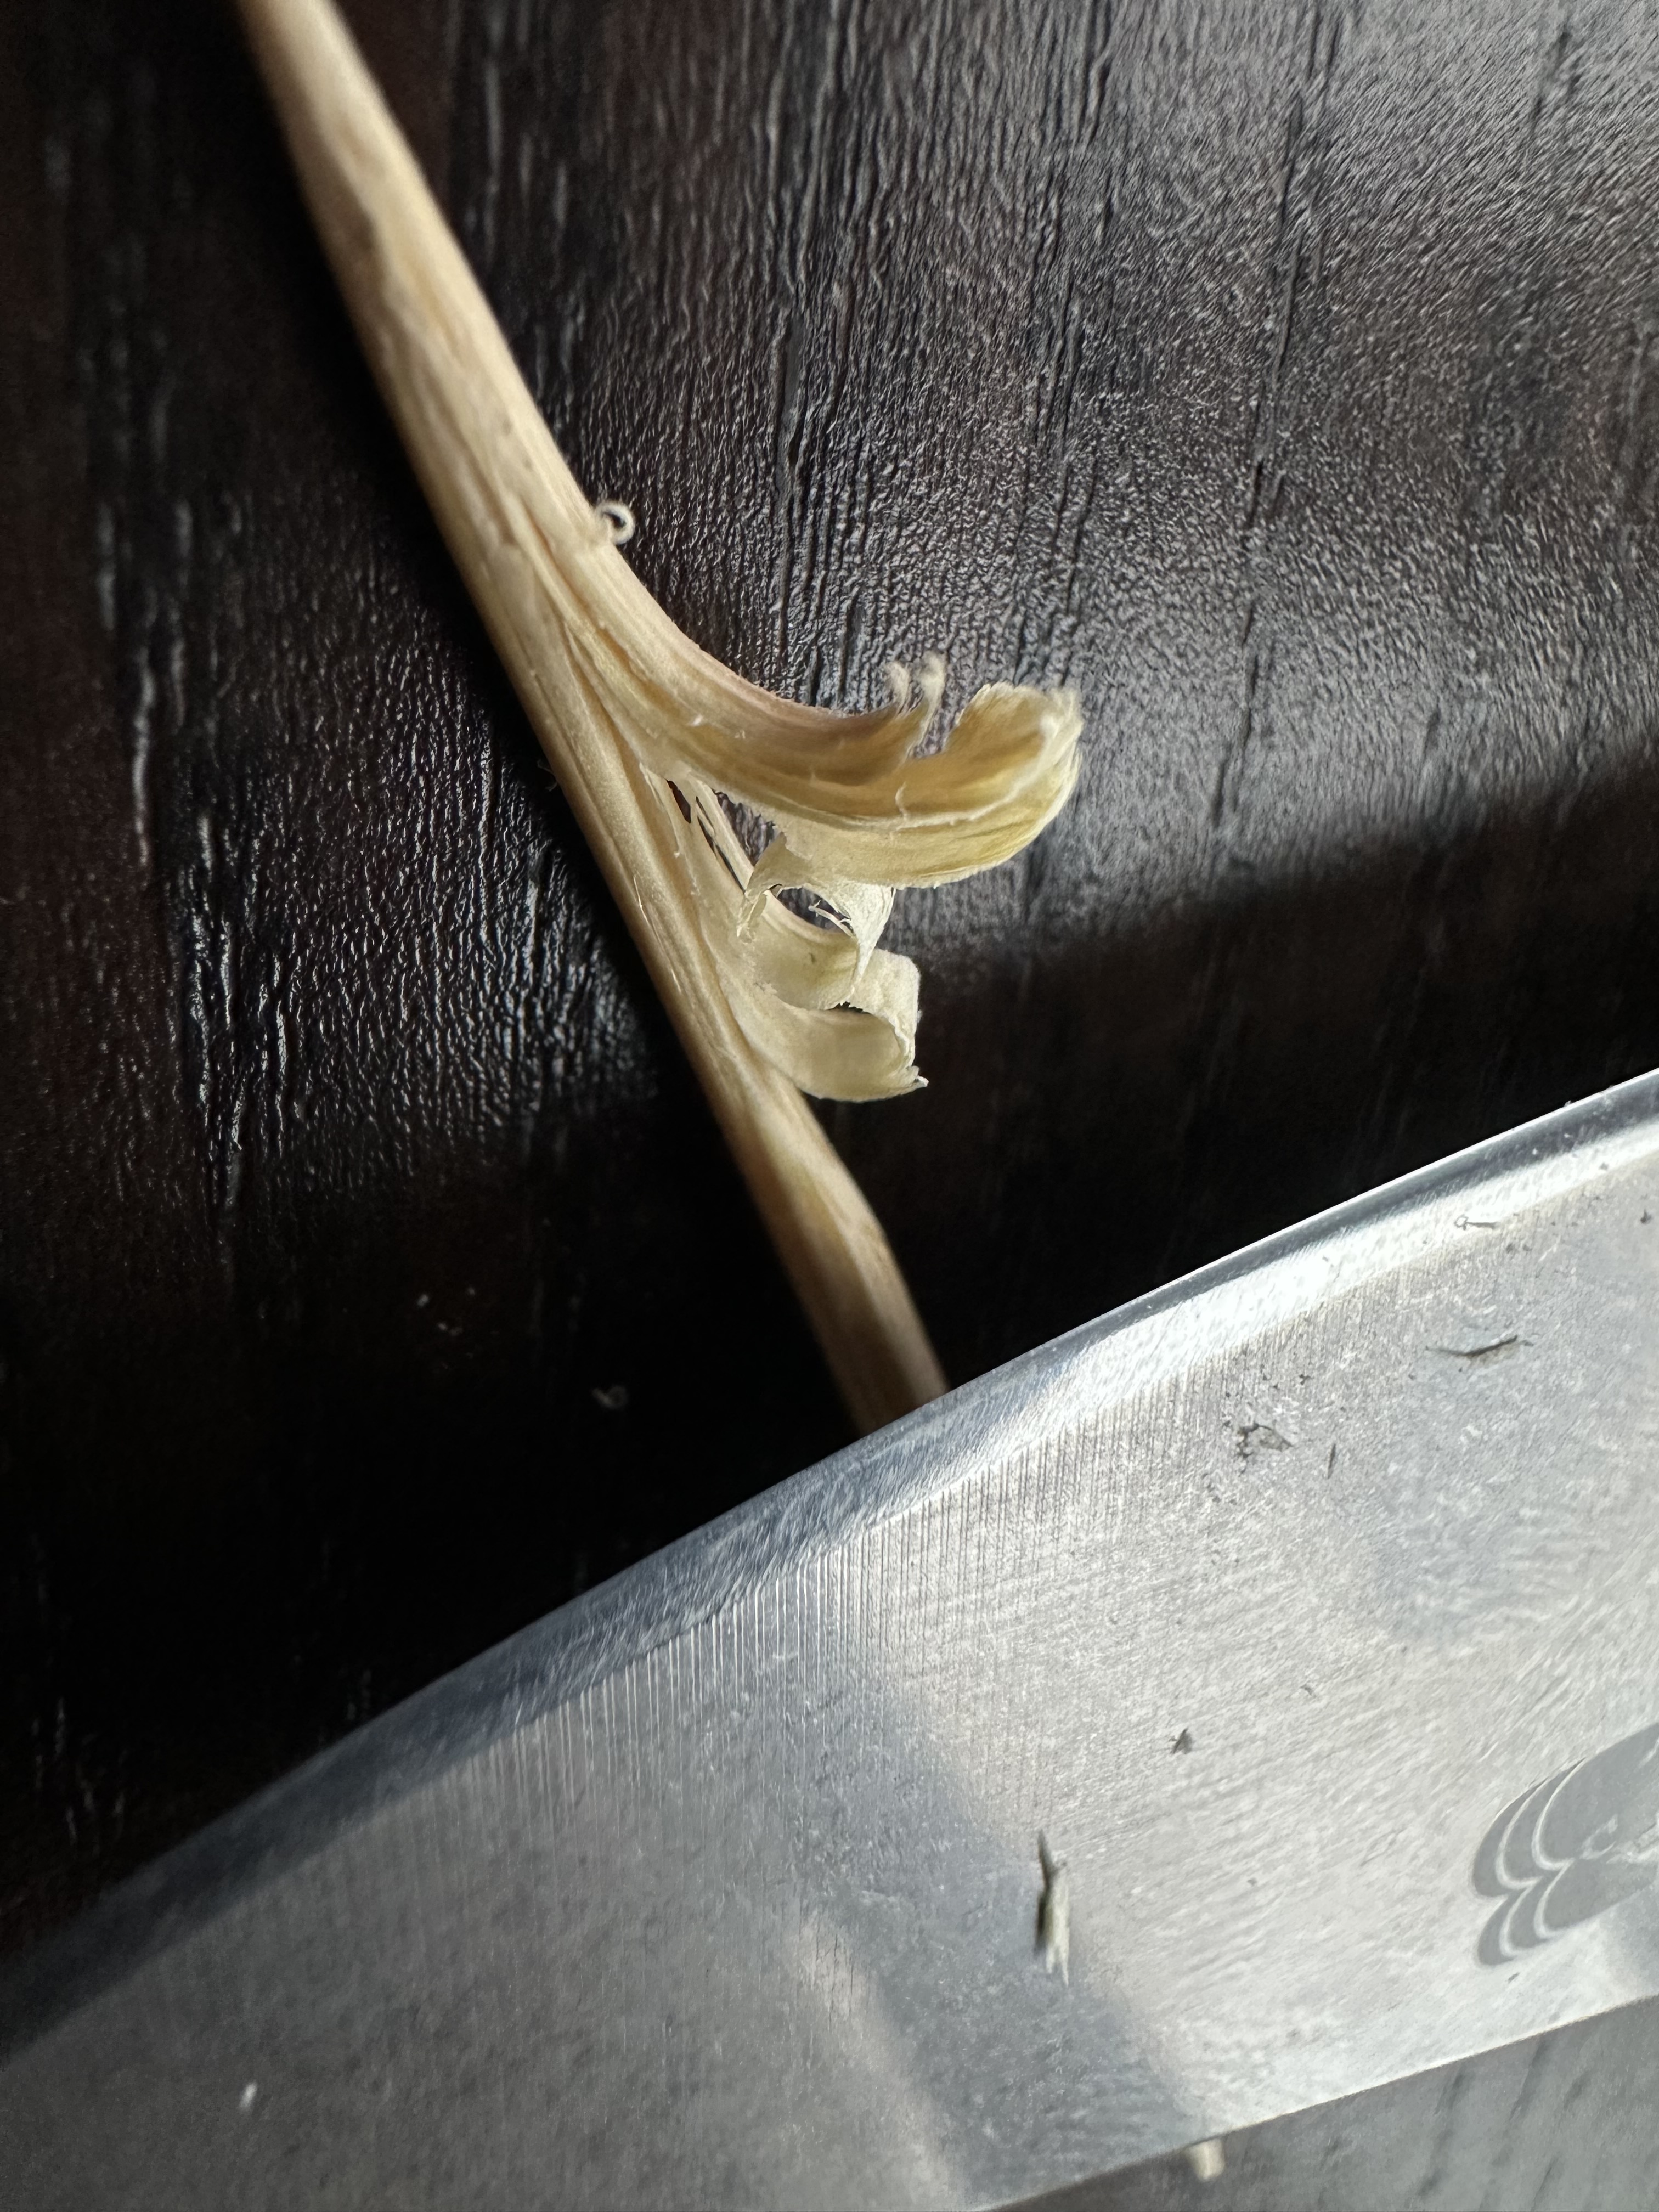
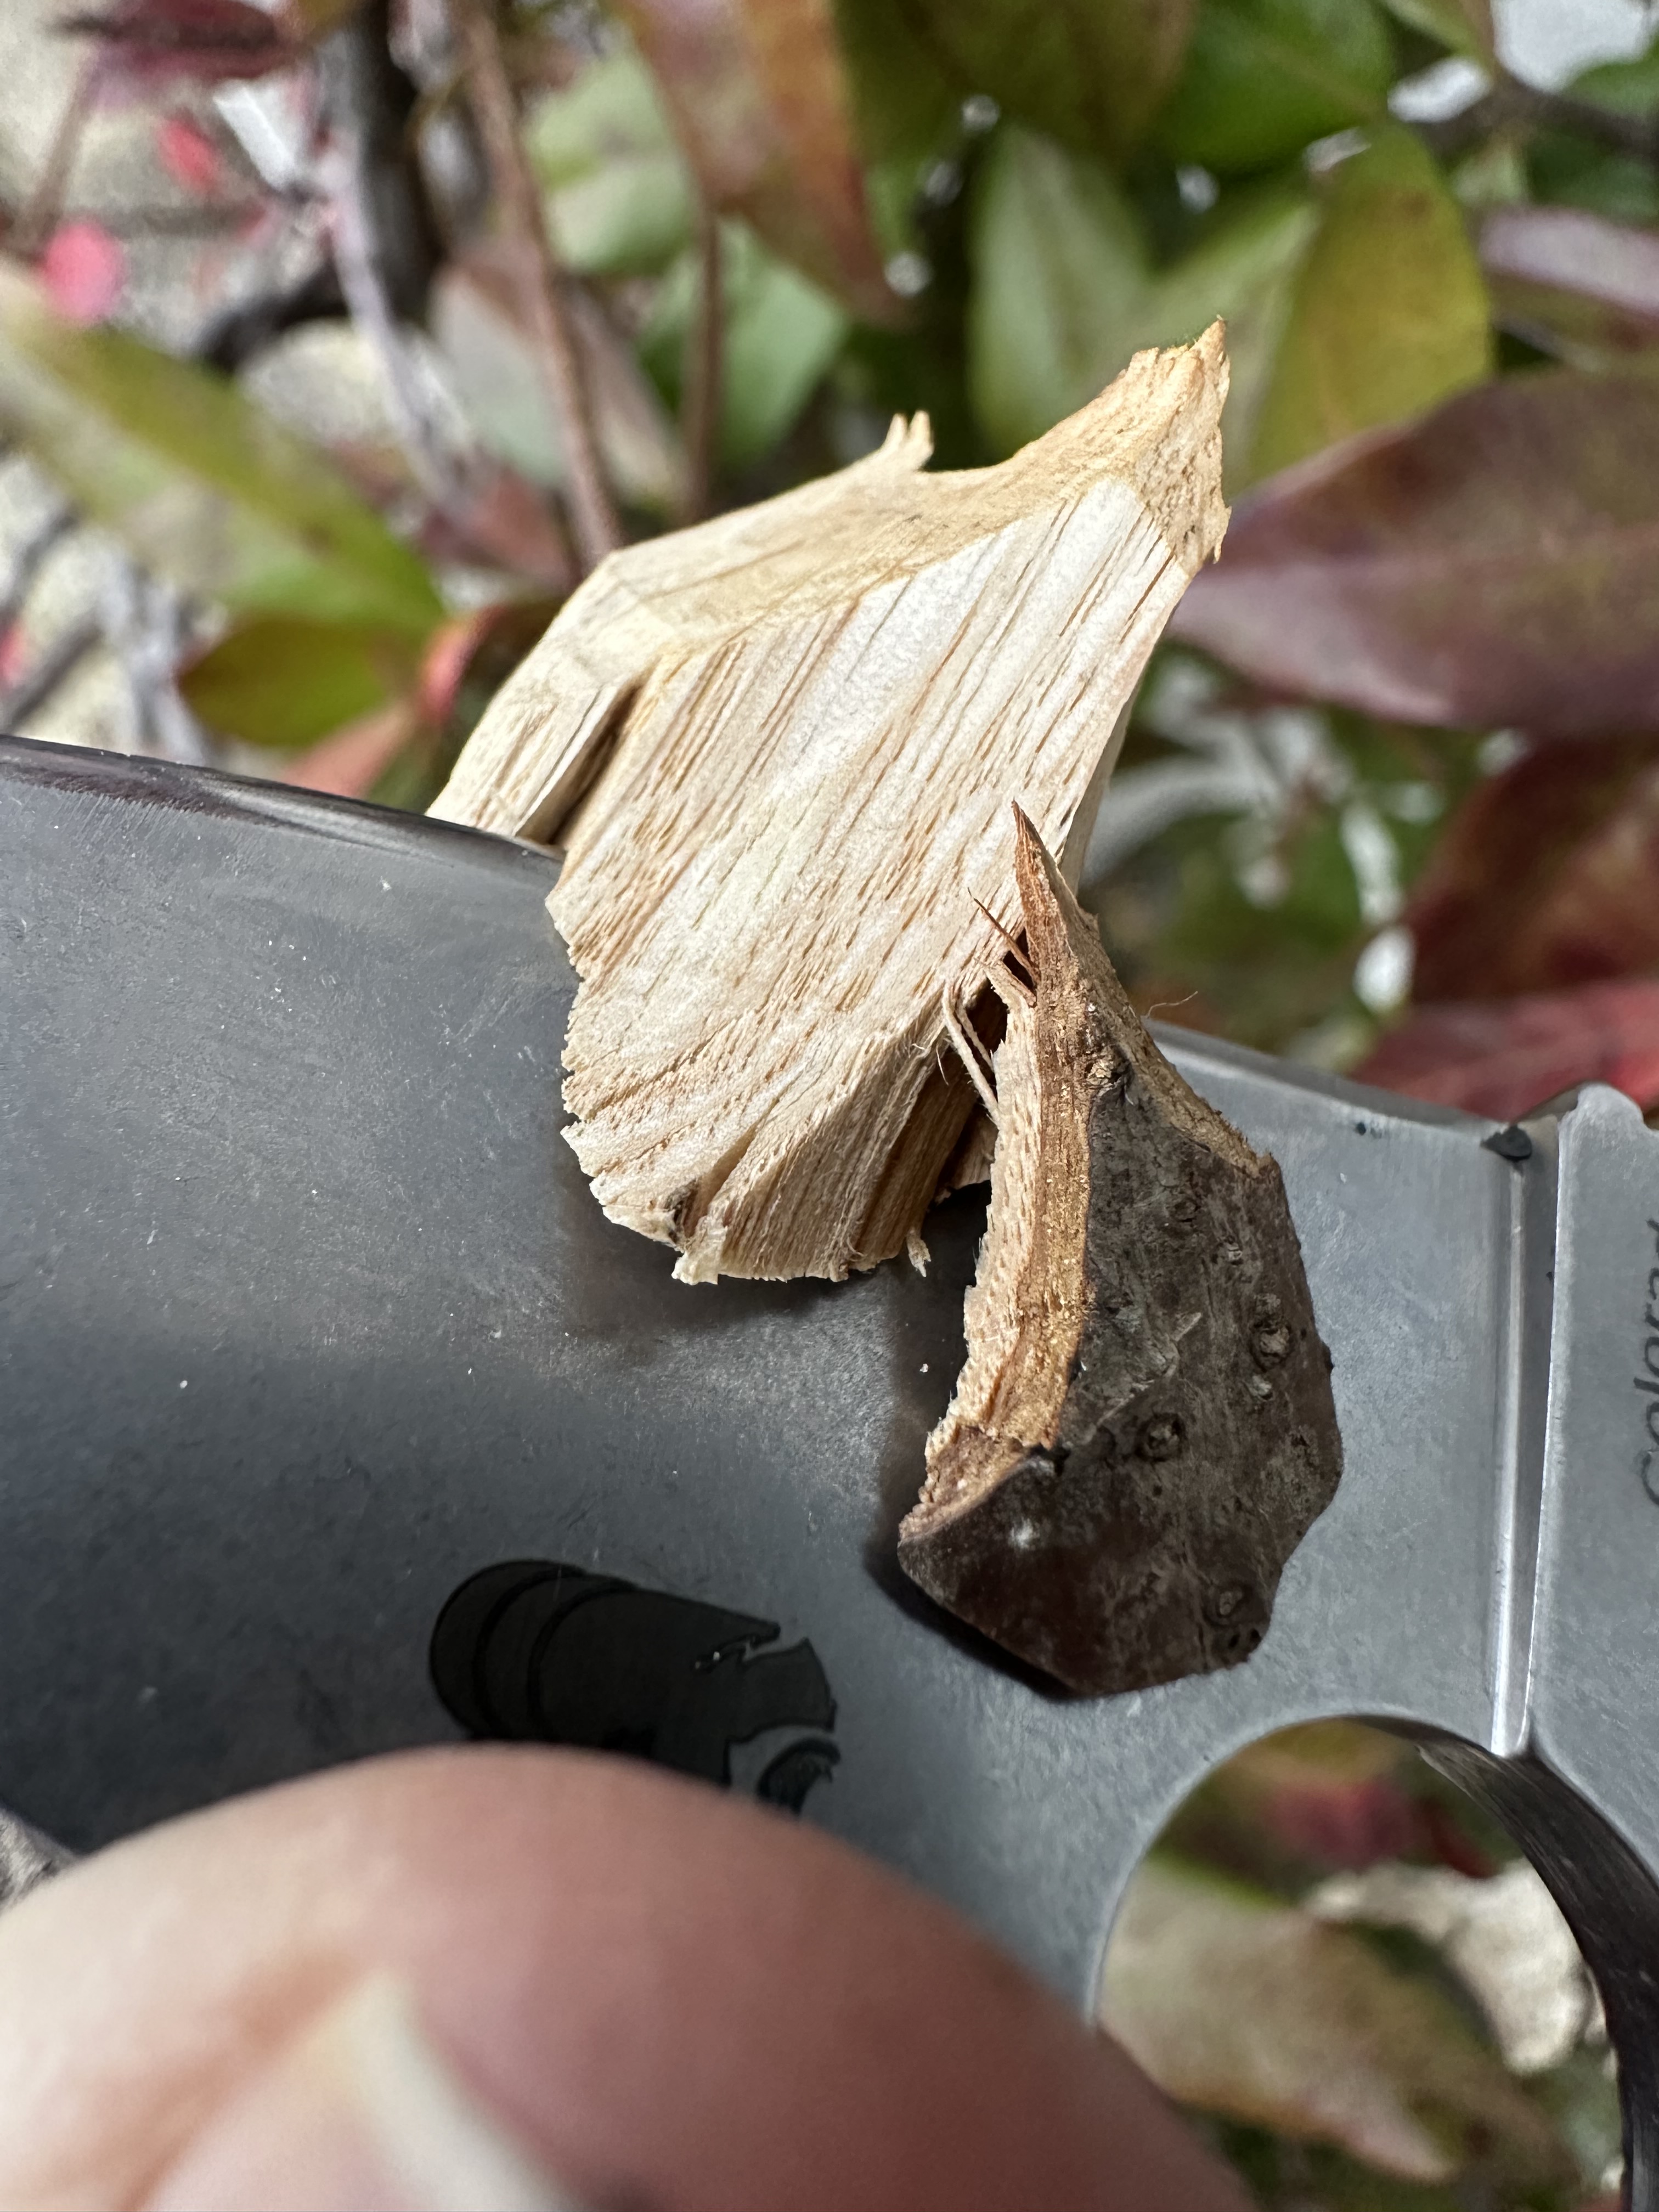
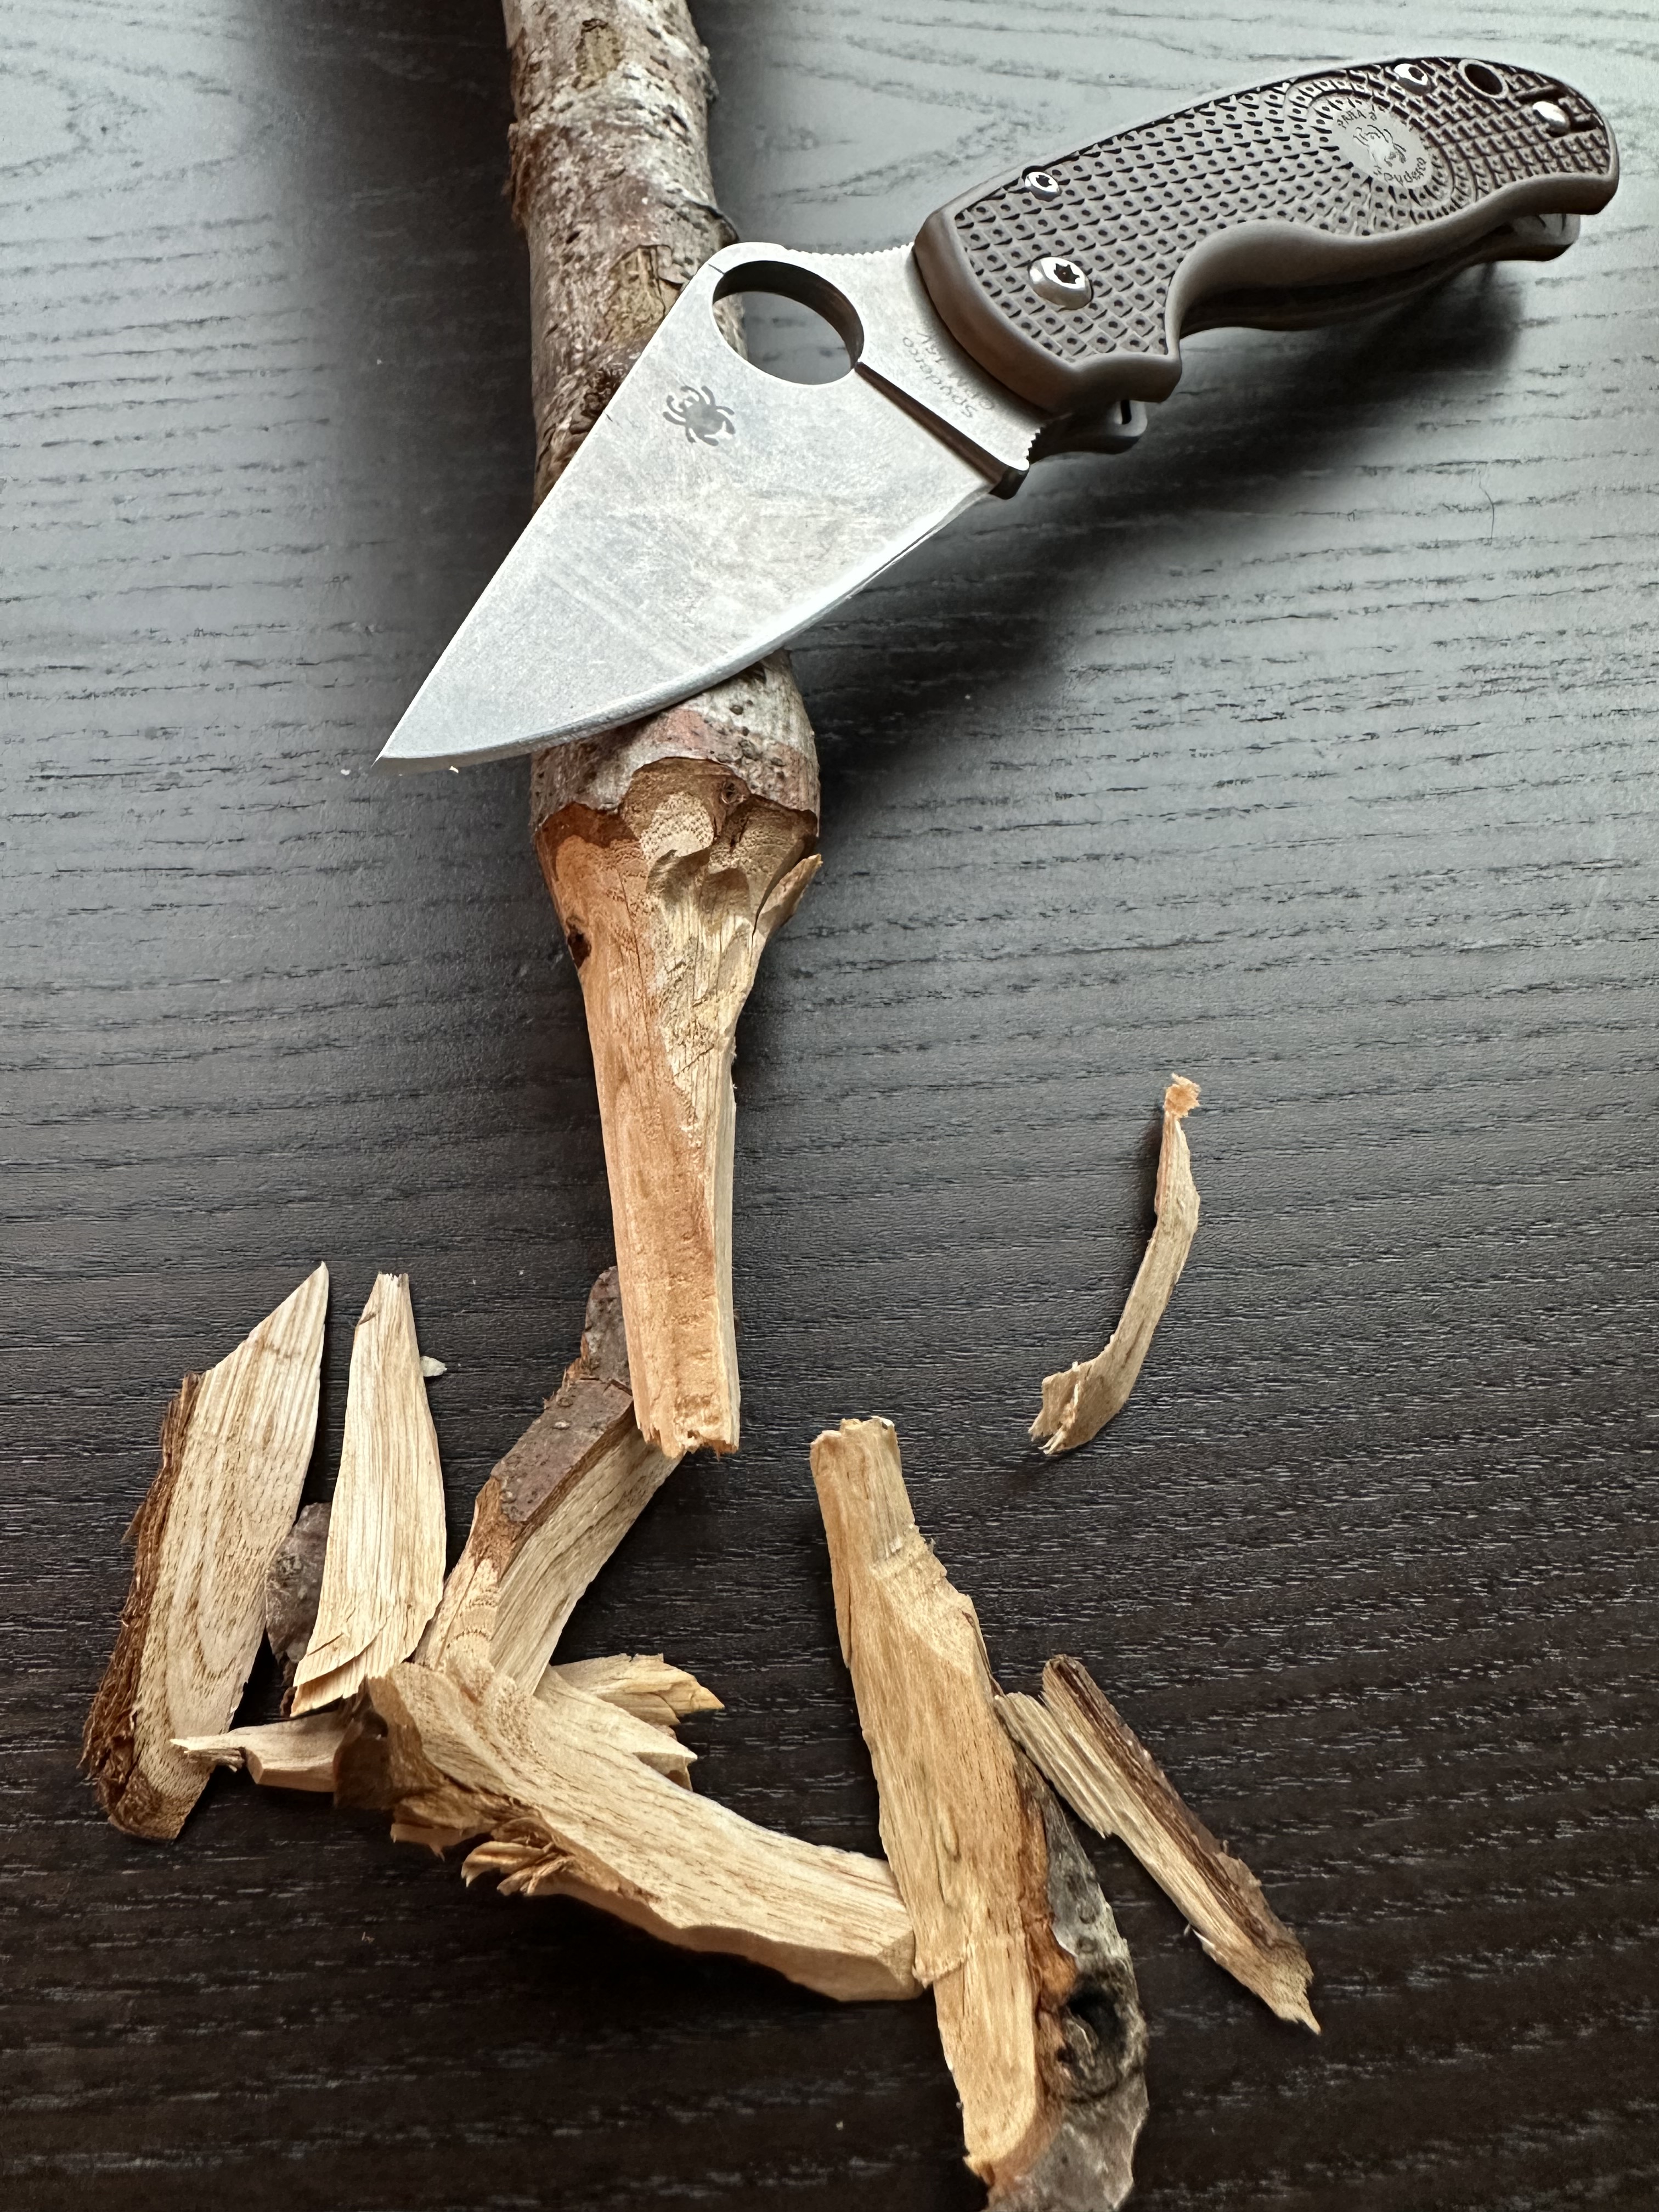
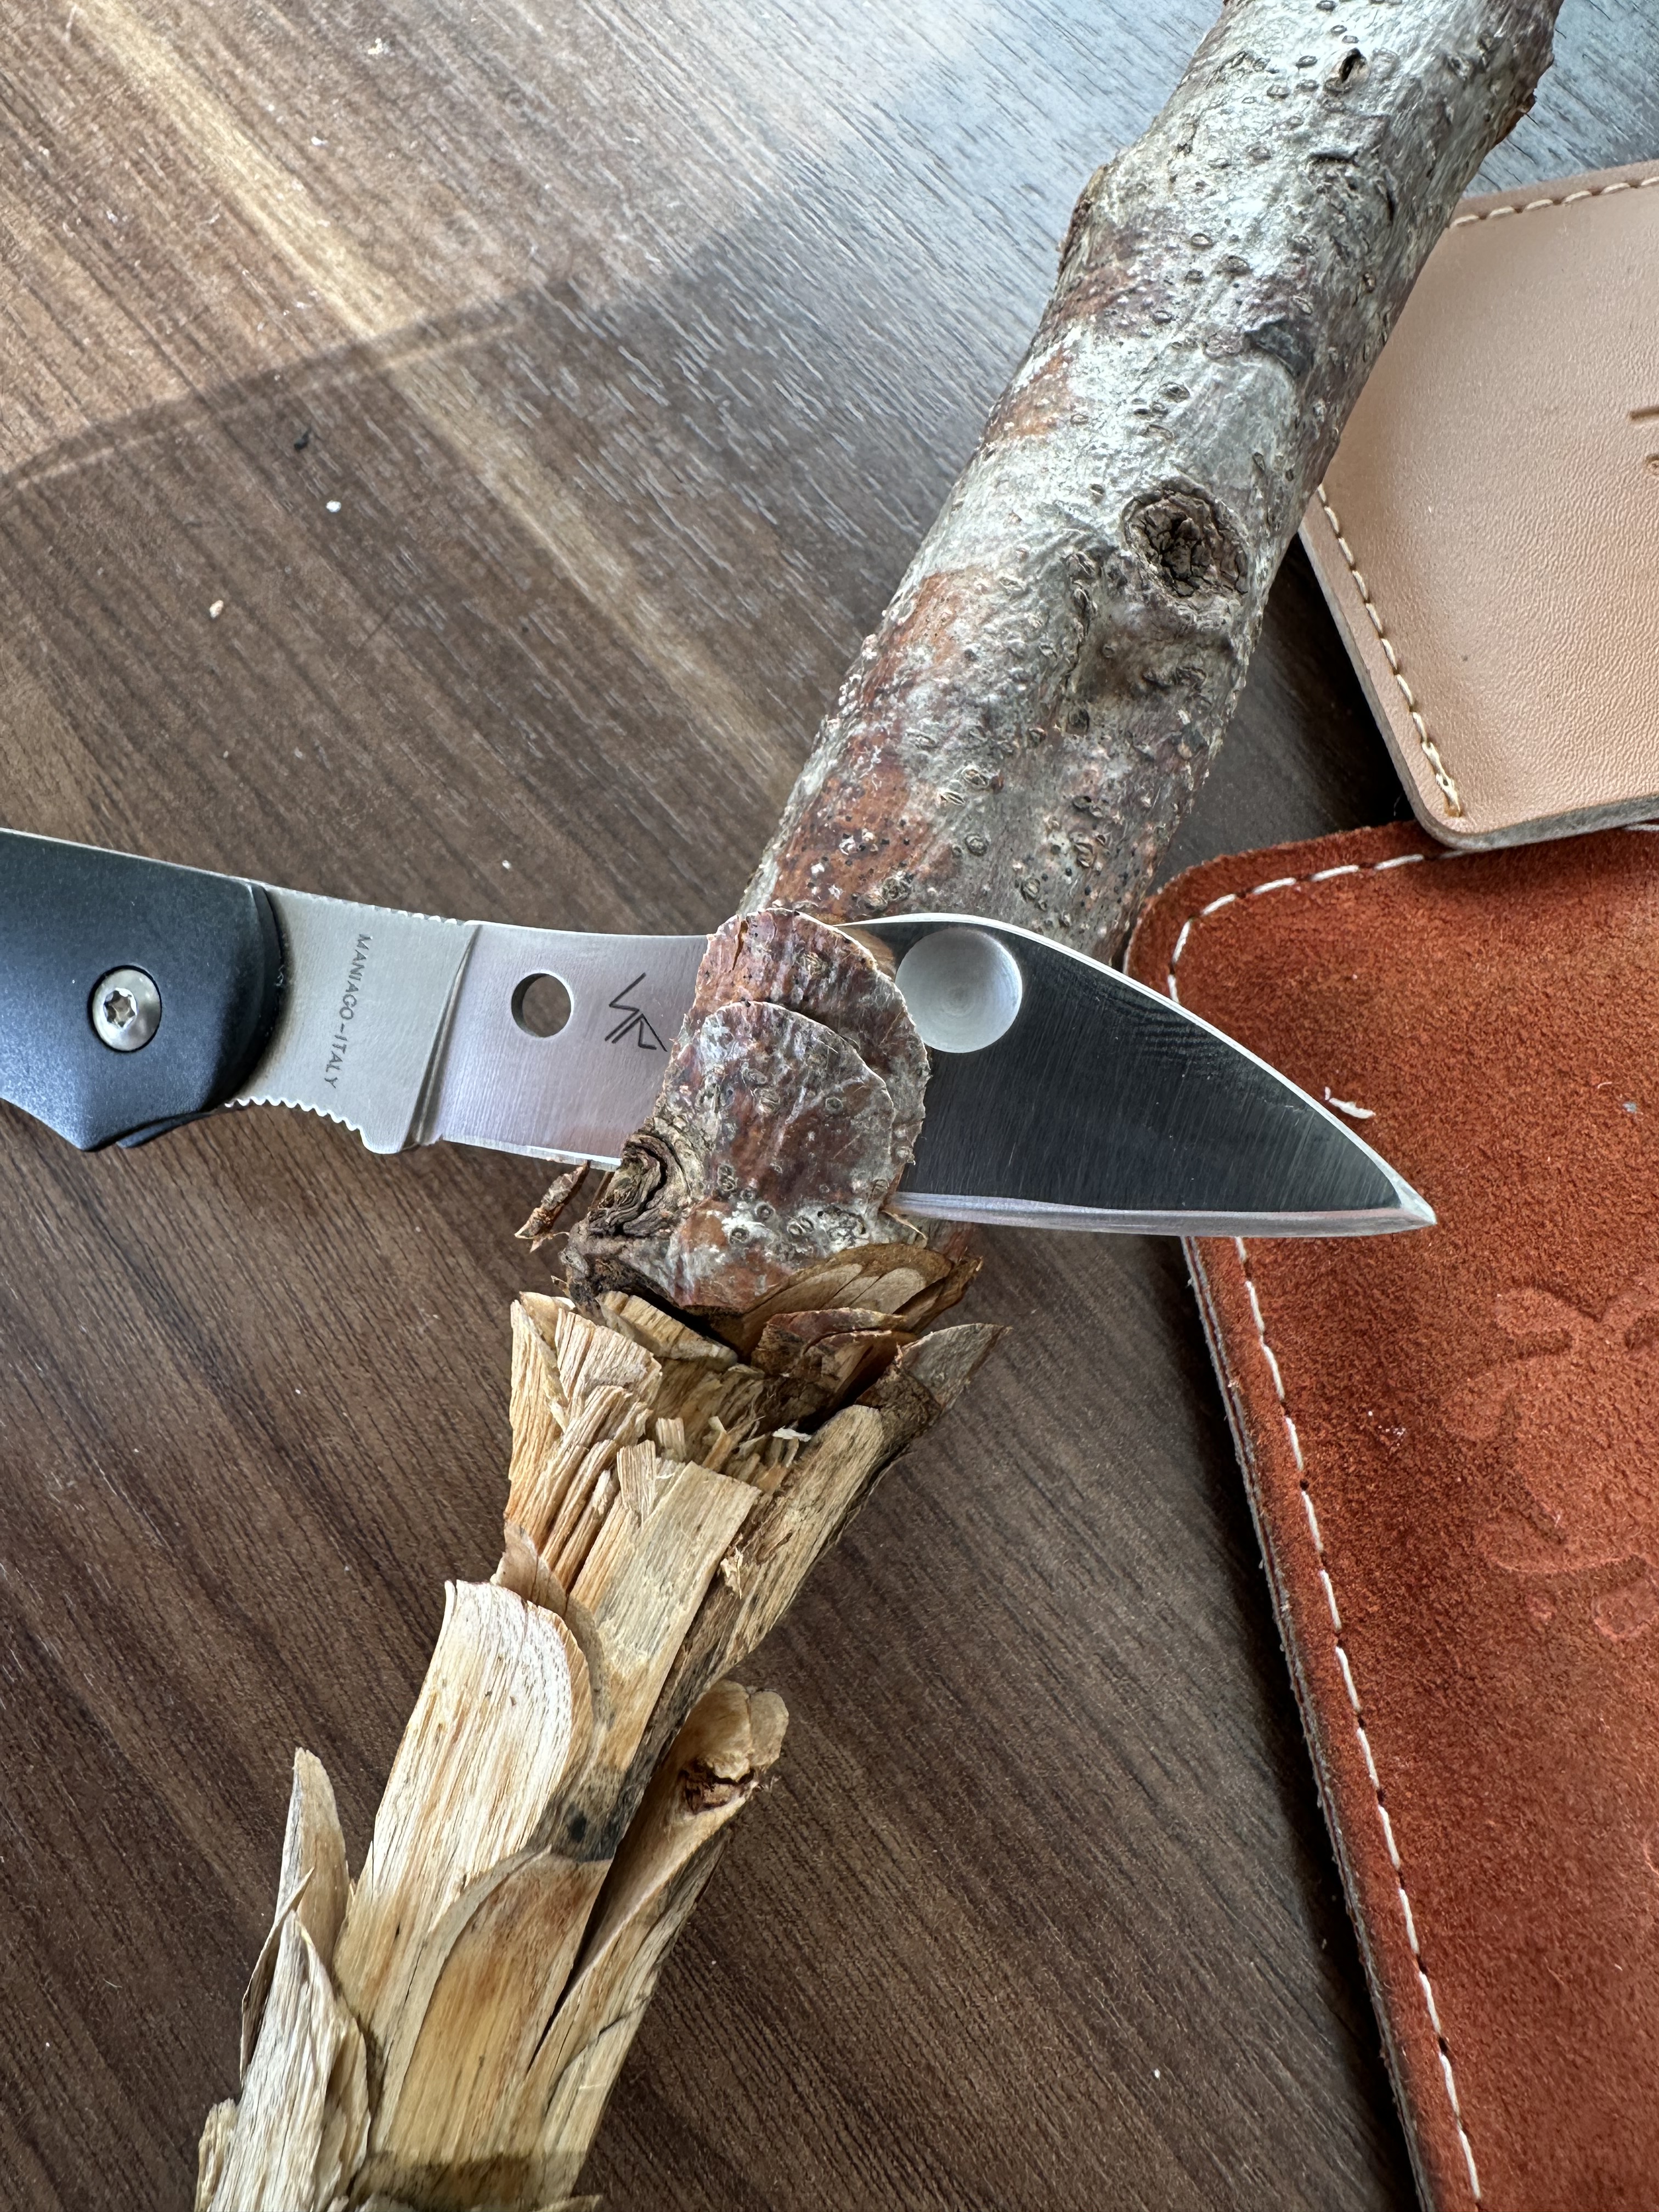
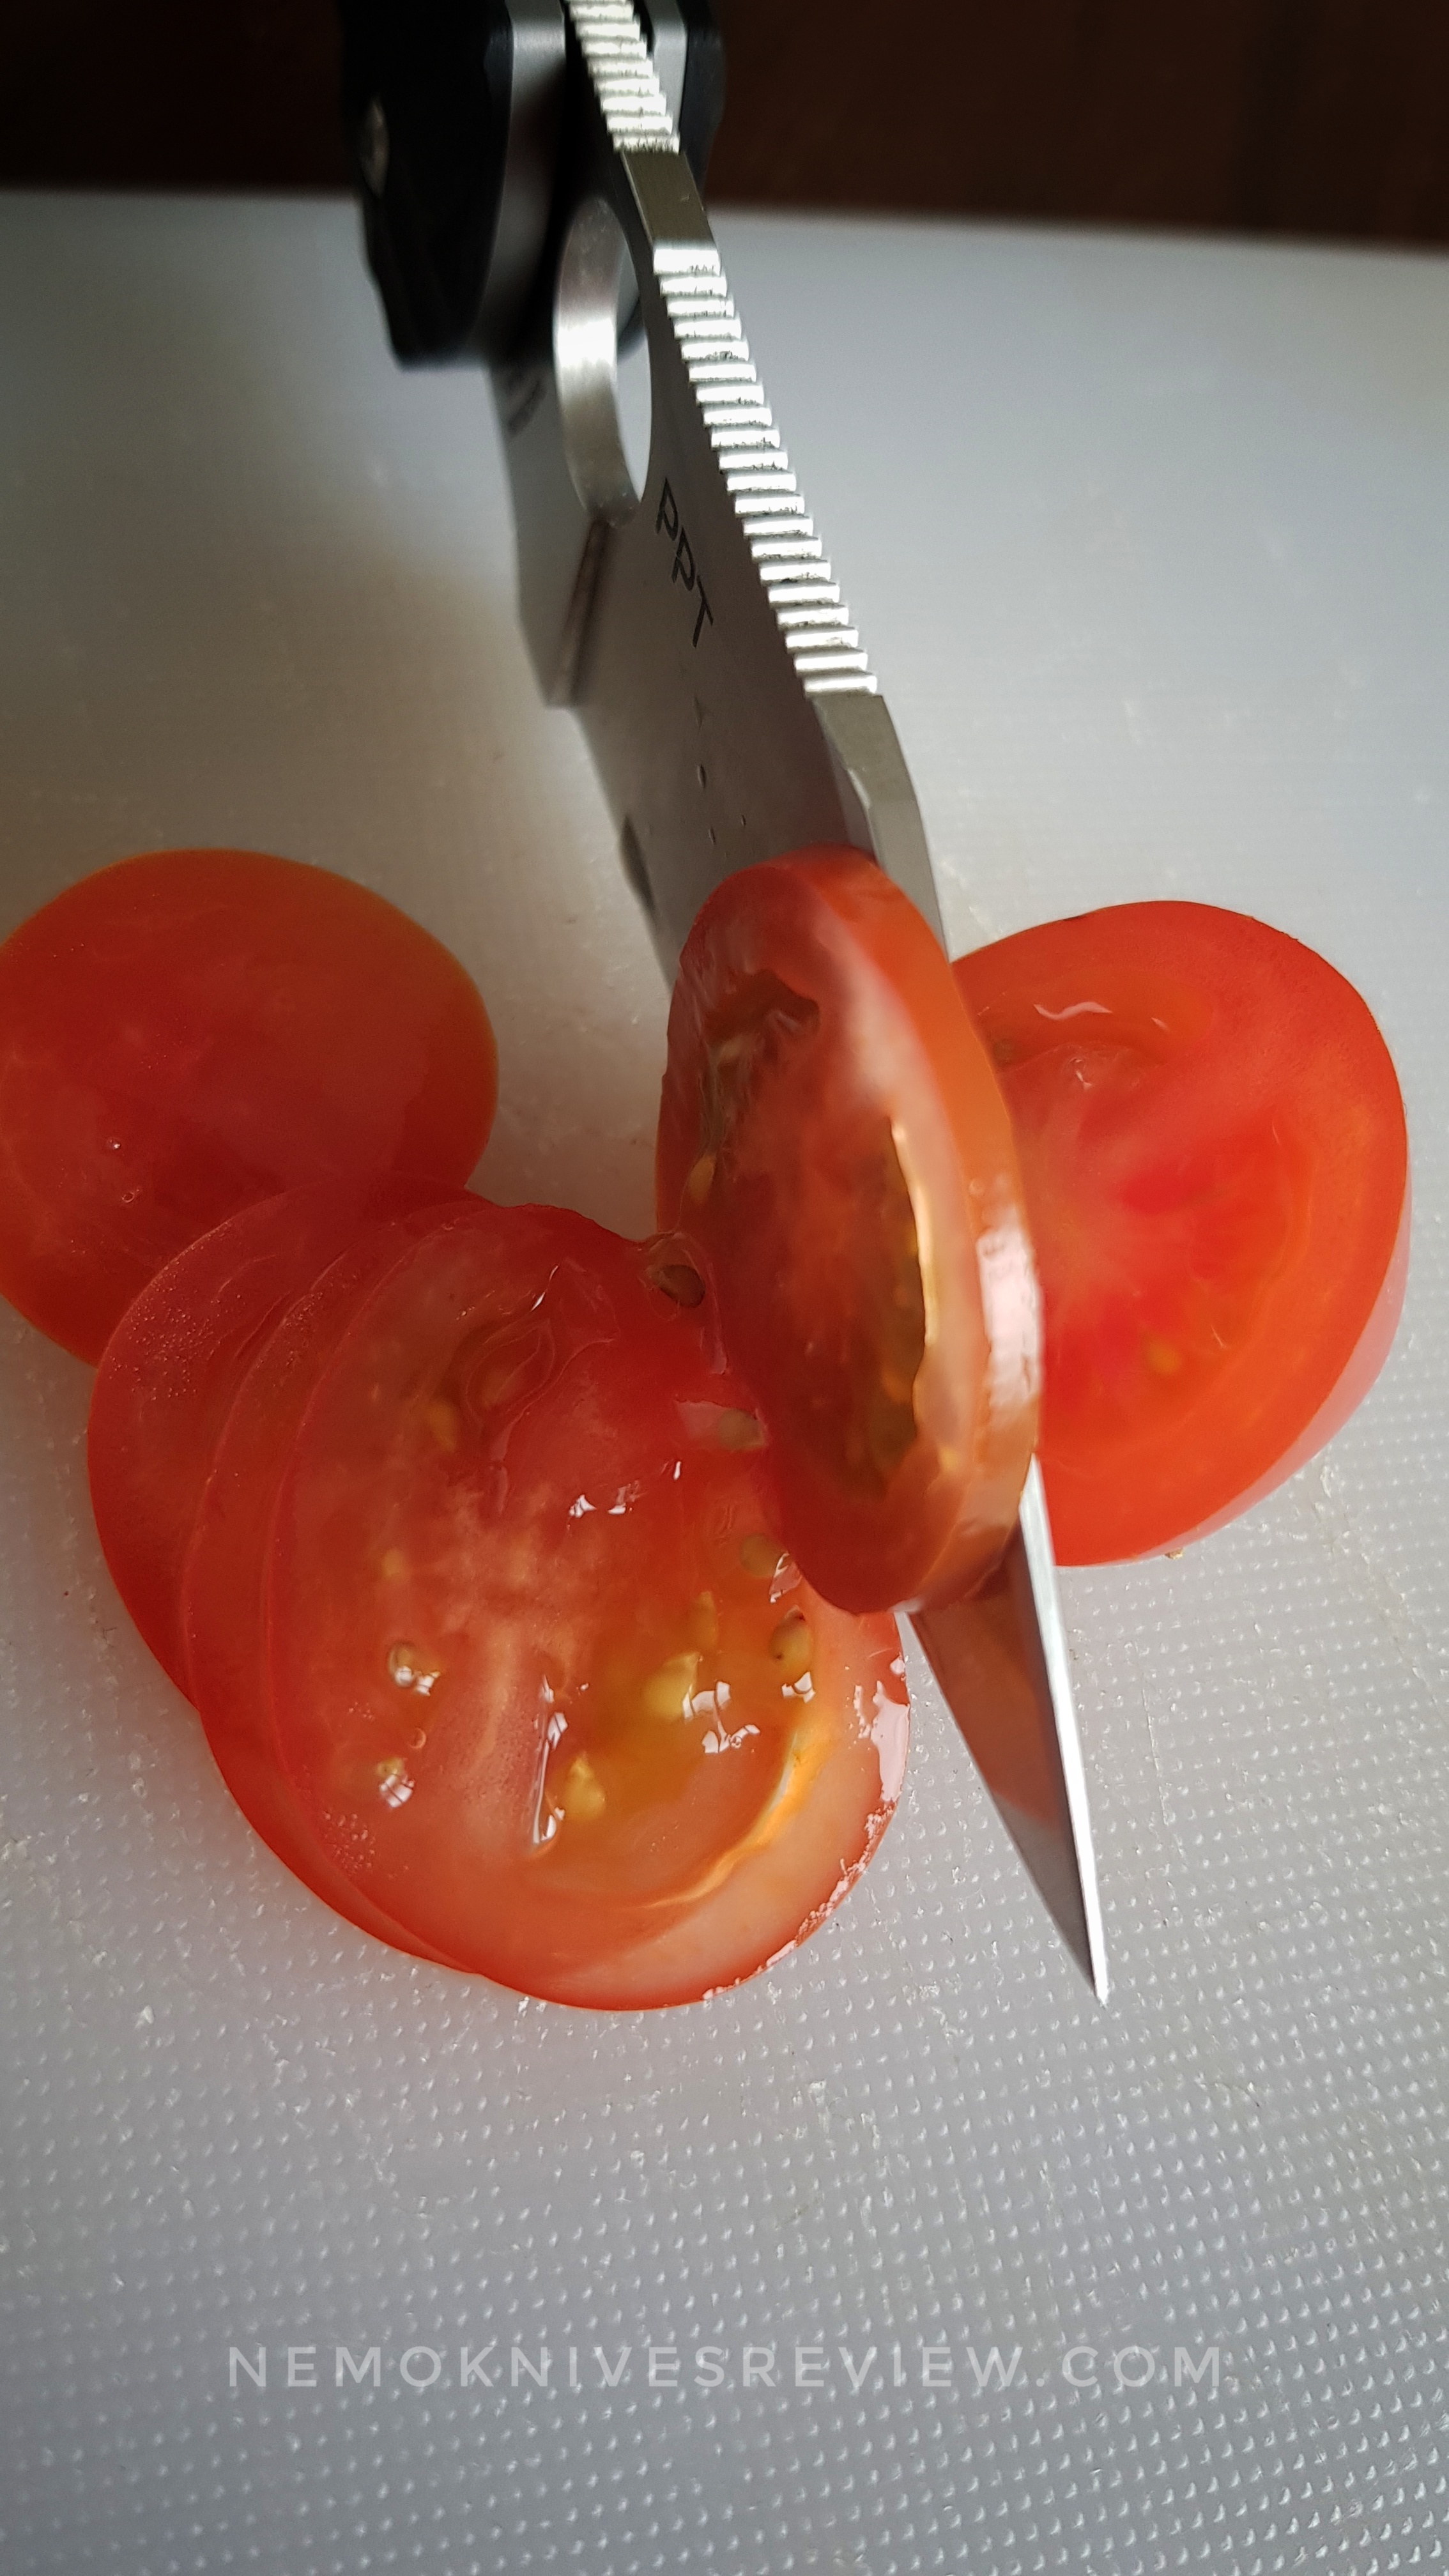
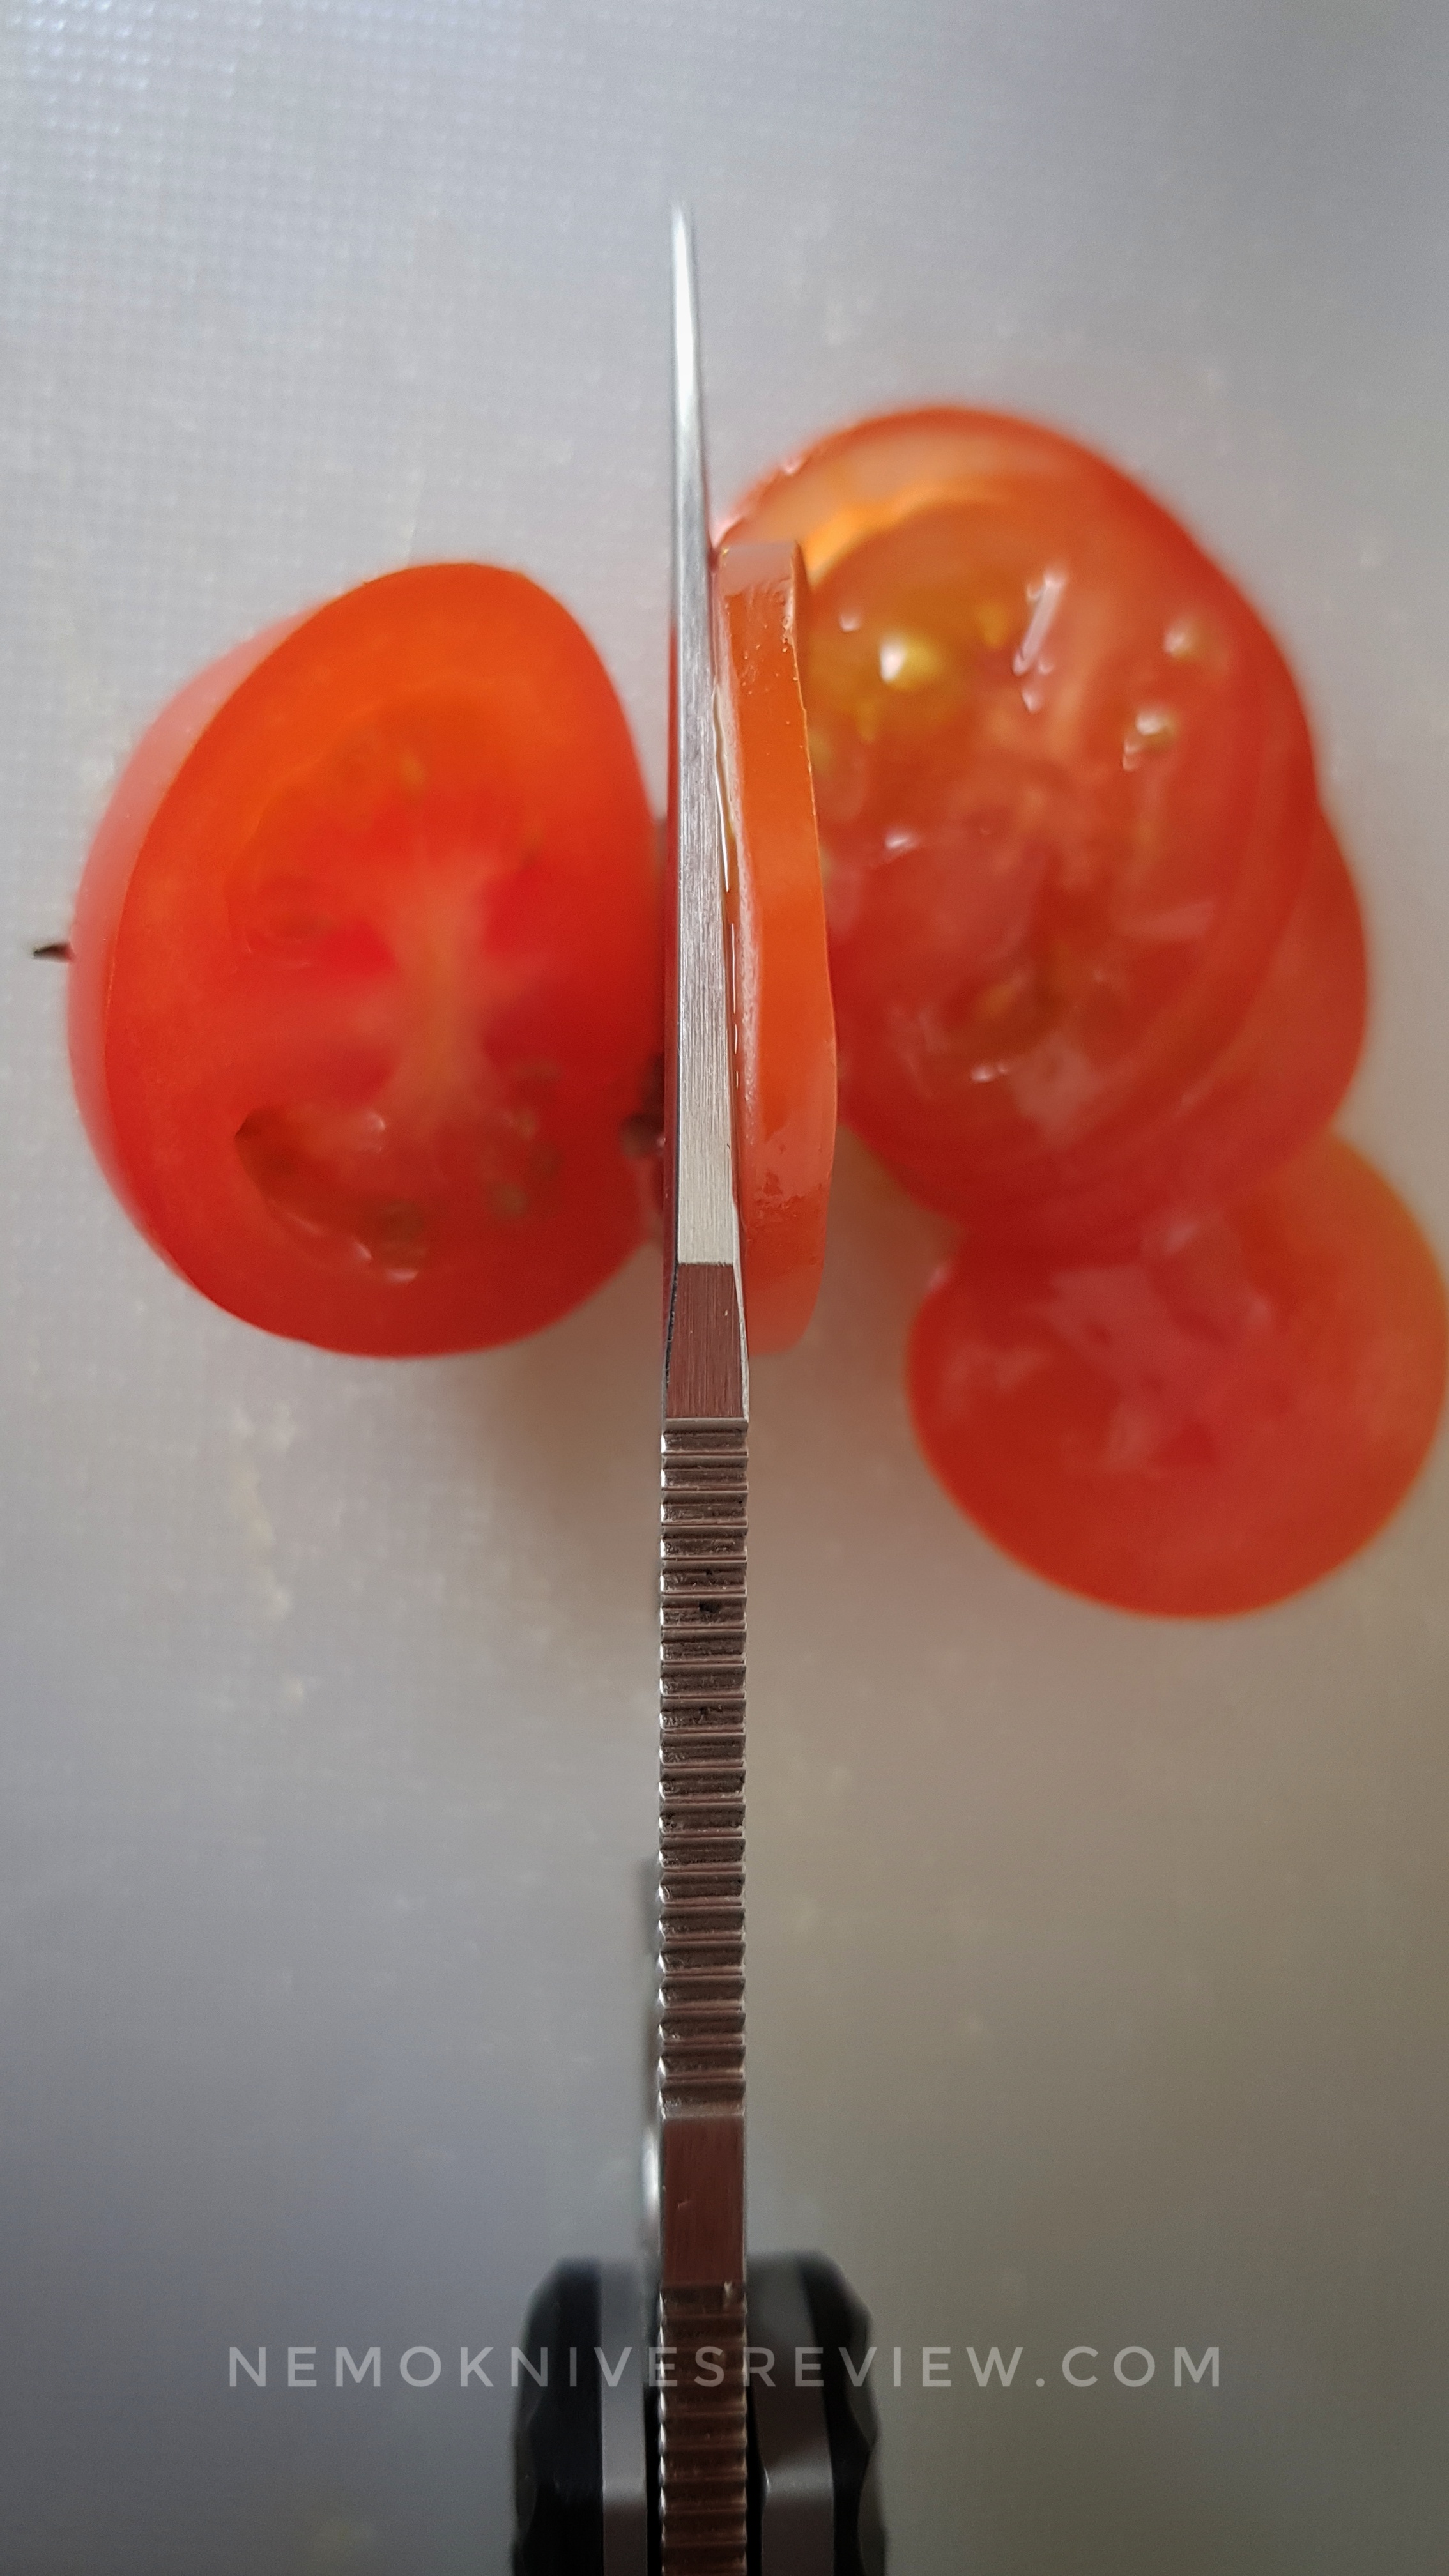
Dry chestnut is fibrous and can grab onto a thicker bevel, so the fact that your convexed ZDP-189 now glides “like a razor through butter” is a strong demonstration that the edge mod really paid off.

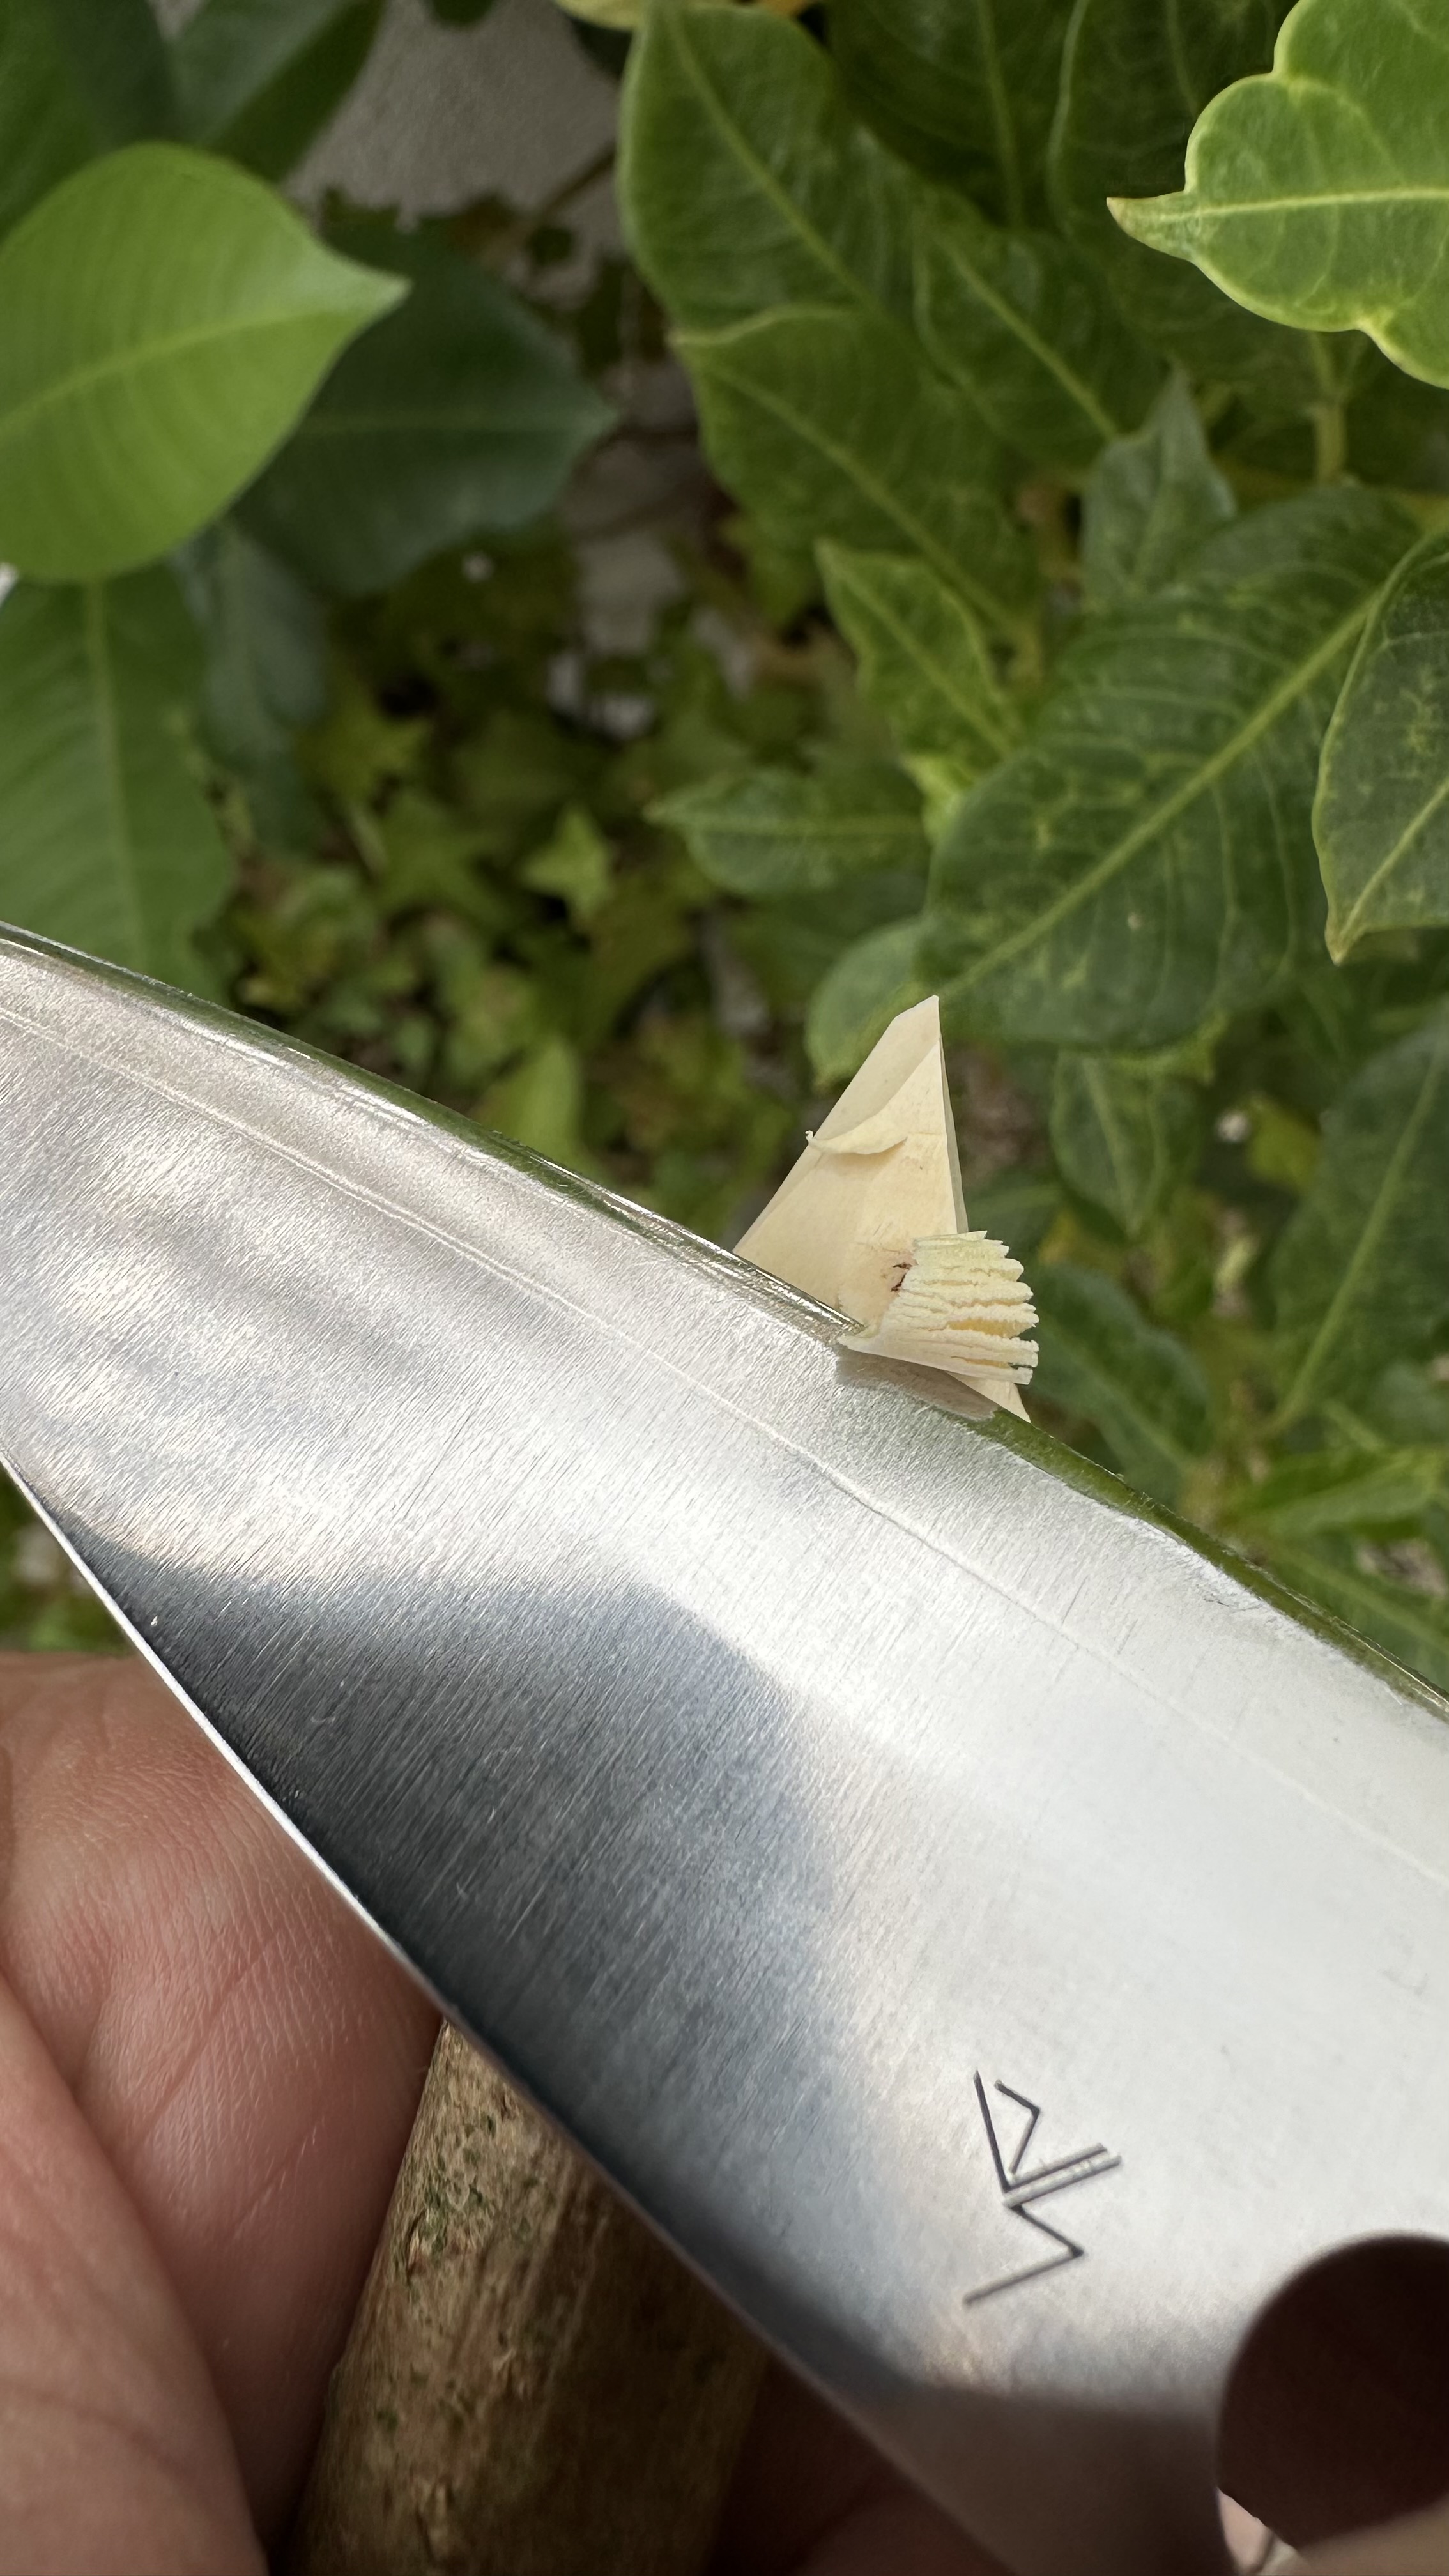
Convexing changes everything. Once the edge’s shoulders are rounded, the edge stops fighting the wood. No more wedging, just a clean, controlled push cut — like sliding through butter, even in stubborn chestnut.

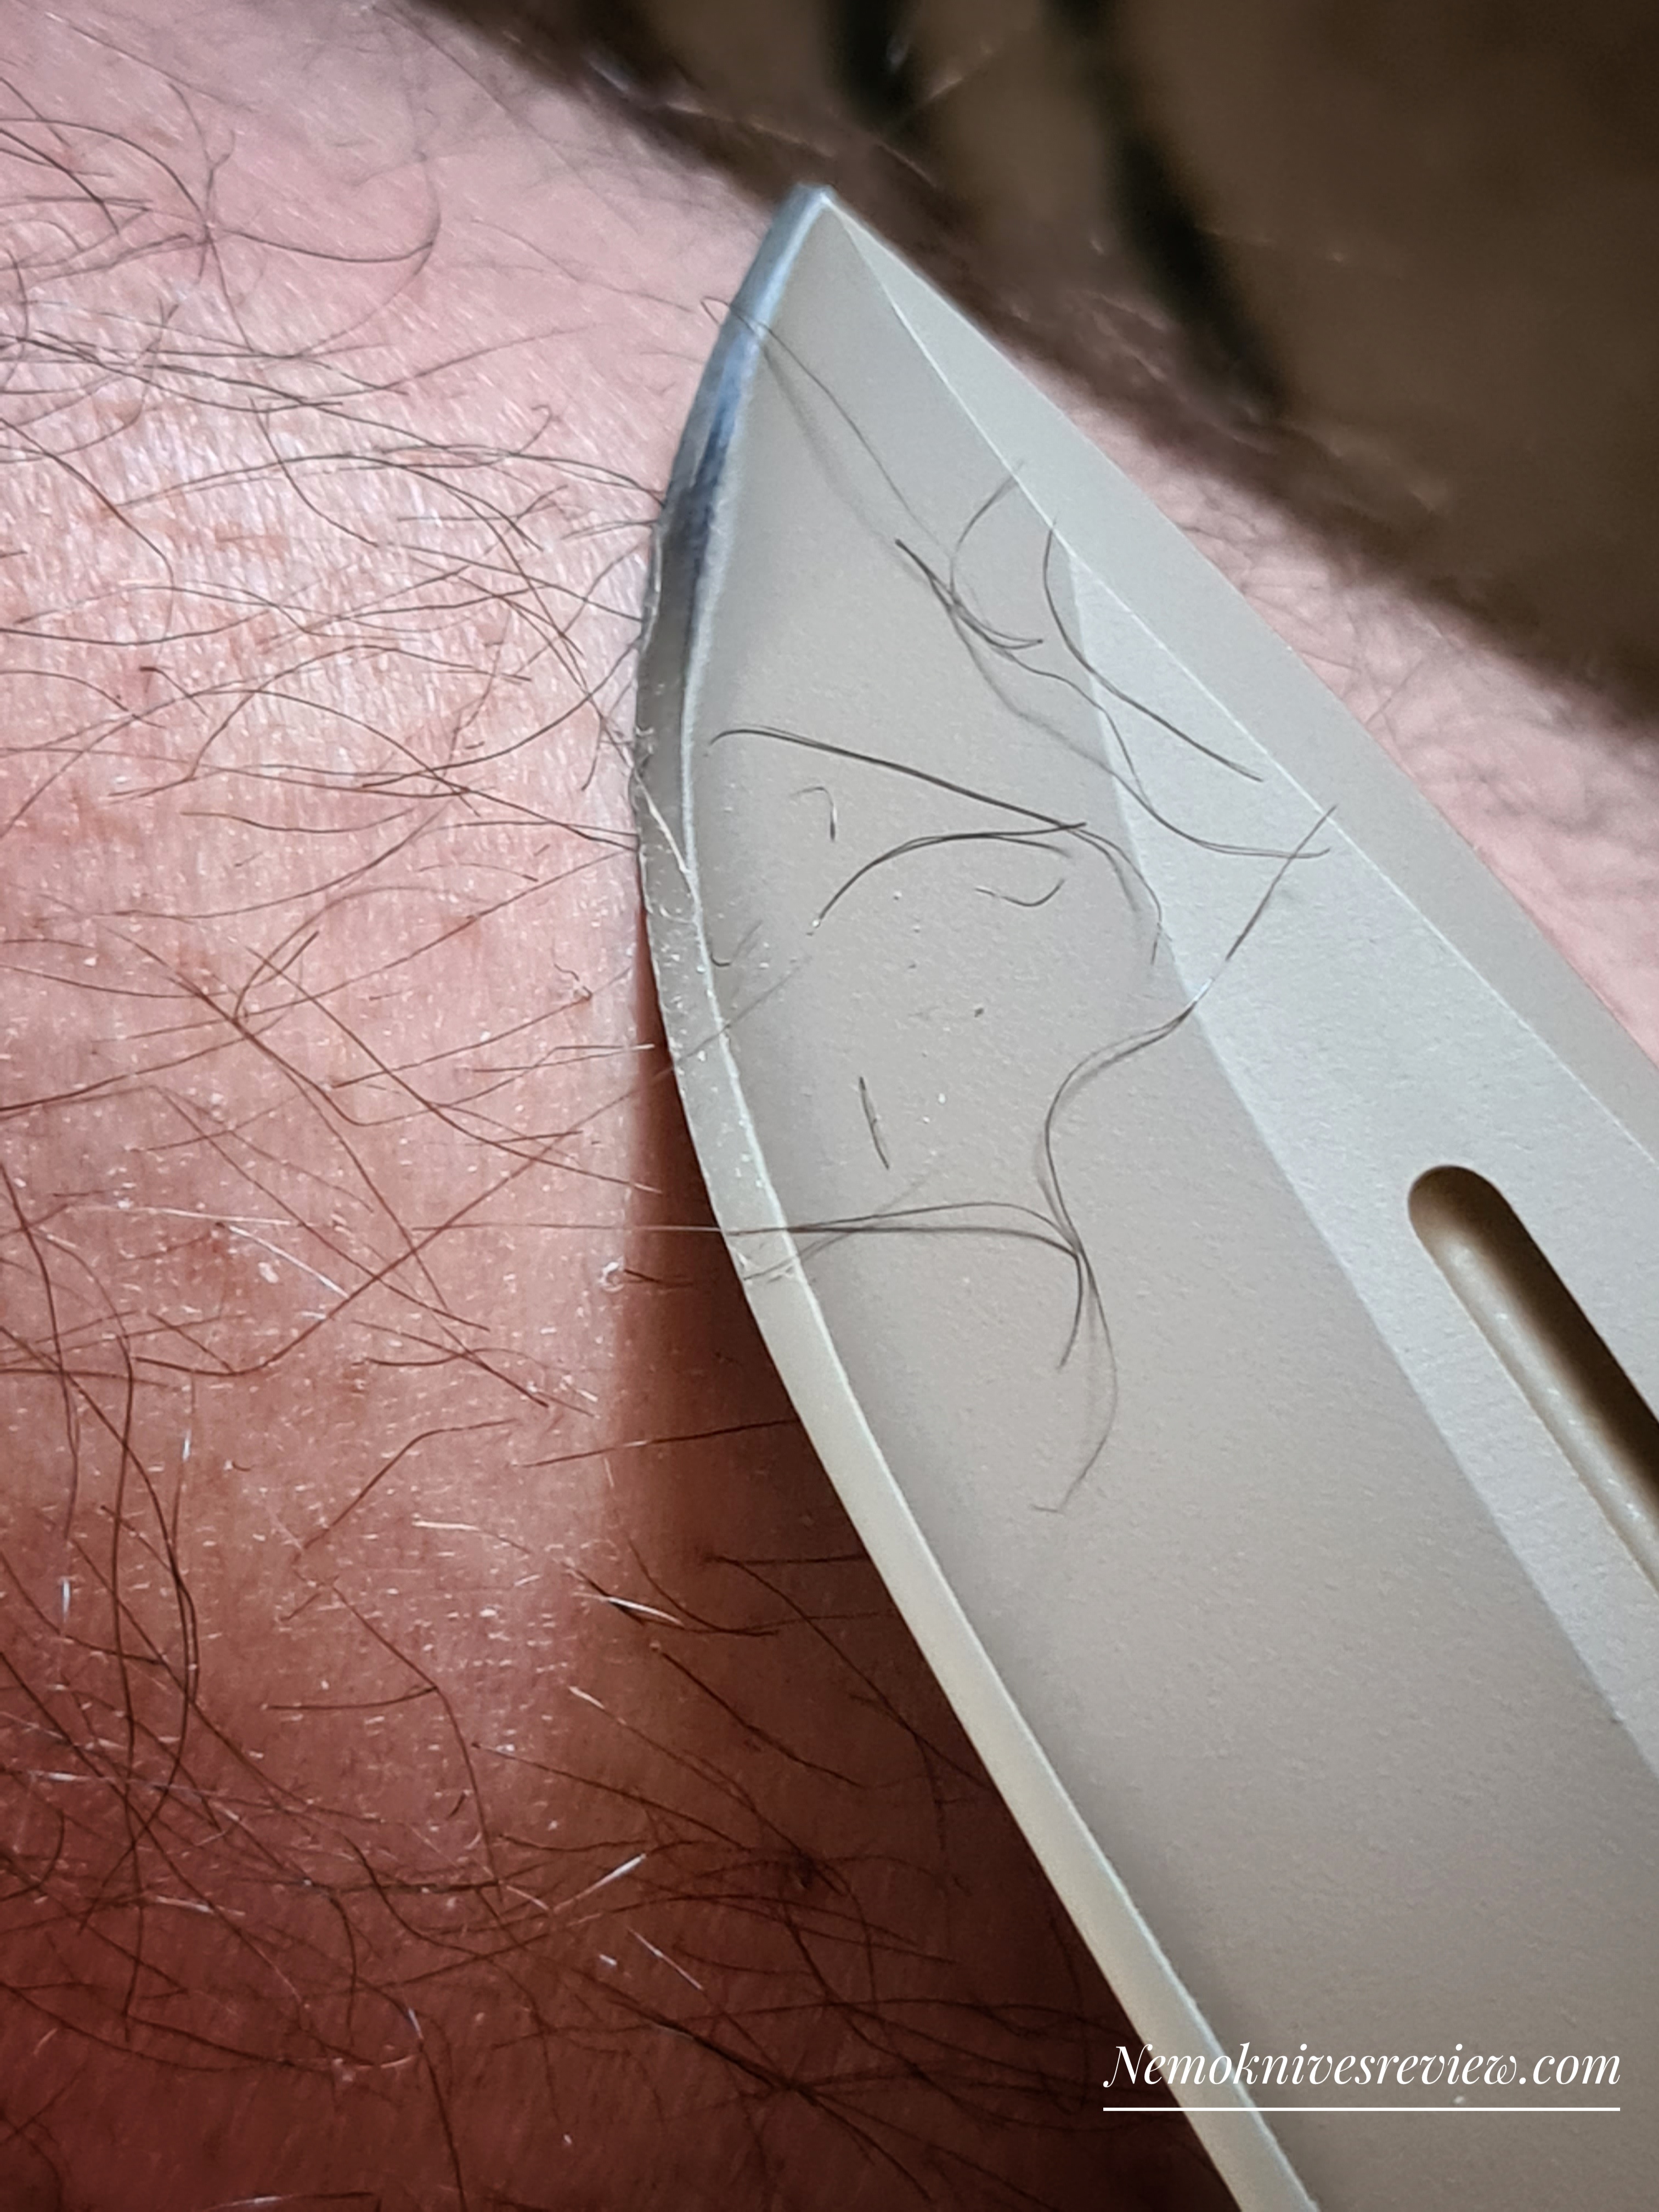
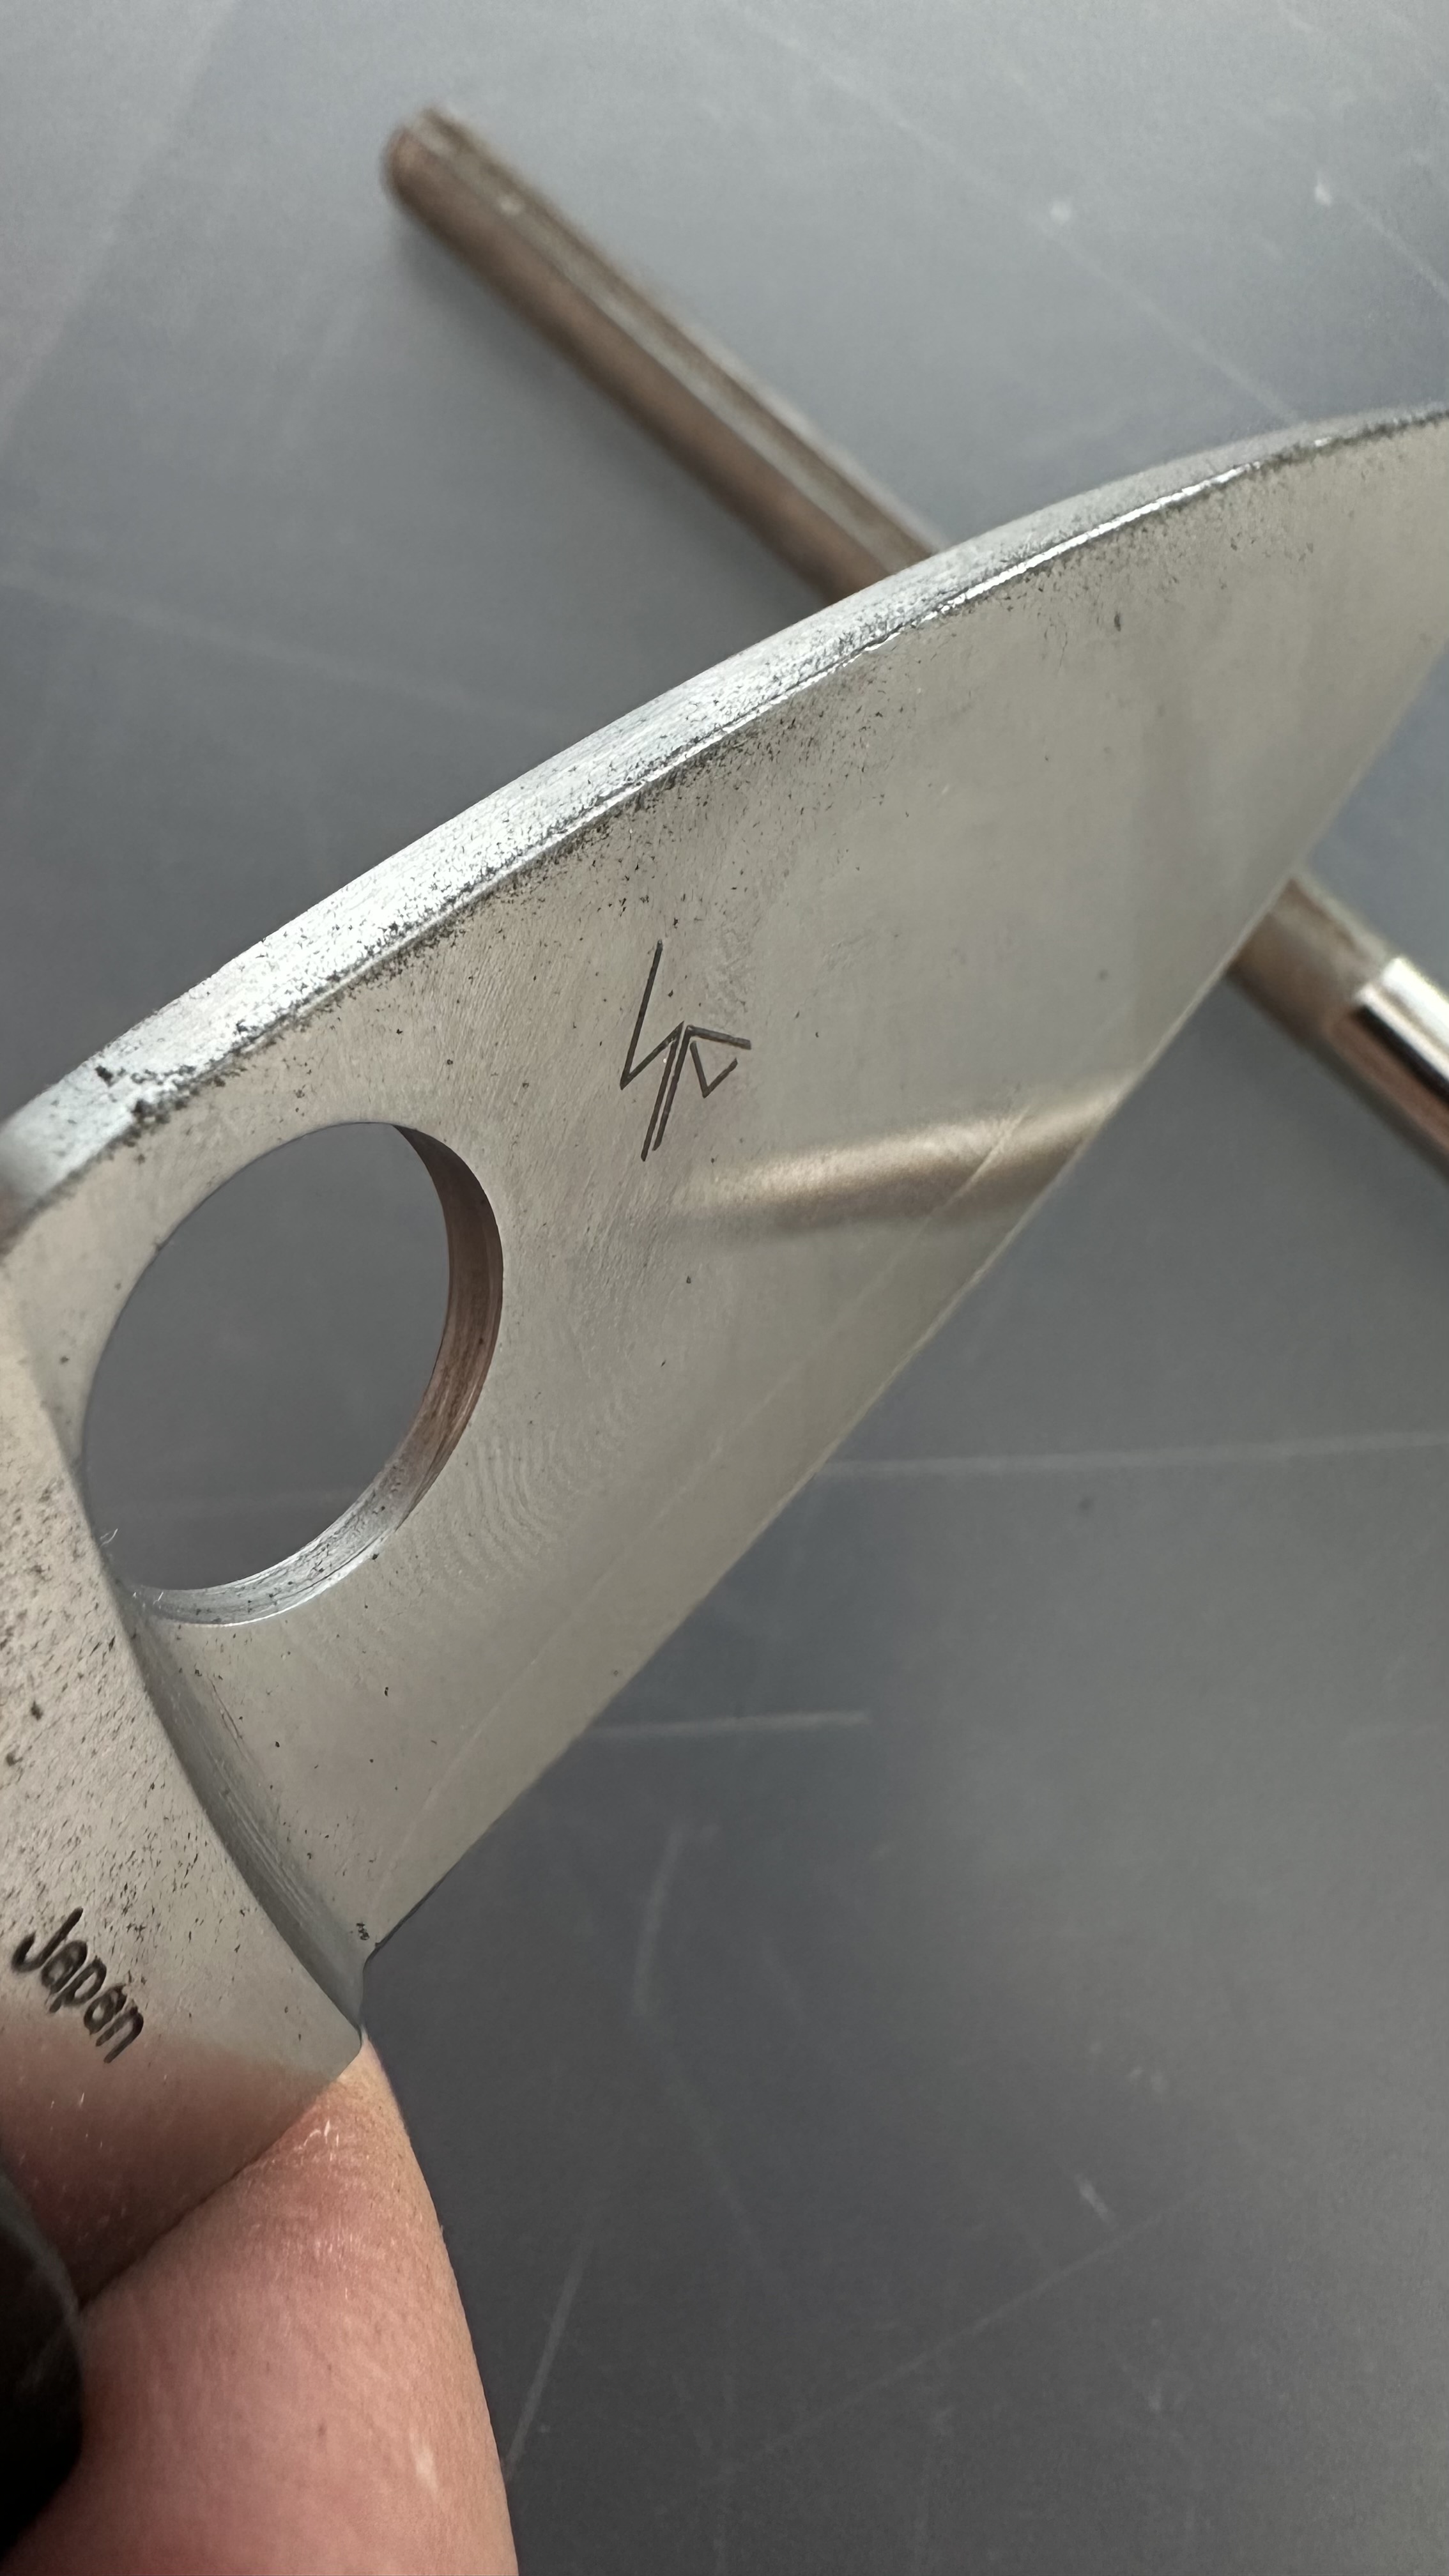
That’s where ZDP-189 really shines. Most steels would give up at this geometry, folding or rolling. But at 65 HRC, ZDP holds steady. You get the sharpness of a razor without the fragility.

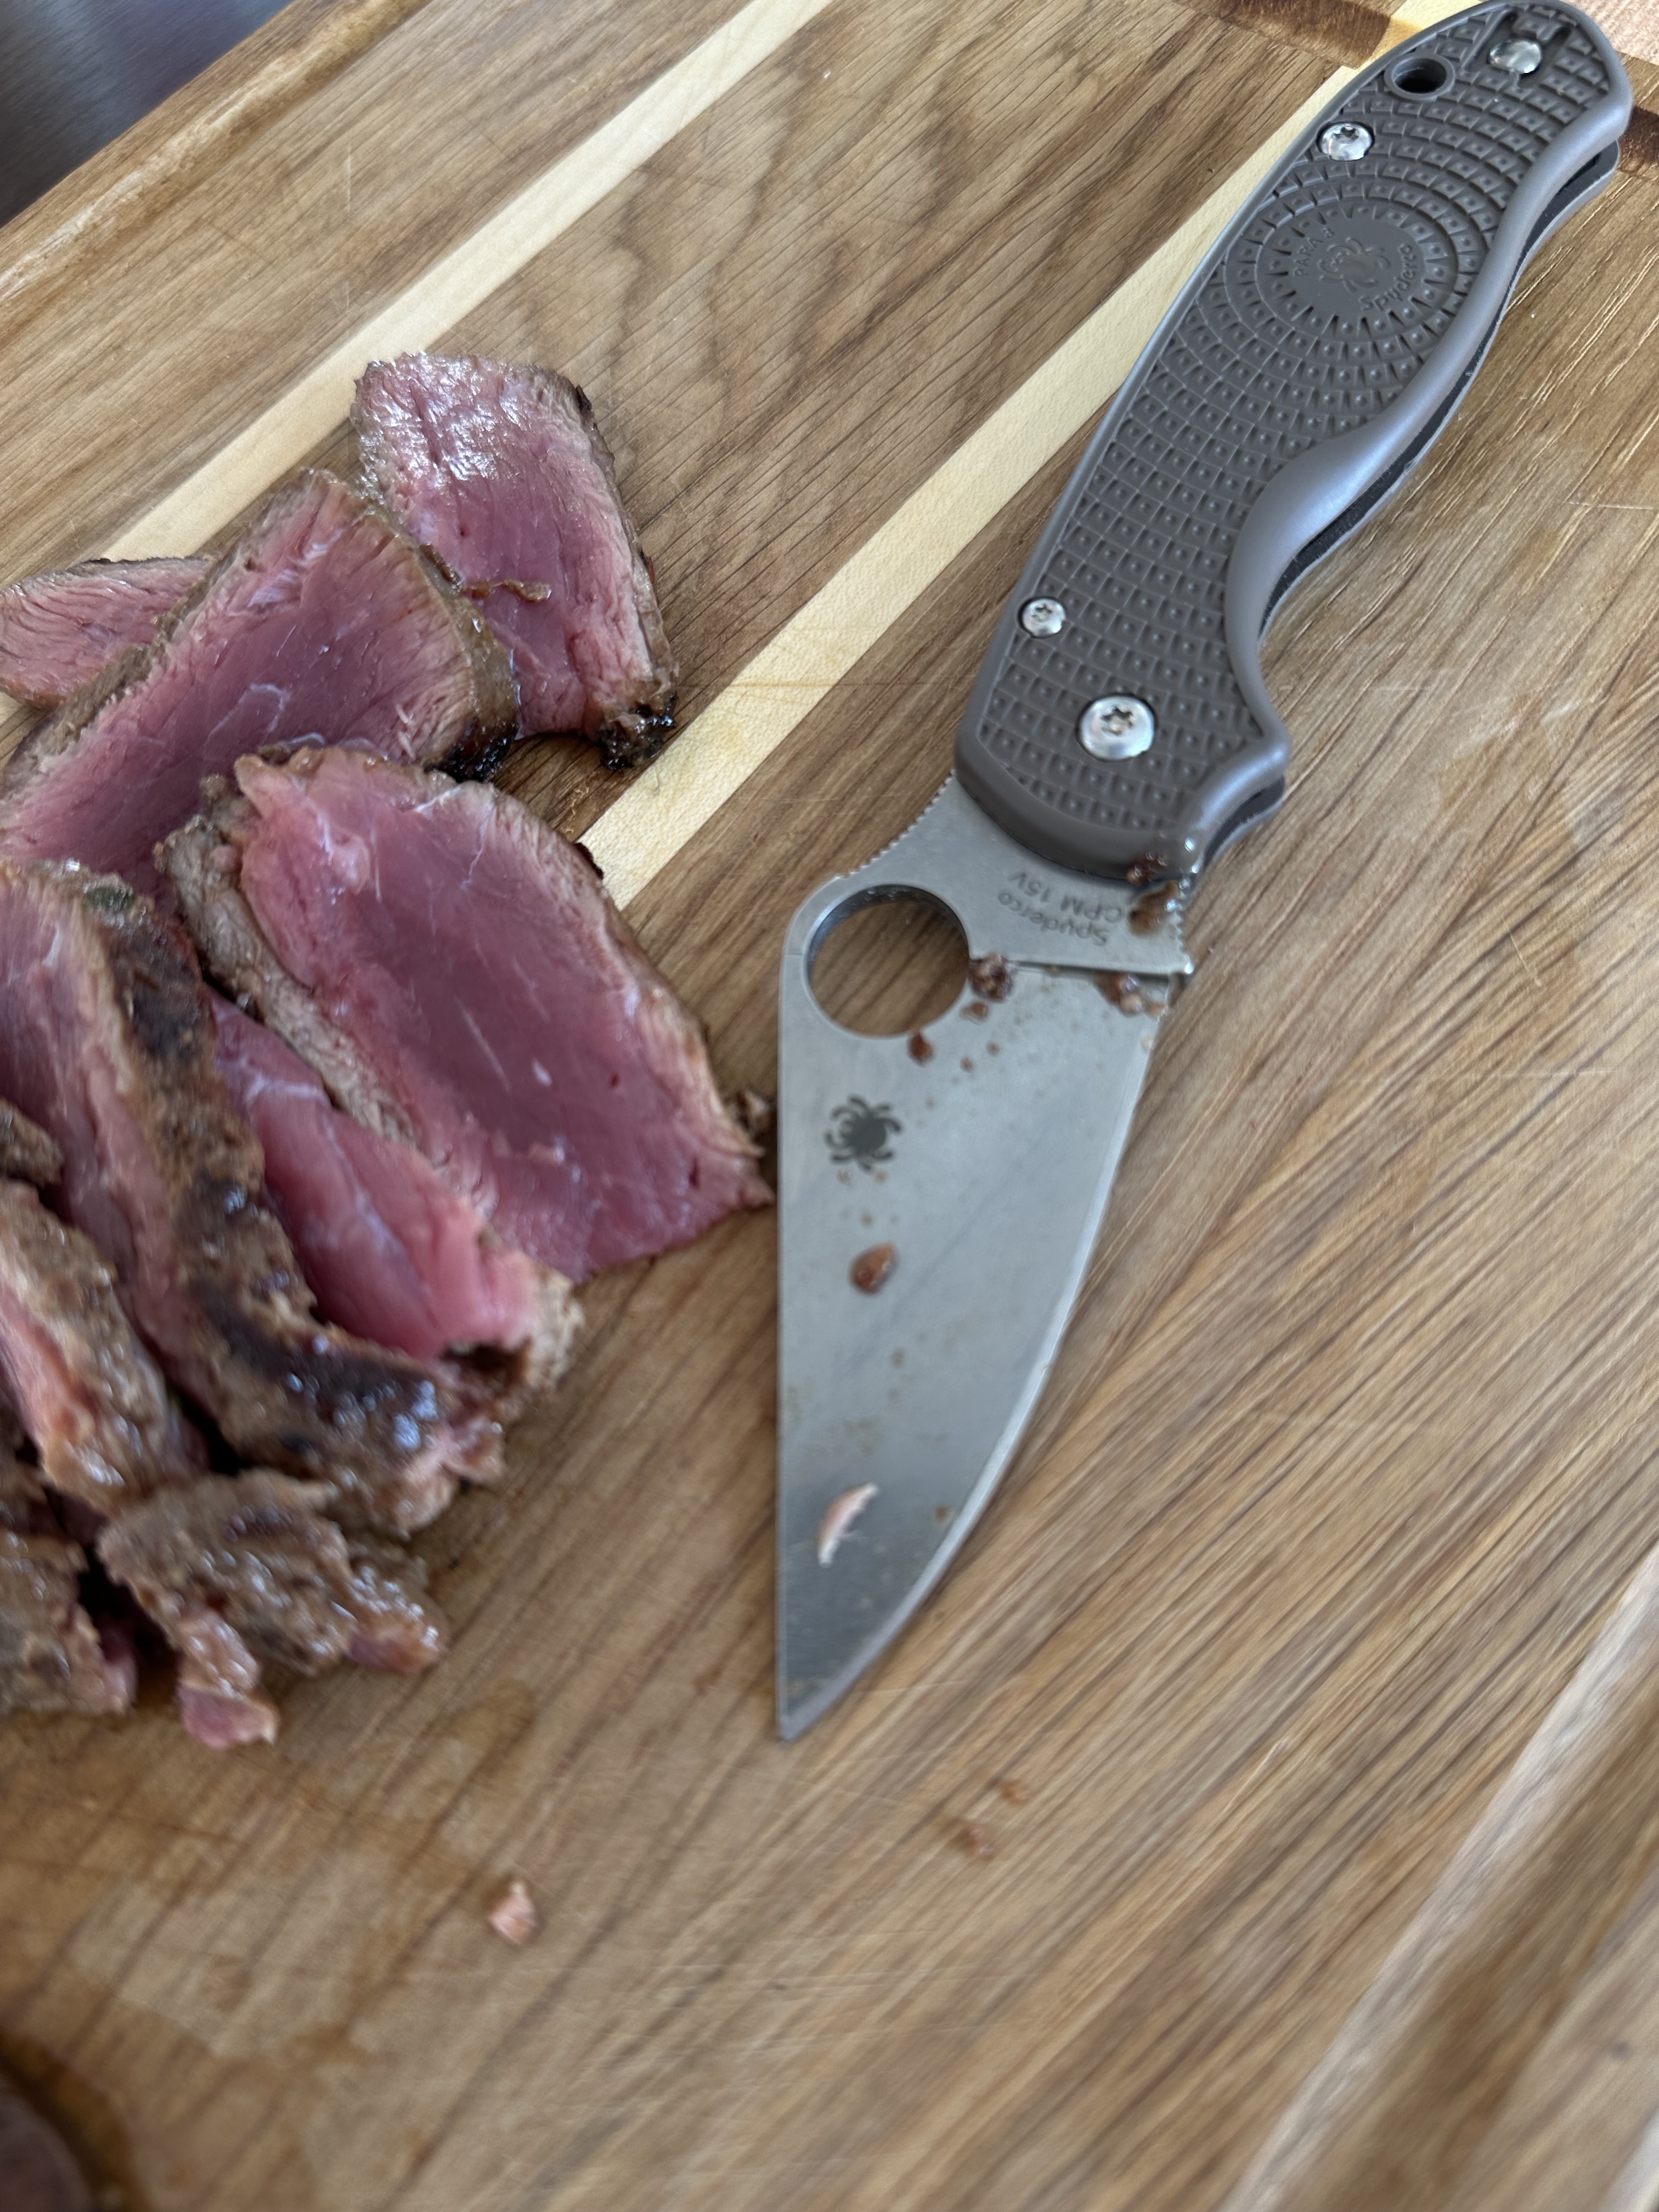
And the Caly 3.5? On paper, it’s a gentleman’s knife. In hand, convexed and sharp, it’s a wolf in disguise. A refined tool that thrives on real work, not just resting pretty in a pocket.
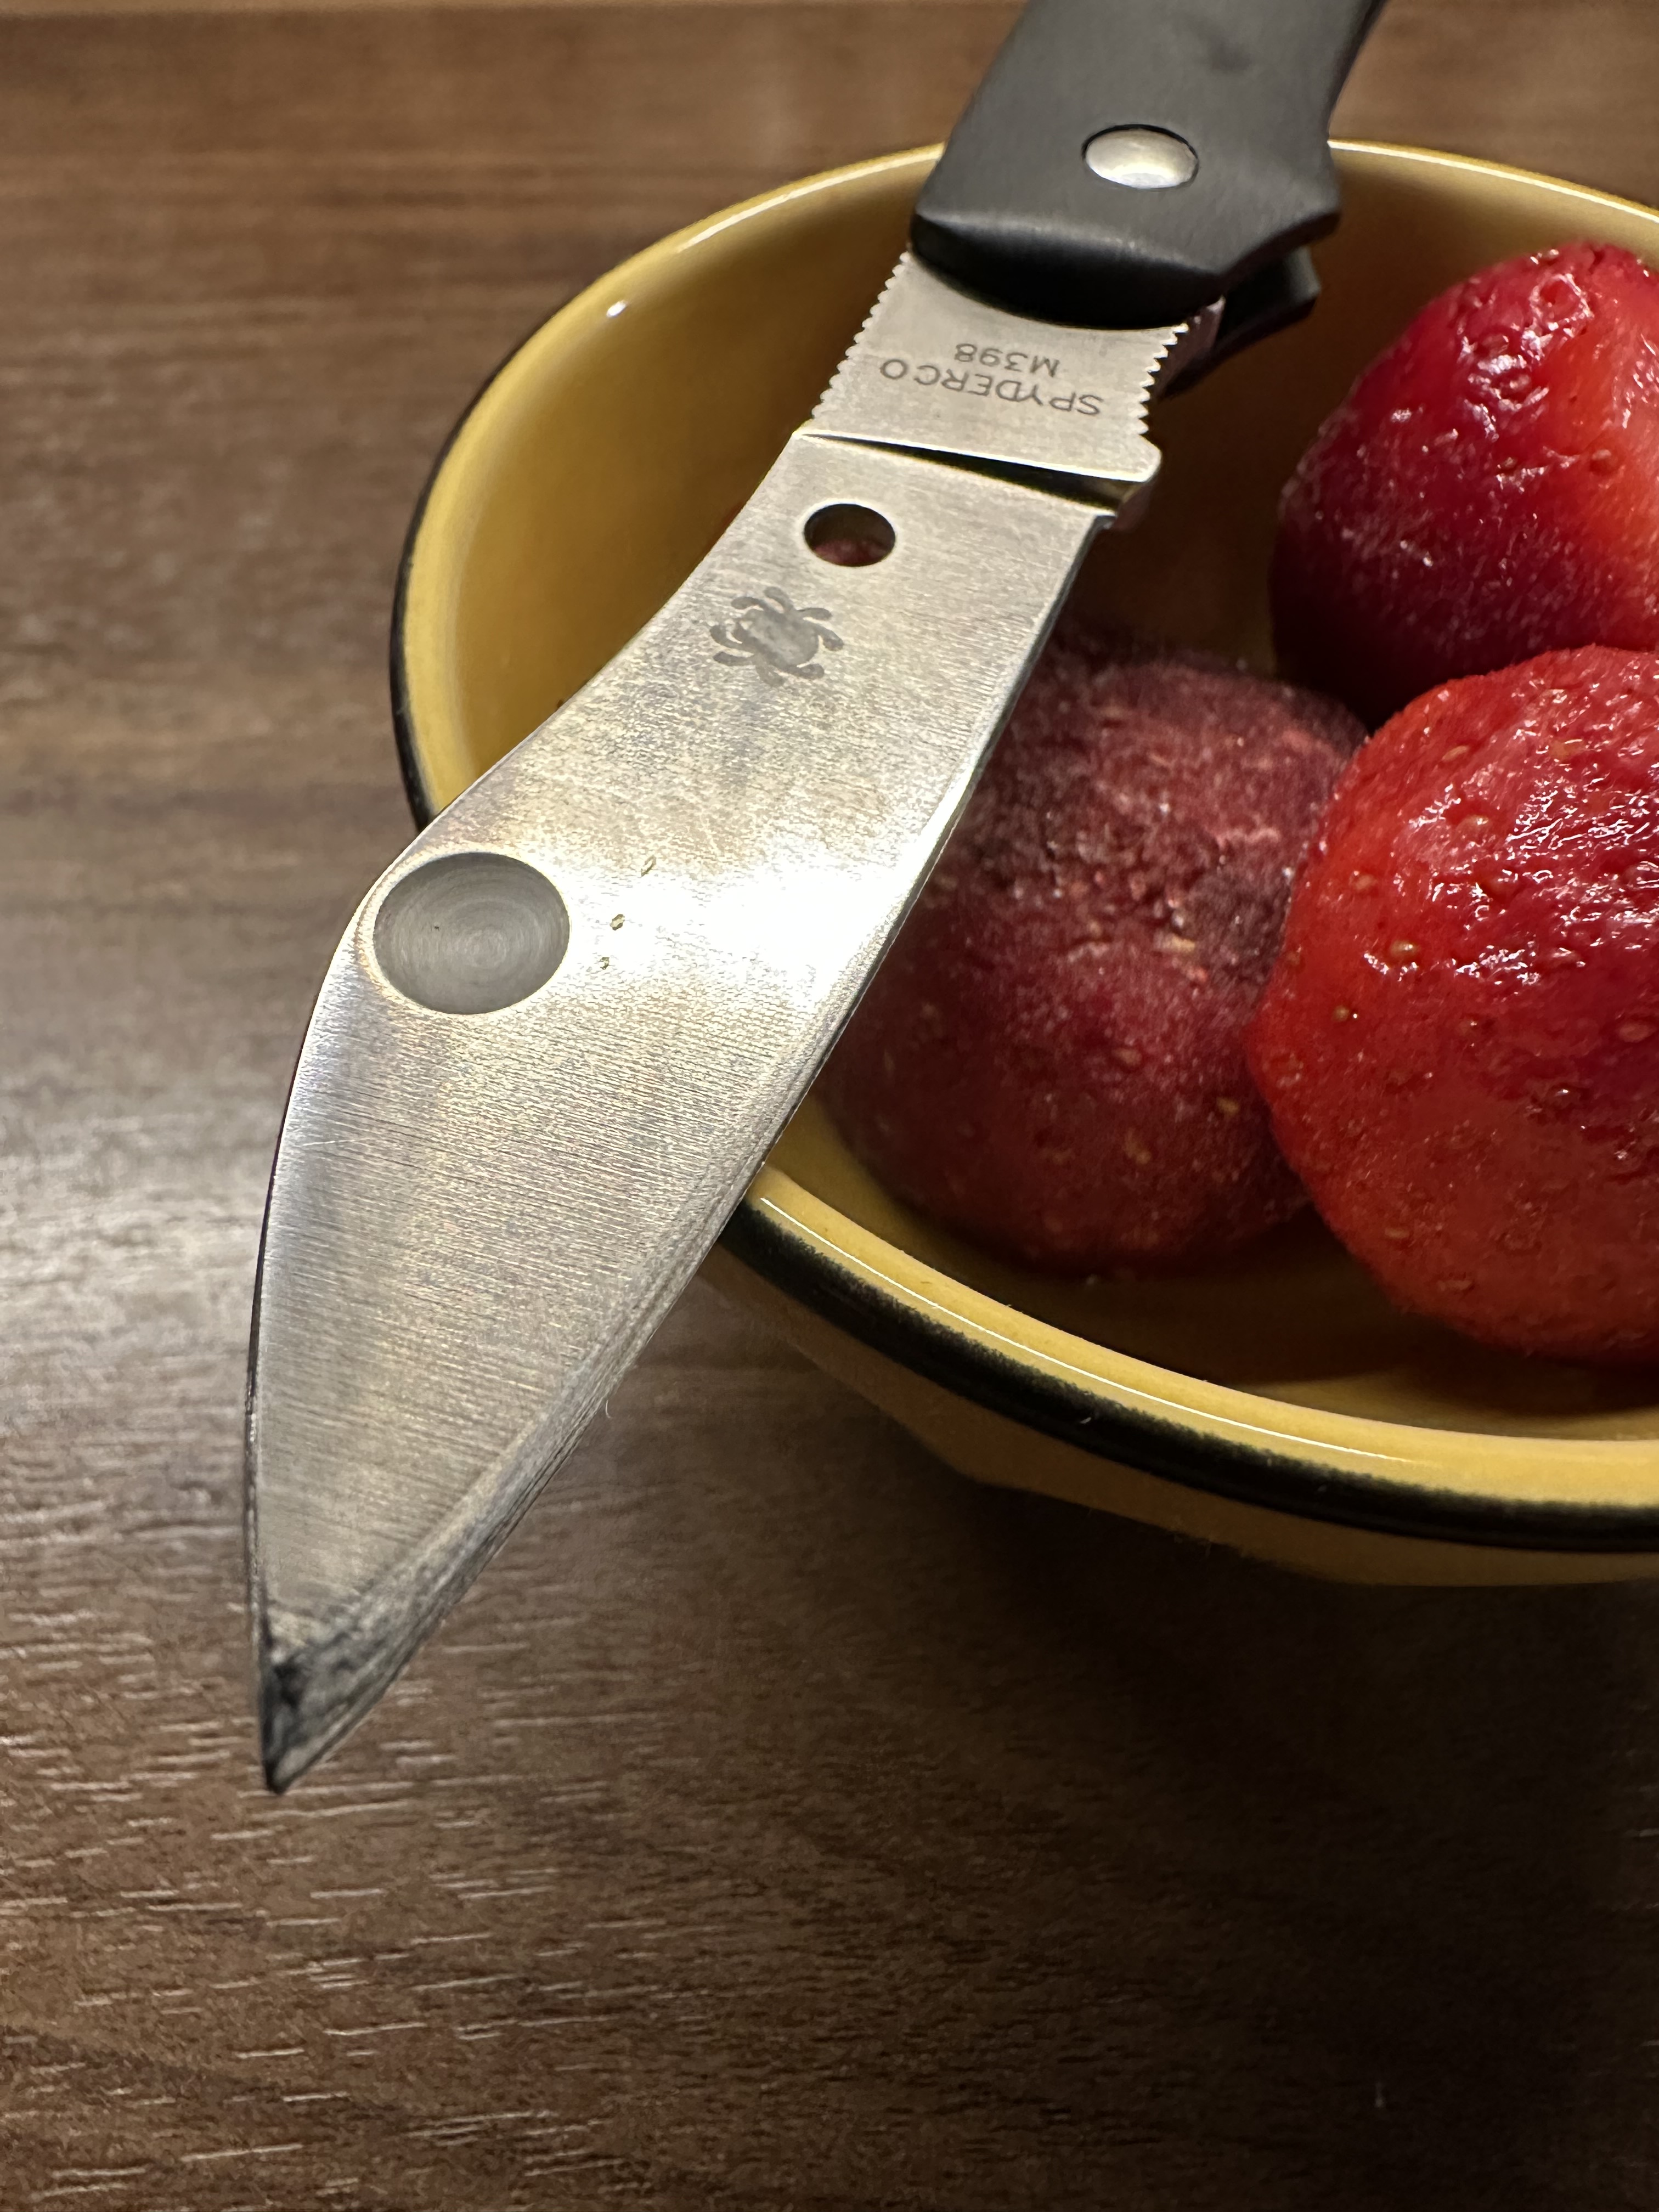
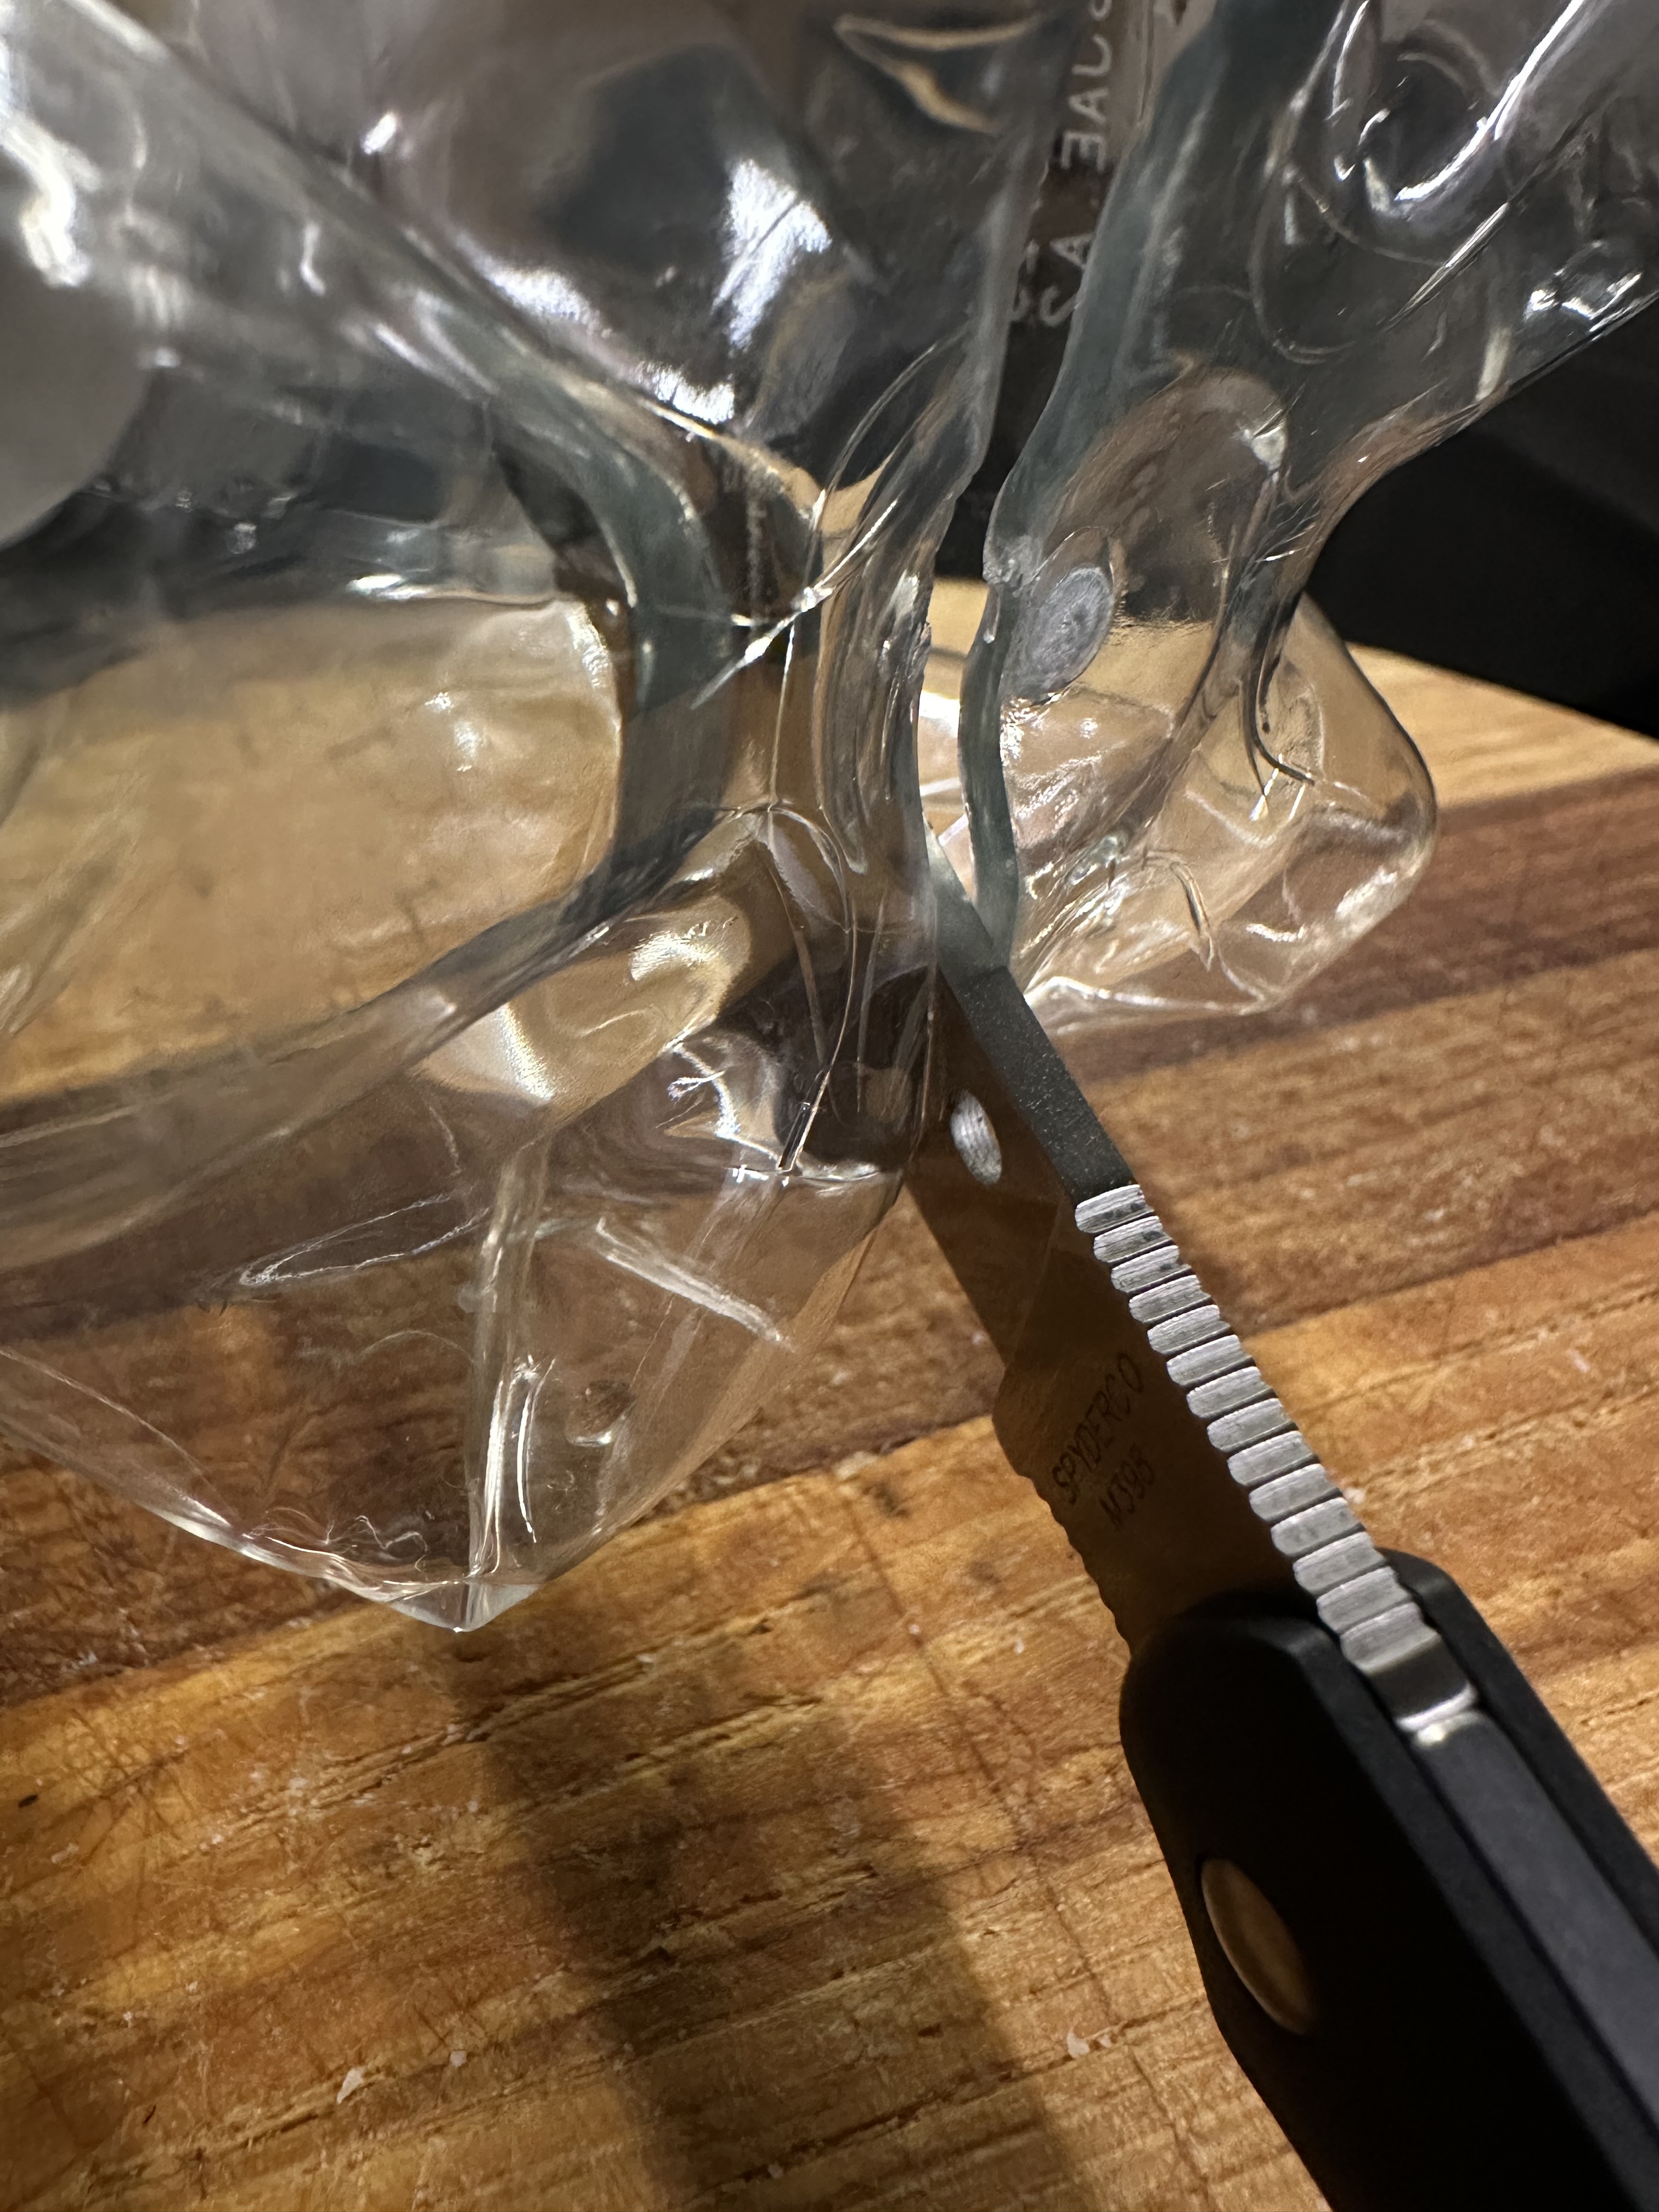
Wood tells one part of the story, but plastic will reveal another — especially the stubborn bottom of a bottle. That’s where I’ll see if this convexed ZDP-189 edge can truly glide without wedging. I’ll update this post as soon as I get the chance to put it through that test.

GETTING A CONVEX EDGE WITH THE CPM-15V BLADE OF THE HOULAHOULA PARA3 LIGHTWEIGHT PART 2.

Since the first try of convexing the Para 3, it is time now to reach the same level of de-shouldering as on my Sage 5 Salt.

My goal here isn’t to touch the edge itself, but to smooth the border between the flat of the blade and the edge angle. This allows me to maintain the edge primarily on leather while reducing drag when cutting hard materials like plastic or wood.

The equipment I used was again the Spyderco Double Stuff 2, focusing mainly on the diamond side. I experimented with gentle, round strokes on the flat diamond stone instead of always moving in the same direction — it seems to remove metal much faster.

For aesthetics, I plan to follow up with white ceramic or jade stones to approach a mirror finish, similar to the Sage 5. Magnacut responds beautifully to polishing, whereas CPM-15V doesn’t particularly care.

The use of gaffer helps preventing any deep scratches on the blade finish.
It works great. The black dust is metal removed by the diamonds.
I do that outside in the wind. I don’t want to breath that dust.

Eventually this second round has gone so smoothly (compared to the first one linked at the start of this review) that i was on the verge to work on the Military 2.

Remember Sal saying:
The Edge is a Ghost. Always changing. Dying (dulling) being reborn (sharpened) split personality (angles and geometry changing). Think of the edge as gas in a vehicle. It runs out of gas and you put in more gas. We provide the format, materials, design for use, variety to avoid boredom and create interest, but the edge is your creation. The result of your understanding, education, experience and practice.

The comparison between the Sage 5 Salt and the Para 3 continues. In short: the Sage 5 has superior geometry thanks to its high 3 mm FFG blade, while the Para 3 features a sturdier blade, a thinner point, and is overall lighter (no steel liners).

It’s really your choice — both are highly capable and complement each other, coming from the same design mind. Shawn Houston even notes that the Para 3 carries “that Delica vibe.”

I’m impressed by the Sage 5’s exceptionally smooth action — one of the best among Spyderco’s compression lock knives. I love both knives. These days, the Sage Salt rides with me, but while both won’t let you down, the smooth Sage is more fidget-friendly. Both are great, but the Sage 5 is simply less popular… 😉

Getting a convex edge with the CPM-15V blade of the Houlahoula Para3 Lightweight.

I have enjoyed the Para3 in CPM15V for a week now and after the first pictures, one of my friend Alexandre wrote to me “Looking forward for a convex edge”.
And I have answered to him that I was not in a hurry to do it on this little wonder of modern cutlery. The steel seemed so hard !
But guess what ? What’s bred in the bone will come out in the flesh.
After a week of frustration trying to get any good (spectacular) result on leather and white ceramic….

Some gaffer is on the blade to protect it from any scratches.
My goal is just to “de-shoulder” the edge, to round it for a better leather stropping experience.

It is not rocket science and I’m clumsy and impatient.
So I’m not helped by natural tendencies.
As you can notice the edge near the guard will have less attention.
My friend JD is able to go even but I’m not to his level in making beautiful edges.

But as you can notice it is getting better.
I use a Double Stuff 2 from Spyderco. Mine is old and the glue between the ceramic slate has gone. The diamond slate is not as efficient as some decades ago but it should bite into CPM15V despite its humungous pourcentage of vanadium.

Since CPM 15V has a high volume (23%) of vanadium carbides (87 HRC) which are harder than the ceramic alumina abrasives. (79 HRC)

That means 23% of the overall microstructure is being pulverized, burnished and adhesively worn to shape rather than cut at the apex.

Over the years I’ve observed a pattern in some folks complaining that these types of steels cannot get very sharp yet the same folks seemingly would refuse to use the abrasive that will cut the remaining 23% of that microstructure cleanly.

I do think that would be fascinating to do a controlled test and look at the differences between the starting sharpness and how that sharpness dies off with cut testing and then compare the loss of sharpness between the two with the same amount of cuts.

I’ve certainly seen this behavior in my personal experience, however, I’ve not documented and shared data publicly.

I’ve mentioned many times that my current favorites for sharpening are the bonded super abrasives rather than the electroplated abrasives. However, there is a cost difference, but in my experience it certainly pays for itself and has better performance.
Shawn Houston on the Spyderco Forums

First look at the result.

Humm it needs to go one more round.

Ah, I am starting to enjoy the result and how the steel takes the light on the belly of the blade.

Now time to put some white compound polish on the leather.

Again I’m not focusing on getting it sharper it but just to polish the edge and remove any scratches. I want a better geometry like I use to have on the Para3 in M390.

CPM15V does not like to give away its particules.
When I have been able to get mirror edges on D2, 52100 or SPY27 I’m not able to get it on 15V. I need certainly to upgrade my equipement and my game for that.
I will polish it on Jade stone and post better results in the coming weeks.
So far I’m happy with the result. More to come later as 15V is not as easy as I thought to work on (JD adviced me “I think diamond past would help with the stropping. Diamonds or cbn can cut the vanadium carbides, of with this steel has a lot”. Not impossible, especially with diamonds but easy. Maxamet on the other side has proven to be much easier to restore even after catastrophic damages.
But I’m very happy with that Para3 which could be the HoulaHoula (*) of folding knives.


(*) Houlahoula are little birds with big balls and when they land they sing “Houla ! Houla !


On the Spyderco Forums Shawn Houston was kind enough to give some advice about how to get a mirror edge on CPM 15V:

“I recommend skipping the White Ceramic and Jade.
23% of the matrix in the 15V is harder than those abrasives.
A bonded diamond/cBN stone should help with the desired finish.


You deburr the best you can with light alternating passes on the stone. From here, the edge should be sharp enough to cut paper cleanly before moving on. Afterwards, go to a leather strop loaded with 1um Gunny Juice and use alternating edge trailing passes.

This is a good benchmark; keeps the “bite” at the edge without smoothing out the slicing effect. It also helps keep the “grab” at the edge for draw cuts but still keen enough for push cuts.

There’s different kinds of stones. They’re not all created equal.
You can take a diamond stone with the same abrasive and the same grit and it will leave a different surface roughness depending on the construction of the stone.
Yes, there are three major types of bonded stone.

Metallic, resin and vitrified.

There’s even some that are hybrids. However, these are not the same as electroplated diamond abrasives.The work more like regular water stones with better surface finishes.

“Diamond or CBN are the way. You can put a functional edge on 15V with ceramics, but if you’re wanting the real performance 15V has to offer, you need to sharpen with abrasives that will cut the carbides in the steel.”
Wandering_About on the Forums has sum it up.

Shawn Houston was also kind enough to share an AI summary of Instagram Reviews.

Based on the latest set of reviews, BBB CPM 15V steel demonstrates exceptional performance and user satisfaction.

Performance:
* Excellent edge retention: Maintains a sharp edge for extended periods, even with demanding use (e.g., cutting blackberry roots, heavy use).
* High edge stability: Resistant to chipping and rolling, even with hard use.
* Versatile: Performs well with different edge angles and finishes (from toothy to mirror).

Comparisons:
* Compared to K390, Maxamet, S90V: Sharpening is considered easier than K390 and Maxamet.
* Compared to M4: Sharpening is considered comparable in difficulty to M4.

Key findings:
* Sharpening Ease: Despite its high hardness and carbide content, 15V is surprisingly easy to sharpen. Users report successful sharpening experiences on a variety of tools, from diamond stones and CBN plates to simpler systems. Burr removal is consistently described as effortless.
* Edge Retention and Stability: 15V exhibits excellent edge retention, maintaining sharpness through demanding tasks and heavy use. It also demonstrates high edge stability, showing resistance to chipping and rolling.

* Versatility: The steel is versatile, capable of achieving both aggressive, toothy edges and refined, smooth edges.
* User Enthusiasm: Many users express high levels of satisfaction with 15V, with some even considering it their favorite steel.
Overall:
BBB CPM 15V appears to be a top-tier steel that effectively balances exceptional performance with user-friendly sharpening characteristics. Its combination of edge retention, stability, and ease of use makes it a strong contender for demanding tasks and a highly recommended choice for knife enthusiasts.”


Spyderco Roadie XL C267BK – Part II – Shattered Tip.

M398 is a fragile steel compared to M390. The encounter of the tip of the Roadie XL with a tile of my kitchen has been definitive. One mm has been shattered and now I got a micro flat screwdriver as a tip.
OK. Diamonds are steels best friend.
I’m able to form a new tip in a diamond shape.

For now I won’t baby that Roadie XL anymore. I decide to thin the edge.

The best way is to protect the blade to avoid any big scratches.

Then it is time to play with industrial diamonds.

I will also use some diamond rod to round the jimping.

Of course I’m enough clumsy to scratch the blade twice and I’m obliged to use some diamond paste to treat the surface.

Then some polishing paste on the leather to slowly makes it like a mirror.

I’m quite happy with the result.

Time to test this new geometry. The edge has been convexed and thinned it should cut much better.

One of the most difficult task is to cut in two the butt of a two liters plastic bottle. This is a test my Scandi blades fail all the time. Any Opinel is king in that. Or the Manly Wasp ! My favorite being the Nilakka.

As a whittler it goes deep in wood.

As a steak knife, the shape of the blade brings only the new tip in contact with the ceramic of the plate.

That new tip is strong enough to be able to pierce a metal lid of a green bean jar. A hole pierce help the release of the lid on some jar.
No damage no more.
Now the Roadie XL cuts much butter.

Benchmade BM275 Adamas part 2: Reprofiling – From Puff Daddy to Daddy Cool !

It’s time to de-shoulder that Benchmade Adamas‘s edge and to convex it a little to my own taste.
My tools are Spyderco Stuff 2 with diamonds, Fallkniven DC4 and leather strop.

First thing I will do is remove the stud which are in the way. I have found/learned that the hard way just by testing the angle, I have scratched them.

Two T6 torxs are necessary. One on each side.

Cerakote protection is found even inside the stub hole. In fact I was really tempted to remove it for good as the Adamas is so easy to open and close just by manipulating the Axis Lock button. But sometimes I need to be able to open it one hand and slowly too…

Next step is to protect each side of the blade, as I don’t want cerakote to be scratched… yet. I use white gaffer for that.

Slowly the edge is convexed and thinned. CPM Cruwear at 64 HRC is hard and diamonds are mandatory. It is a slow process all made by free hand.

Leather stropping is apply next. Again this is made slowly.

Soon this is a razorblade popping hairs just in one caress.

The Soda Bottle Butt Test was not passed in my previous test.
This is the reason I have decided to thin the edge of the Adamas in the first place.
Now it goes steady in like in butter.

The center of the butt is much thicker and harder to pass as the bottom can collapse. This is really my geometry test and many famous knives were not able to pass it.

The Adamas is now much better in terms of pushcutting and its steel (CPM Cruwear) is perfect for a thinner edge.
The stud has been put back and the big folder is ready !
Easy peazy lemon squizzy. It took me 1 hour.

The Spyderco PPT Round 2 — The Son of Anarchy.

20180424_184458-01.jpeg

Strangely I am coming back often to the PPT when I first thought it would be a collection and a safe queen. Safe queen my a$$ ! Pardon my French but there is something quite sensual when holding this knife, something which makes the other feel “hollow” in comparaison. The PPT got that heavy butt “anchoring” it to the palm but also the toxicated finish of the handle’s slab is a delight under the thumb.
There is something almost “paleo” in the finish. Something primal in the mechanical way it feels. It’s dense but is designed to be heavy metal. It’s a knife Opie could have admire…

20180424_184506-01.jpeg

On the performance side, I have decided to get a convexed edge. Diamonds are the only language stubborn S90V seems to understand and scratches on the blade side are, well especially for the clumsy sharpener, something hard to avoid especially when using the stone at a 10° angle to get rid of that secondary bevel. The performance in pushcutting are really enhanced now. I can measure it to the Manly Peak and its thin S90V blade.

20180424_184620-01.jpeg

I use white ceramic to make the steel shiny but S90V is really a tough cookie in the kindergarden of alloys: it’s a game of patience to obtain a nice finish.

But now on plastic I can enjoy the enhancement of that already very thin edge. It goes easy through.

Someone asked me why using a workhorse knife on tomatoes ? Tomatoes may look like some fragile fruits but they are not: their skin got no pity for any dull knife and their flesh will give in under any pressure. The best tools for tomatoes are serrated and micro serrated knives.

20180429_134118-01.jpeg
Hence that test on my polished edges. You need a very keen blade to push cut in a tomato and make thin loaves. Plastic and bambou can be used to test the edge stability which often is only due to thermic treatment of steel.

20180429_134128-01.jpeg

The alignement of the point on the PPT is very different from my Millie and is very close to the experience of the YO2: its makes powerful cuts.
Also the handle makes Icepick/reverse grip very confortable, knowing this is the favorite grip of Philippe Perroti on La Griffe, a grip I have found handy in forcing a door. Just kidding but the confortable reverse grip (à la “griffe de chat” in French) is not a joke.

20180429_143749-01.jpeg

You get also an excellent blade/handle ratio for a choiled knife compared to my Para3 for example.

20180429_143822-01.jpeg

And as good as the non-choiled Sliverax !!

20180429_142459-01.jpeg
My PPT has been used in the kitchen is not easy to clean because the way the hole in the liners are not accessible. This is serious issue if, for example, a piece of raw meat get stuck there and could contaminated the blade. The full Reeve Integral Locks are the best lock for checking your folding for any debris. I would have preferred solid titanium liners without that hidden cheese holes which ask for special maintenance starting by unscrewing the slabs to get full access and complete cleaning.

So in a wrap, the PPT is a compact hard user with very high performances featured by great ergos. It has a really strong character (it feels like it has been done for some Hell’s Angel fan) but once deployed it will pierce and cut with high reliability. Once the PPT is entering the game: this is serious business. For the record being represented to bikers gathering, bikers love La Griffe and various neckknife which are handy on a ride. So it’s easy to understand some DNA in the PPT design.

20180429_141539-01.jpeg

SLIVERAX — ELEGANT DREAMED ENGINEERED KNIFE – ACT II: Convexing.

20171118_103910-01362796173.jpeg

Many times, people asked me how I was honing my knives to my taste.
I love thin edges and I love edges which can be maintain by stropping on leather.
For that any sharp angle but the edge itself need to removed.

So my first step on the Sliverax full flat ground blade is to remove the shoulder on the secondary bevel. For that I use Fallkniven FB04 diamonds or Spyderco Double Stuff II.

As I don’t want recreate two other angles, I do it free hand creating a gentle natural convexed medium between the grind and the edge.

20171120_123347-01267367917.jpeg

Soo some dark dust of removed metal appears. The edge of the blade is untouched as after some initial testing I do trust it.

20171120_124143-011125093009.jpeg

I need that convexed edge on the belly of my blade, I don’t minde about the tip and the choil which are not where I do apply the most force to push cut through wood for example. It takes 30 minutes to get where I want without to make a mess by scratching the blade finish. It means each pass on the diamond is check with my finger before, sto be certain to focus on that edge shoulder. To obtuse it will scratch the edge and to acute it would scratch the blade finish. So it takes time to be certain for each stroke.

Luckily the manufacturing lines on the blade exactly follow my pass and some miss strokes were not visible.  It takes around 500 passes on each side on S30V.
Then I switch to white ceramic directly.

20171120_125333-011773286312.jpeg

White ceramic brings some mirror polish on the convexed edge and also hone it to razor.
Here I can go much faster as I won’t ruin my blade if I’m clumsy. White ceramic are very forgiving…
Soon I got a very nice mirror on both side and I can go to leather.

20171120_125945-01492821791.jpeg

I use a century old barber accessories I have found in a garage sale in Italy. With some white compound, it has honed my blade for 15 years.
Time to test the blade on a chesnut road.
20171120_125455-011458232424.jpeg

The thinner edge goes much more deeper and with more control and more ease.
Eventually after playing with the knife for 5 minutes on various material, I inspect the edge and there is no chipping or rolling.
It takes me around 45 minutes.
That’s how I proceed to get an edge which suits my need. 🙂
20171120_130035-011101427946.jpeg